Every model airplane designer has his own favorite way to build an engine cowling. As a result, if you look at a lot of different plans you will see a lot of different cowl construction methods. I have my own favorite way, too. I like to stick big balsa blocks below and around the engine, then carve them to shape. A few years ago I acquired a large quantity of balsa blocks, and ever since then a block cowling goes on almost every plane I build.
I’ll demonstrate this process on the RCM Basic Trainer.

If you haven’t built one of these yet, you should consider it. It’s pretty easy to build, and it flies very well and is a plane you’ll be very pleased to own once you finish building it.
The RCM Basic Trainer plan shows cheek cowls which are a continuation of the balsa sheet fuselage sides. They are formed by gluing the sides to the hardwood engine beam mounts.
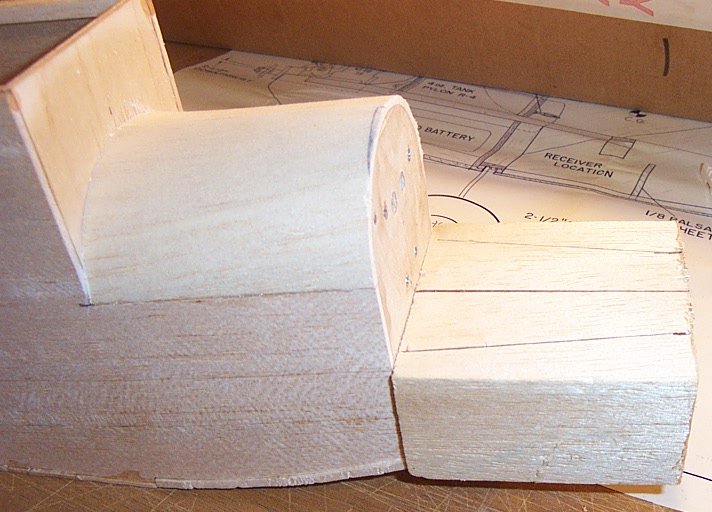
This is a building technique that was common in the 1960s and earlier. Today we have fiberglass engine mounts, which are a lot easier than carving a pair of hardwood beams. I used a Dave Brown mount attached to the firewall with 4-40 screws and blind nuts. To build the cowling I used a block of balsa and two pieces of 1/4″ sheet balsa. To get started I just needed to know how thick the block should be from the bottom of the plane to the bottom of the engine mount, and how long it should be to almost reach the back of the propeller. As you can see in the photos, I needed a 1.5″ thick block just a little less than 3″ long.
Once I had the dimensions I cut a suitable block and drew a center line on it. (It’s always a good idea to make sure the cut is nice and square.) After sanding the front of the airplane flat at the firewall, I stuck the block to the firewall with 5 minute epoxy, although thick CA glue would work just as well. Then I attached the engine to the firewall and held up one of the 1/4″ cheeks to find where it would need to go to accommodate the width of the engine. I drew a line on the inside edge of this sheet, then duplicated the line on the other side of the centerline.
After you figure out where everything goes, glue the balsa cheeks in place. If you place them so they stick out about 1/8″ wider than the sides of the plane it will be easier to sand a nice curve into them later.
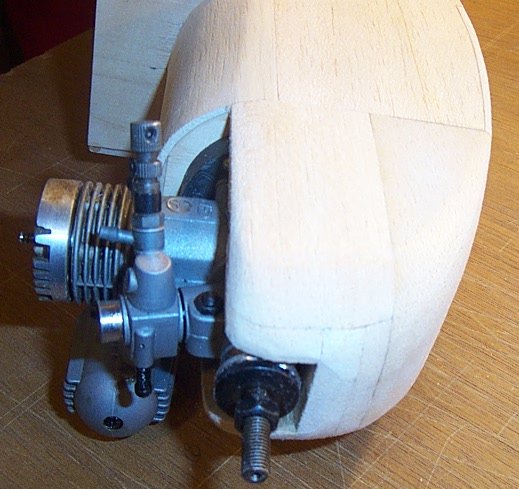
After you have these parts in place you’ll need to mount the engine again momentarily and glue a few scraps inside the front of the cowl to fill in the space around the crankshaft somewhat. My scraps were about an inch long, and I placed them so the grain was running in the same direction as the big pieces. Unfortunately I forgot to take a photo of this step…
But I did take a photo of the next step, which is where I carved the sides of the blocks away so they would follow the contours of the sides and bottom of the airplane.
Here is the front after rough carving.
Here it is at the same stage, from another angle.
After I carved the rough shape I sanded the sides and bottom of the cowl to exactly match the contour of the fuselage sides and bottom. This step takes a little bit longer, but it’s still not difficult. Notice that my cowl still has sharp edges. I sanded a simple curve on the right, a simple curve on the left, and a simple curve on the bottom. Think of it as a 3-view drawing, and don’t put in any compound curves yet or you’ll get off track and end up with a cowl shaped like a potato.
Here’s another view of the same step. Notice that you can see the scraps placed in the nose to close in the space around the crankshaft.
The next step is to put the engine back in place to make sure everything lines up OK. Still no compound curves yet. This step is very important because it’s where you make sure everything looks symmetrical.
Once everything looks right, then it’s time to sand those sharp corners off to make nice compound curves. I used a block to take the major portions off, then I used a sandpaper sheet with my bare hand to smooth everything out. As you go along, make sure that whatever you do to one side, you also do to the other side. Also, trim the edges of the inner nose filler scraps at this point to make them blend with the sides. You can see that in the next photo, just under the needle valve and throttle arm.
Here’s what the cowl looks like from the bottom.
When it’s all finished it looks just like the front of an airplane, and all that was required was a couple of measurements, a little bit of eyeballing, and a lot of sanding. I wasn’t following a plan, I just threw some balsa on the front of the plane and made sure the hole in the middle was big enough for an engine.


