On my kit list I have a Midwest Aerostar trainer that has tab and slot construction just like the original kit. My brother in law built one of these in 1990. It’s a very good flier, and it’s also quite durable.
Put your fuselage parts together and hold them with rubber bands. Adjust all of the tabs and slots until the fuselage is straight.


When you are satisfied that your fuselage is straight and not twisted, use thin CA to glue the edges and joints. Manage your glue carefully so it doesn’t drip out the end of the airplane and glue your pants to your leg. Hold each joint tightly with your hand as you glue it, because thin CA doesn’t do much good if there’s a gap.
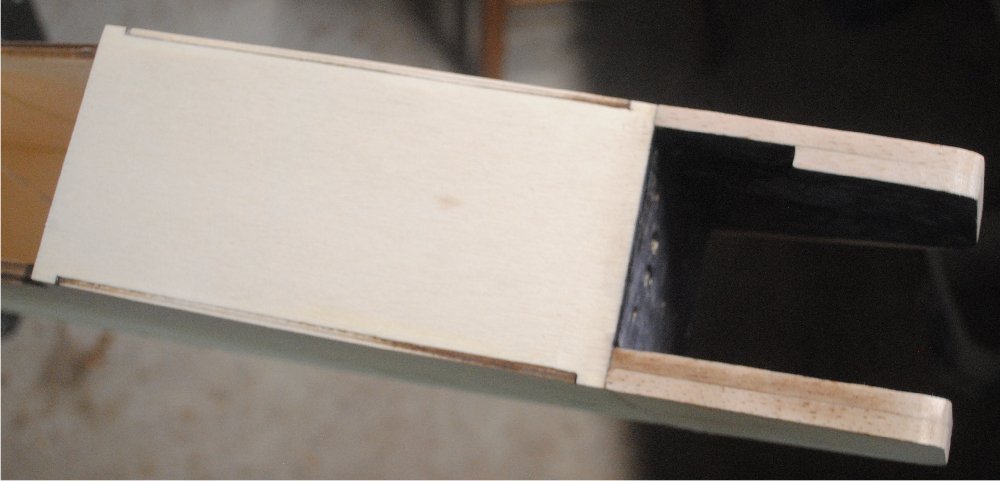
Do not glue the top of the fuselage front, because you’ll need access to the front of the bulkhead so you can drill the wing dowel hole. You will also notice in my photos that I assembled the plane without the firewall. On some planes you can leave off the fuel tank hatch and glue the firewall in, and still have access to the back side of the firewall for hardware installation, but on the Aerostar there is no tank hatch, and there is a tank floor in the way, so the best choice is to leave the firewall out at this stage.
To give you another example, here are a couple of photos of the Bingo 20, which also has tab and slot construction.

The Bingo 20 has a fuel tank hatch, and the fuel tank compartment is just a simple box with no sub-floor. The builder can feel free to install the firewall whenever it’s convenient, and the hardware can be added to the back side before or after assembly.
Now let’s get back to the Aerostar 40.
After you have glued all of the joints you’re going to glue, take the rubber bands off. (Don’t worry, you can sand little pieces of rubber band off of the wood if they get glued on accidentally.)
The next step is to switch to medium or thick CA and reinforce each joint from the inside of the plane. As you complete each section give it a shot of accelerator to keep it from running while you’re gluing the next section. Try not to get accelerator on your glue dispenser. Accelerator on a superglue dispenser is no fun. Glue the front of the front cabin bulkhead and the back of the rear cabin bulkhead, so you’re not filling the corners inside the radio compartment. It’s easier to mount servo rails and other equipment later if the corners aren’t filled with glue.
Here are a few photos of what the plane looks like with glue reinforcements in and rubber bands off.


This plane has a 1/4″ firewall, which is laminated from two layers of 1/8. I laminated mine with Titebond II. It’s a good idea to clamp it thoroughly to make sure it doesn’t end up warped or separated.

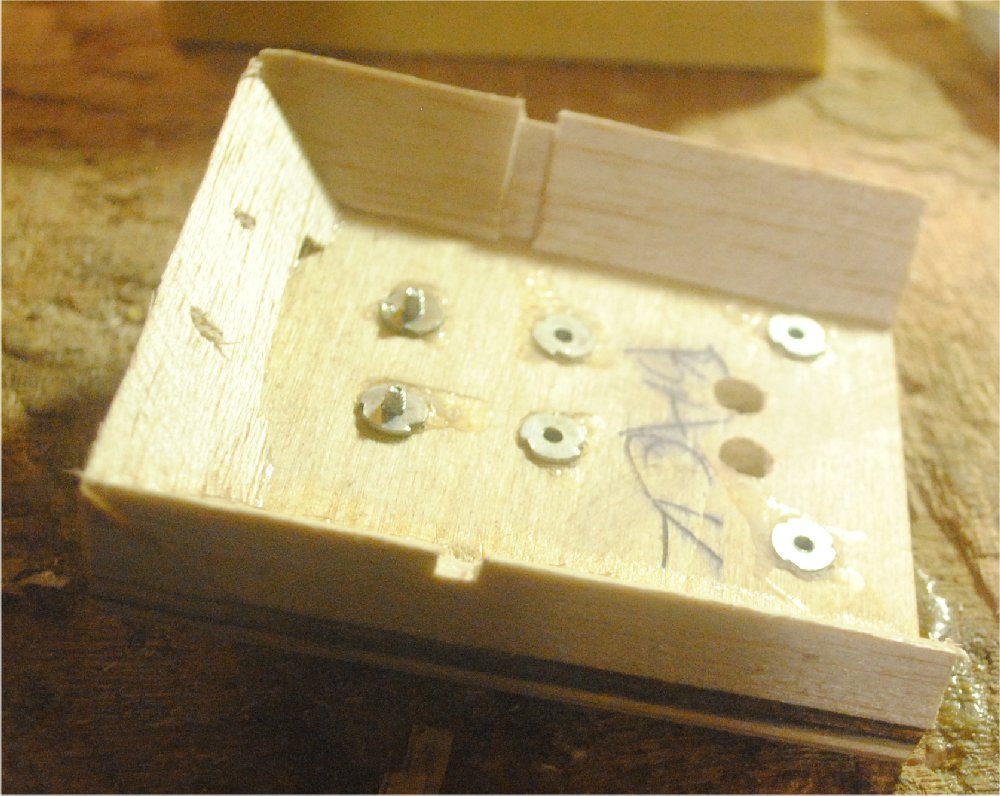
On the plan the firewall to fuselage joint is reinforced with triangle stock. Before we get to the triangle stock, let’s install the blind nuts for the nose gear block and the engine mount. You don’t want the triangle stock there first, because you would have to dig holes in it to get the nuts installed. So install the nuts first. Drill your holes, insert the nuts, and pull the nuts tight into the wood by installing screws through the mounting holes in the nose gear block and the engine mount.

Now we’re ready for the triangle stock. The bottom piece has a sliver taken out of it to accommodate the blind nuts, and it has holes drilled through it for the bolts.

I don’t know if it’s apparent in the photo, but the bottom edge of this piece was trimmed to give the triangle stock a slightly obtuse angle rather than 90 degrees, so it will fit the fuselage bottom piece.
Now the two side pieces are trimmed to fit the bottom one, and they are glued into place.
These two pieces are actually slightly too large for the angled cutout in the fuel tank floor, so the triangle stock is relieved slightly to allow it to fit into the allotted space.
Now a generous bead of Titebond II is applied inside the nose of the fuselage on the bottom and sides, and the firewall assembly is inserted into place. The sides are quickly clamped tight, as the firewall position is adjusted as necessary.

Once this is in place, Titebond II is added to the inside joints to make sure everything dries without voids. You can see where I cut a hole in the fuel tank floor to allow me to inspect the fit between the fuselage bottom and the bottom triangle stock. I think I’ll go back to my files and add some holes to be cut by the laser cutter for this purpose.

The fuselage was left leaning on the wall at a 45 degree angle to make sure the extra glue would get sucked into the joint as the joint dried. The bulkhead at the leading edge of the wing was drilled into the wing leading edge for the wing retaining dowel.

The hole has to be drilled from the front, and after this little job is finished, you can install the windshield piece. After it’s in place, then the fuselage is ready for final sanding.