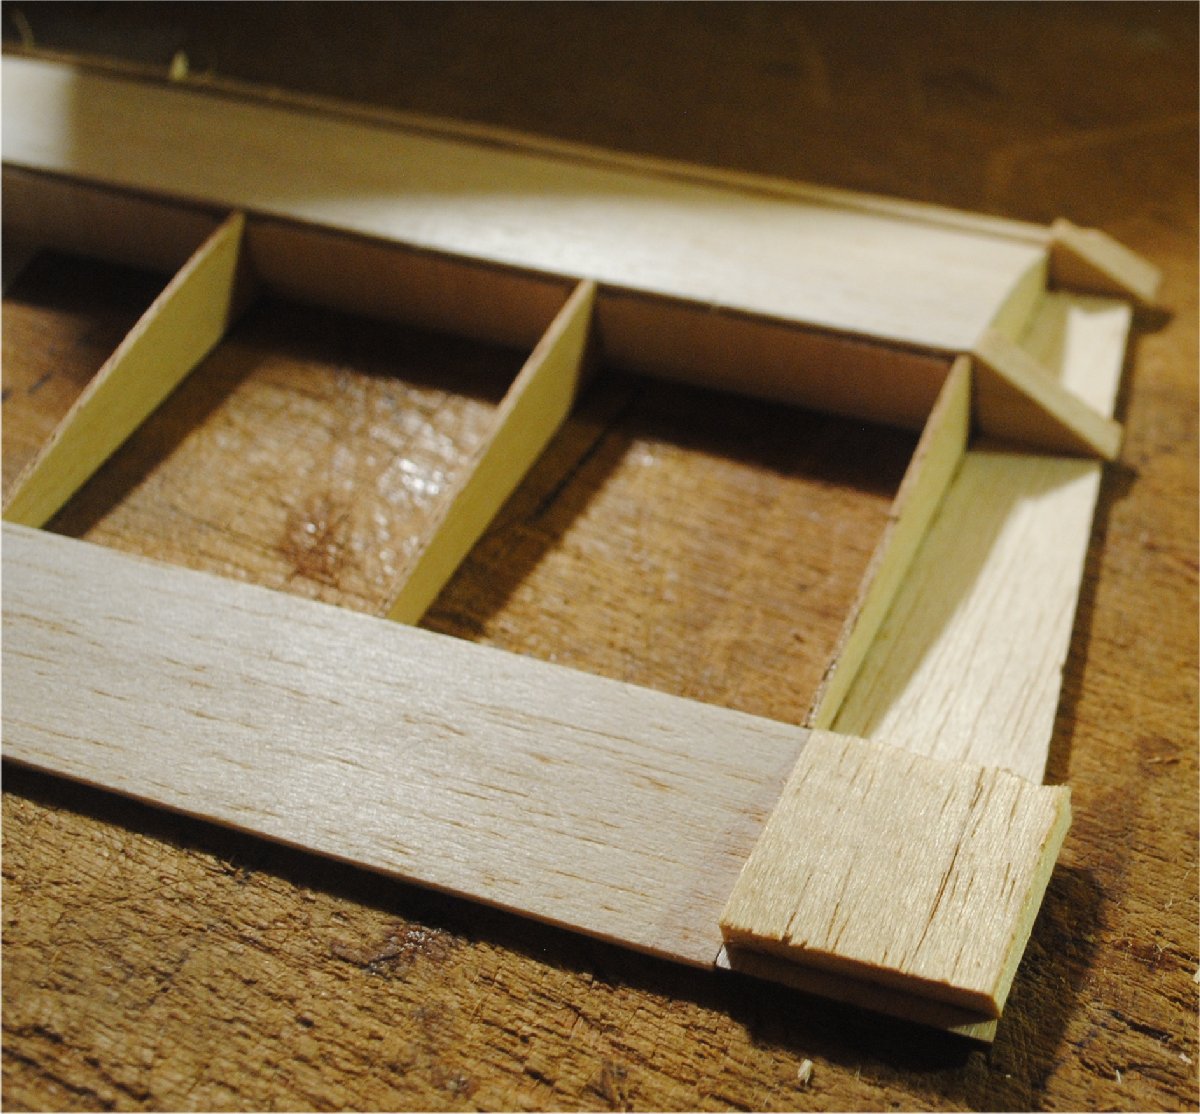
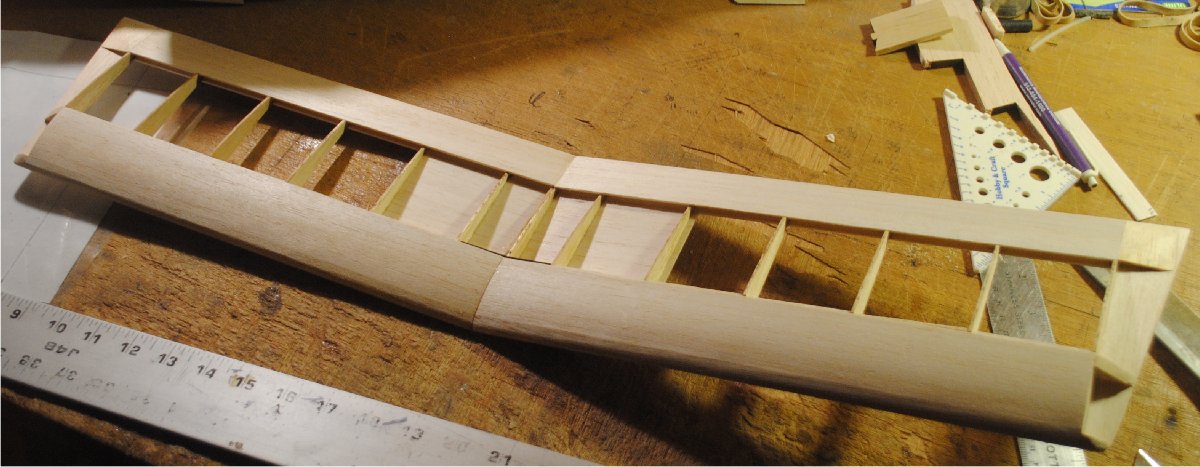
Start by cutting some 1/16 sheet to the right sizes for the top and bottom sheeting. The main panels are 12.5 inches long, so make your pieces 12.75 inches. The can’t-fail way to cut the sheeting is to start with a 3″ wide sheet and cut a strip 1.25″ wide for the trailing edge. The remainder will be about 1.75″ wide, which is a quarter inch more than you need for the leading edge sheeting, but that’s OK because too big is better than too small. If you make the trailing edge sheet the exact correct size then you’re set up for success. While you’re at it, cut some 1/8 x 3/16 spars from hard balsa, and go ahead and make them about a quarter inch longer than the nominal 12.5″ length shown on the plan as well. Once you’ve done that, glue a spar to one edge of the leading edge sheeting. Make two of these assemblies. The edges should be flush as shown in the following photo.
If you download the plan and print it, you won’t have to bother marking the sheeting and spars, but it’s quite easy to build the plane without printing a plan. If you want to do it without a plan, mark the rib locations on the bottom sheeting. The rib spacing is inch and a quarter between the root and rib #2, then two and a quarter for the remainder of the spaces. Label the root and tip of each piece, making sure to make pieces appropriate for left and right wings. When you get this far, this is what it should look like. Note the top sheeting sitting to one side, unmarked.
If you’re working without a plan, make a square guide from a piece of office paper. I made mine with two lines crossing at 90 degree angles. I made a line an inch and a half from the edge, then another line just like it an inch and a half from the adjacent edge.
Obviously I could have just used the corner of the paper as a square, but I wanted to draw lines. Do it your way. Put a piece of plastic wrap or Monokote backing over the paper and pin one of your sheets with the edge flush to one of the lines, and the end flush with the other line. Use a rib to set the 2.5 inch distance between the spar and the trailing edge sheet, and pin the other piece in place as shown.
Now use a square to stand the ribs up straight and add all the ribs except the root. Note that this is 4 regular ribs with a step in them, and 3 slim ribs with no step. The three slim ribs go in the center section. Use the dihedral gauge to set the root rib at the correct angle.
Add the top spar. Remember how we cut everything a quarter inch too long? It should be easy to get the spar in place without it being too short, so if you get it in the wrong place it’s your fault. Once that’s in place, put some medium CA on top of the top spar and on the ribs in front of the spar. Put the top leading edge sheeting in place and press it in place on the spar and all the ribs. Spread your fingers out to try to get everything pressed down evenly.
Add a piece of 1/16 balsa sheeting to the bottom in the first two rib bays.
Now you need to use a sanding block to sand the trailing edge of the bottom sheeting to a taper. The effect you’re going for is that the sheeting should taper to match the line of the ribs. Once you get it tapered apply some medium CA glue and add the top trailing edge sheeting. Here’s what it looks like if you tapered the bottom sheeting and get the top sheeting in the right place.
The next thing to do is shave off the sheeting that extends in front of the ribs. Start with a planer and finish with a sanding block. Then add the leading edge stick, which is 1/4 inch thick and about 7/16 inch tall.
We’re making tons of progress! Now make sure the bottom of the wing is flat by sanding the leading edge stick flush with the bottom sheeting, then set it down on a flat table and hold it with weights. Add the vertical grain 1/16 balsa shear webs.
Next it’s time to add the wing tips. Sand the outboard end flat, set the wing flat on a plastic sheet on the table, and add the tip. The bottom should be flat straight across from the wing to the tip.
Add some scraps to brace the tip.
Sand the scrap blocks so everything looks pretty.
While you’re at it, shape the leading edge stick so it looks like an airplane wing.
Once the leading edges are shaped it’s time to join the two panels. Cut a slot in each root rib to accommodate the 1/16 ply dihedral brace. The slot needs to go all the way down to the bottom sheeting.
Glue the brace to the spars in one wing half with medium CA and hold it tightly so it sets and sticks really well. Then add the second wing half, gluing the brace firmly to the spars first, then use thin CA to glue the bottom sheeting together, and then the rest of the joint. If you have a crack somewhere, and the two halves aren’t fully coming together, you can sand the area a bit with a sanding block, then rub the dust into the crack, then hit it with some thin CA to fill the crack.
After the two halves are joined, add the top center section sheeting. Here’s what the plane looks like next to a standard size container of table salt for scale.
In the next section we’ll do the tail and final assembly.


