
Here’s a plan that I bought from RCM in the 1990s, the Guppy. It’s a really cool plane with flaps but no ailerons. I built it with flaps and ailerons, and it was a really great flying airplane, on land or floats. It’s a perfect match for the OS 26 Surpass. I’m going to show you my way to cut out a set of ribs for this plane.

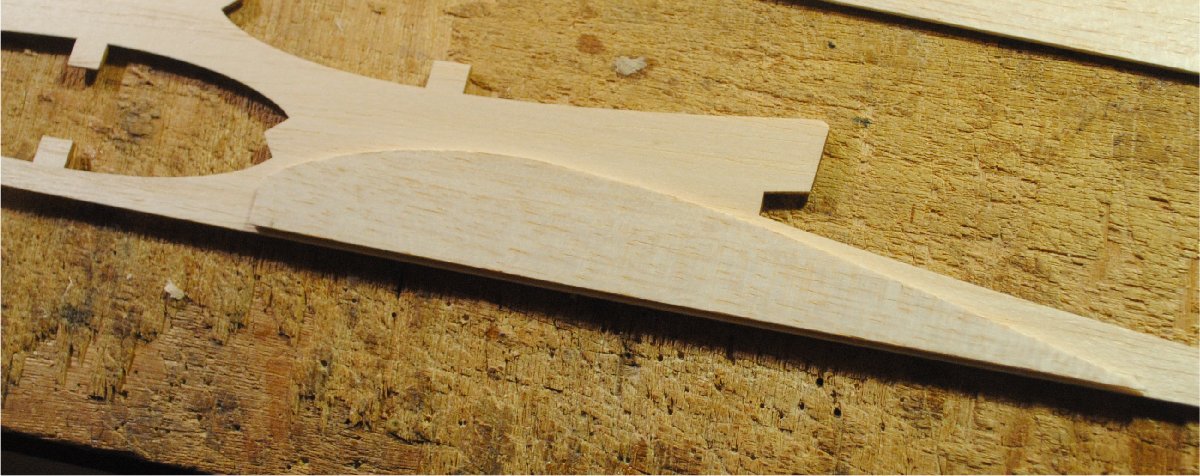
I’ll start by making a set of ribs. Sometimes you get the rib outline from the fuselage side view, but this plan shows an empty wing profile there instead. Complete wing rib templates are in the upper right area, as shown in this photo.

Typically, a set of ribs is made in two steps. First a master rib is made, and then the rest of the ribs are made from the master rib.
MAKING THE MASTER RIB
The first step in this process is to get a piece of paper to trace the rib outline. I have a box of used office paper for this purpose.

The wing rib outline is traced with a pencil. Note that it is traced on the inside of the wing sheeting, to make a rib the correct size.

Sorry about the dirty fingernails. I changed the oil in my wife’s van today.
Next, the traced template is cut out with scissors. It doesn’t have to be super accurate, so don’t worry about it.

Here’s a photo of the template, placed over the outline on the plan. You can see that it’s a fair representation, but not super perfect.

The ribs of this plane are cut out of 3/32″ sheet. The template is placed on a piece of balsa, and the outline is traced with a ballpoint pen.


Next, the rib is cut with a knife. Don’t worry about getting it perfect. Theoretically the part should be cut on the inside of the line, but if you try to do that you will inevitably cut it too small in one or more spots.


When the part is placed on the plan, it’s obviously too big. You can clearly see that the rib is covering the wing sheeting in the drawing.


The rib will need to be sanded to make it fit correctly.

Sand it in one area until that part of the rib fits inside the line.

Then sand the next segment, and recheck the fit. Sand a little bit more, and check again. Keep doing this until the entire rib is the correct size and shape.

MAKING THE REST OF THE RIBS
Now you need a whole stack of these. For many planes there will be two or more specific rib outlines. In the case of the Guppy some ribs go full length, some are short to make room for the flaps, and some are just different because they go in the rounded wing tip. When cutting ribs for this type of wing, it makes sense to cut the biggest ones first, then trim the master rib for use as a template for the smaller ones. You probably noticed that I made the short rib first in the above sequence. Well, you caught me not following my own advice. So I made a full size master rib for the following tutorial, and I’ll use photos of it now.
Before I go any further, I feel like I should mention that there is no one right way to do things. Most of the time when you ask how to cut out a set of ribs you will hear answers that involve a disc sander, a band saw, or a sanding block, and a stack of balsa blanks secured tightly with a couple of screws. The master rib is attached on the top of the stack, or one on the top and one on the bottom, and the whole stack is cut on a saw, or block sanded, or held on the flat table as the edge is formed by a disc sander.
I don’t have a band saw or a disc sander, and for some reason the block sanding method never really inspired me. So I’m going to tell you how I made all of my wing ribs for literally hundreds of planes that I built over the course of thirty years. I’m one of those guys who always had a building project on the table, at least one a month, and and for many years it was at least one plane per week. Have I built a thousand planes in my lifetime? Probably not, but I’m getting close. I tell you this because although my rib cutting method sounds kind of funny, I can assure you I have cut out a whole lot of ribs this way. So without further ado, here it is.
First, I harden the edge of the master rib with thin CA glue. It helps to make the first rib from rather robust wood, because you don’t want a fluffy rib with a crispy edge. Such a rib would come to a bad end.

After the CA treatment, the edge will be bumpy and grainy. A light touch with a sanding block makes it nice and smooth.

Next, the master rib is placed on a piece of balsa sheet for tracing. As you can see, I’m using a piece of laser cutter scrap because I’m cheap. There is no compelling reason to make small parts from new wood if you have scraps.
“If you have laser cutter scraps, why don’t you just cut the ribs on the laser cutter?” Good idea, but you probably don’t have a laser cutter, which is why you’re learning one way to cut ribs out by hand.
The outline is traced with a ballpoint pen. Accuracy is not critical.


Next the ribs are all cut out. If I were using a new piece of wood I would pack the outlines really tightly to use the wood as efficiently as possible. But these are scraps, so I’m not going nuts for this demonstration. If you’re on a tight budget, you can splice scrap wood for your ribs. These Guppy ribs are over an inch tall, but let’s say you have some strips that are less than an inch wide. You can edge-glue another strip to make it wider and it will work as well as it needs to.
These ribs are easy to work with because they are straight on one side. For the next step I take one of my rough cut ribs and align the straight edge with the straight edge of my master rib. Check your wood to make sure the straight edge is actually straight. If it isn’t, straighten it with a sanding block.

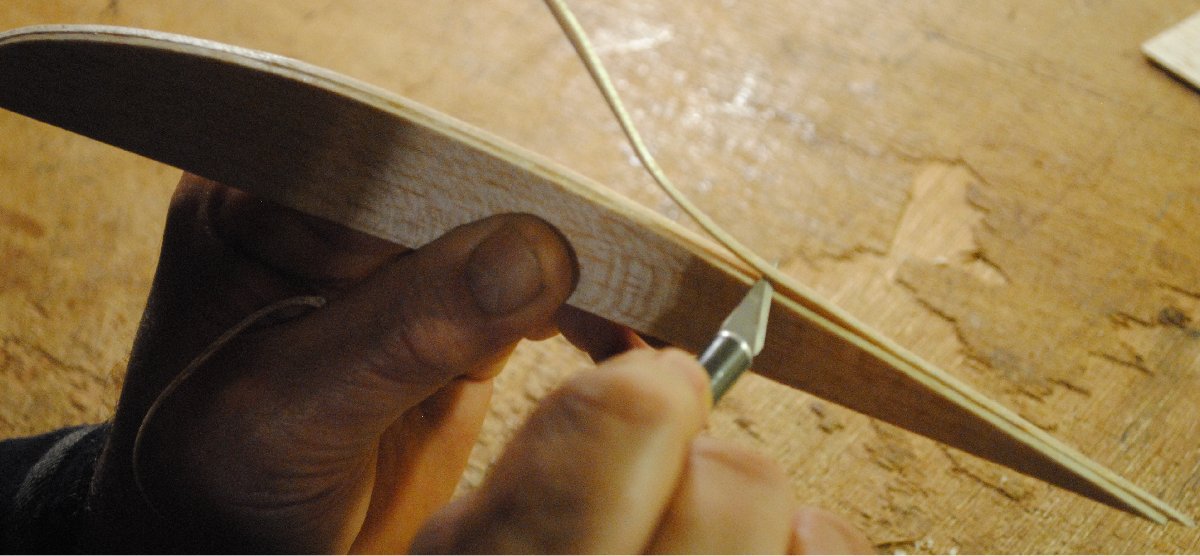
Holding the ribs together tightly with my left hand, I then cut the protruding edges flush with the master rib, using a new, sharp hobby knife. Don’t let go of the ribs. Trim all the way around before you allow them to separate. Otherwise you’ll have to realign them.


You have to pay attention to grain direction when doing this. If you cut into the grain you’ll force your knife into the master rib and damage it, and you may dislodge a sliver of the target rib. It’s best to start at the crest of the airfoil and work toward the leading edge, then the trailing edge.


The rest of the ribs are held against the master rib one at a time and trimmed in the same way. When all of the full length ribs have been made, then the master rib is cut to make a pattern for the shorter ribs in the flap and aileron bays.
When all the ribs have been formed, spar notches are cut in the master rib. You could use a ruler and mark a quarter inch square notch, but there is a much smarter way to do this. First the spar locations are marked. I always mark the rear edge of the spar with a ballpoint pen.

The spar notch is traced around a piece of the material to be used for spars. In this case it’s a piece of 3/16 square bass wood. The location is marked with a knife on all three sides of the spar.


You can see the spar location in the following photo.
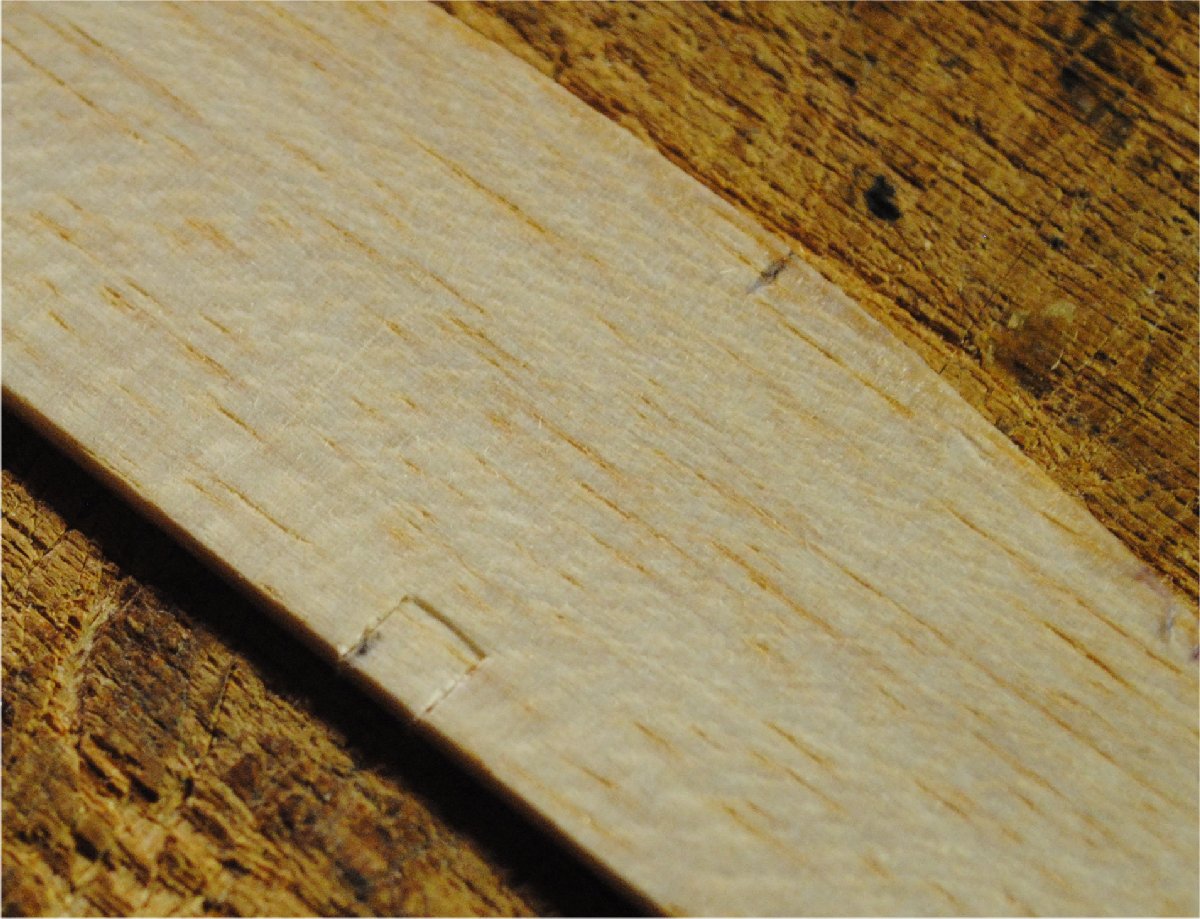
The notch is cut out with a hobby knife, preferably one sharper than the one I’m using.

Here is the finished notch.

The notch is hardened with thin CA glue, and then each rib in turn is held against it while the notches are marked. Don’t cut through the target rib at this time. Just mark the notch with your knife, and try not to enlarge the notch in the master rib.


After you have marked the spar notches on all of the ribs, then go back and cut them all out. You really want a sharp blade for this. It will make your life easier. Here’s what it looks like when you use a not-so-sharp blade.

If I were just building this plane without doing a tutorial I would do it all in the correct order, but the process of taking photos sometimes makes me forget what I’m supposed to be doing. Normally I would make all four spar notches in the master rib, then hold each target rib tightly against it in turn while marking all spar locations. Then after all ribs have been marked I would then cut the notches out of each rib, until the entire stack is finished.
There you have it. That’s how I make a stack of ribs for a plane. It seems kind of labor intensive, and it seems like a band saw or sander would be easier. Maybe it would be, but with some practice it becomes easy and quick. I can make a set of 20 ribs in about half an hour, during which time the band saw guy and the sander guy are pinning a stack of blanks together and gluing paper templates to the top rib with contact cement. Six of one, half a dozen of the other, I say.