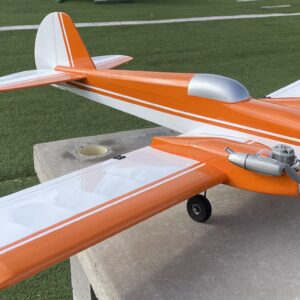
$60.00
Description
As indicated on the plan, you have a choice of flat bottom or semi symmetrical ribs.
I’ve moved Bulkhead #2 forward slightly so it’s in front of the wing instead of coming down on top of it. This bulkhead is shown as 1/8″ balsa on the plan, but mine is cut from 1/8″ ply.
I also updated the landing gear attachment. Here’s the process of building this part of the plane.
- Install Bulkhead #2 in the new position.
- Hold the wing in place and from the front, drill a hole through Bulkhead #2 into the leading edge of the wing. This is the hole for the wing retaining dowel.
- Set the wing aside. Install the 1/16″ plywood chin, attaching the rear edge to the bottom of Bulkhead#2.
- Using epoxy, attach the two 1/8″ landing gear plates inside the fuselage, on top of the 1/16″ ply floor, also gluing them to the front of Bulkhead #2.
- When the epoxy is dry, drill forward through the hole you already made in Bulkhead #2, and extend it into the landing gear reinforcing plates that you epoxied into the floor, for dowel clearance.
- Now you can use an aluminum landing gear, with nylon bolts threaded into the bottom of the fuselage.
If desired, you can build a wire gear and attach it with landing gear straps. This method works well with only one layer of 1/8″ plywood reinforcement inside the fuselage bottom, which in turn will probably not be tall enough to block your dowel retaining hole, which means you won’t have to drill forward to create dowel clearance.
Also, if desired, you can build the landing gear as shown on the plan. Just remember that my Bulkhead #2 is sized for placement in front of the wing, rather than on top of it, so you’ll have to drill through it for the dowel.
These instructions may sound complicated, but my modifications make it more normal for today’s methods, so it should feel really familiar to you. It’s really easy, but if you have any questions, just ask.
Additional information
| wingspan | 50" |
|---|---|
| engine | 20 |


