When you build the wings on the plan, you should protect the paper with plastic if you are using CA glue, or wax paper if you’re using old fashioned adhesives. I like to use the plastic backing from Super Monokote. I have a lot of it on hand, but it’s no longer available so it would be a good idea to come up with an alternative.
The left wing is built directly on the plan. For the right wing, draw a line on the plan 5 inches behind the wing spar, the full length of the wing. Instead of including this line in my plan I’m making you draw it so you’ll be more likely to remember what you’re doing and therefore less likely to build the same wing twice. Build the right wing with the spar pinned down at this line and the ribs facing the opposite direction. Try to envision which wing you’re building before you stick any parts together, so you will end up with a left and a right when it’s all said and done. The following photos taken with the wings on the paper plan may skip back and forth between left and right wings, but when you do it you will build one, then the other. (The plan in the photos is an obsolete version, so don’t get too wrapped up in the details depicted on it.)
Start by pinning a 1/4 x 1/2 x 36 bass wood spar to the table. You obviously won’t pin through the spar because it’s too hard. Put the pins next to the spar. If your spar is bowed you can easily straighten it out with two pins on one side of the spar and one on the other side. The pins can be inserted all the way down so the head of the T-pin holds the spar down flat on the table and prevent arching.
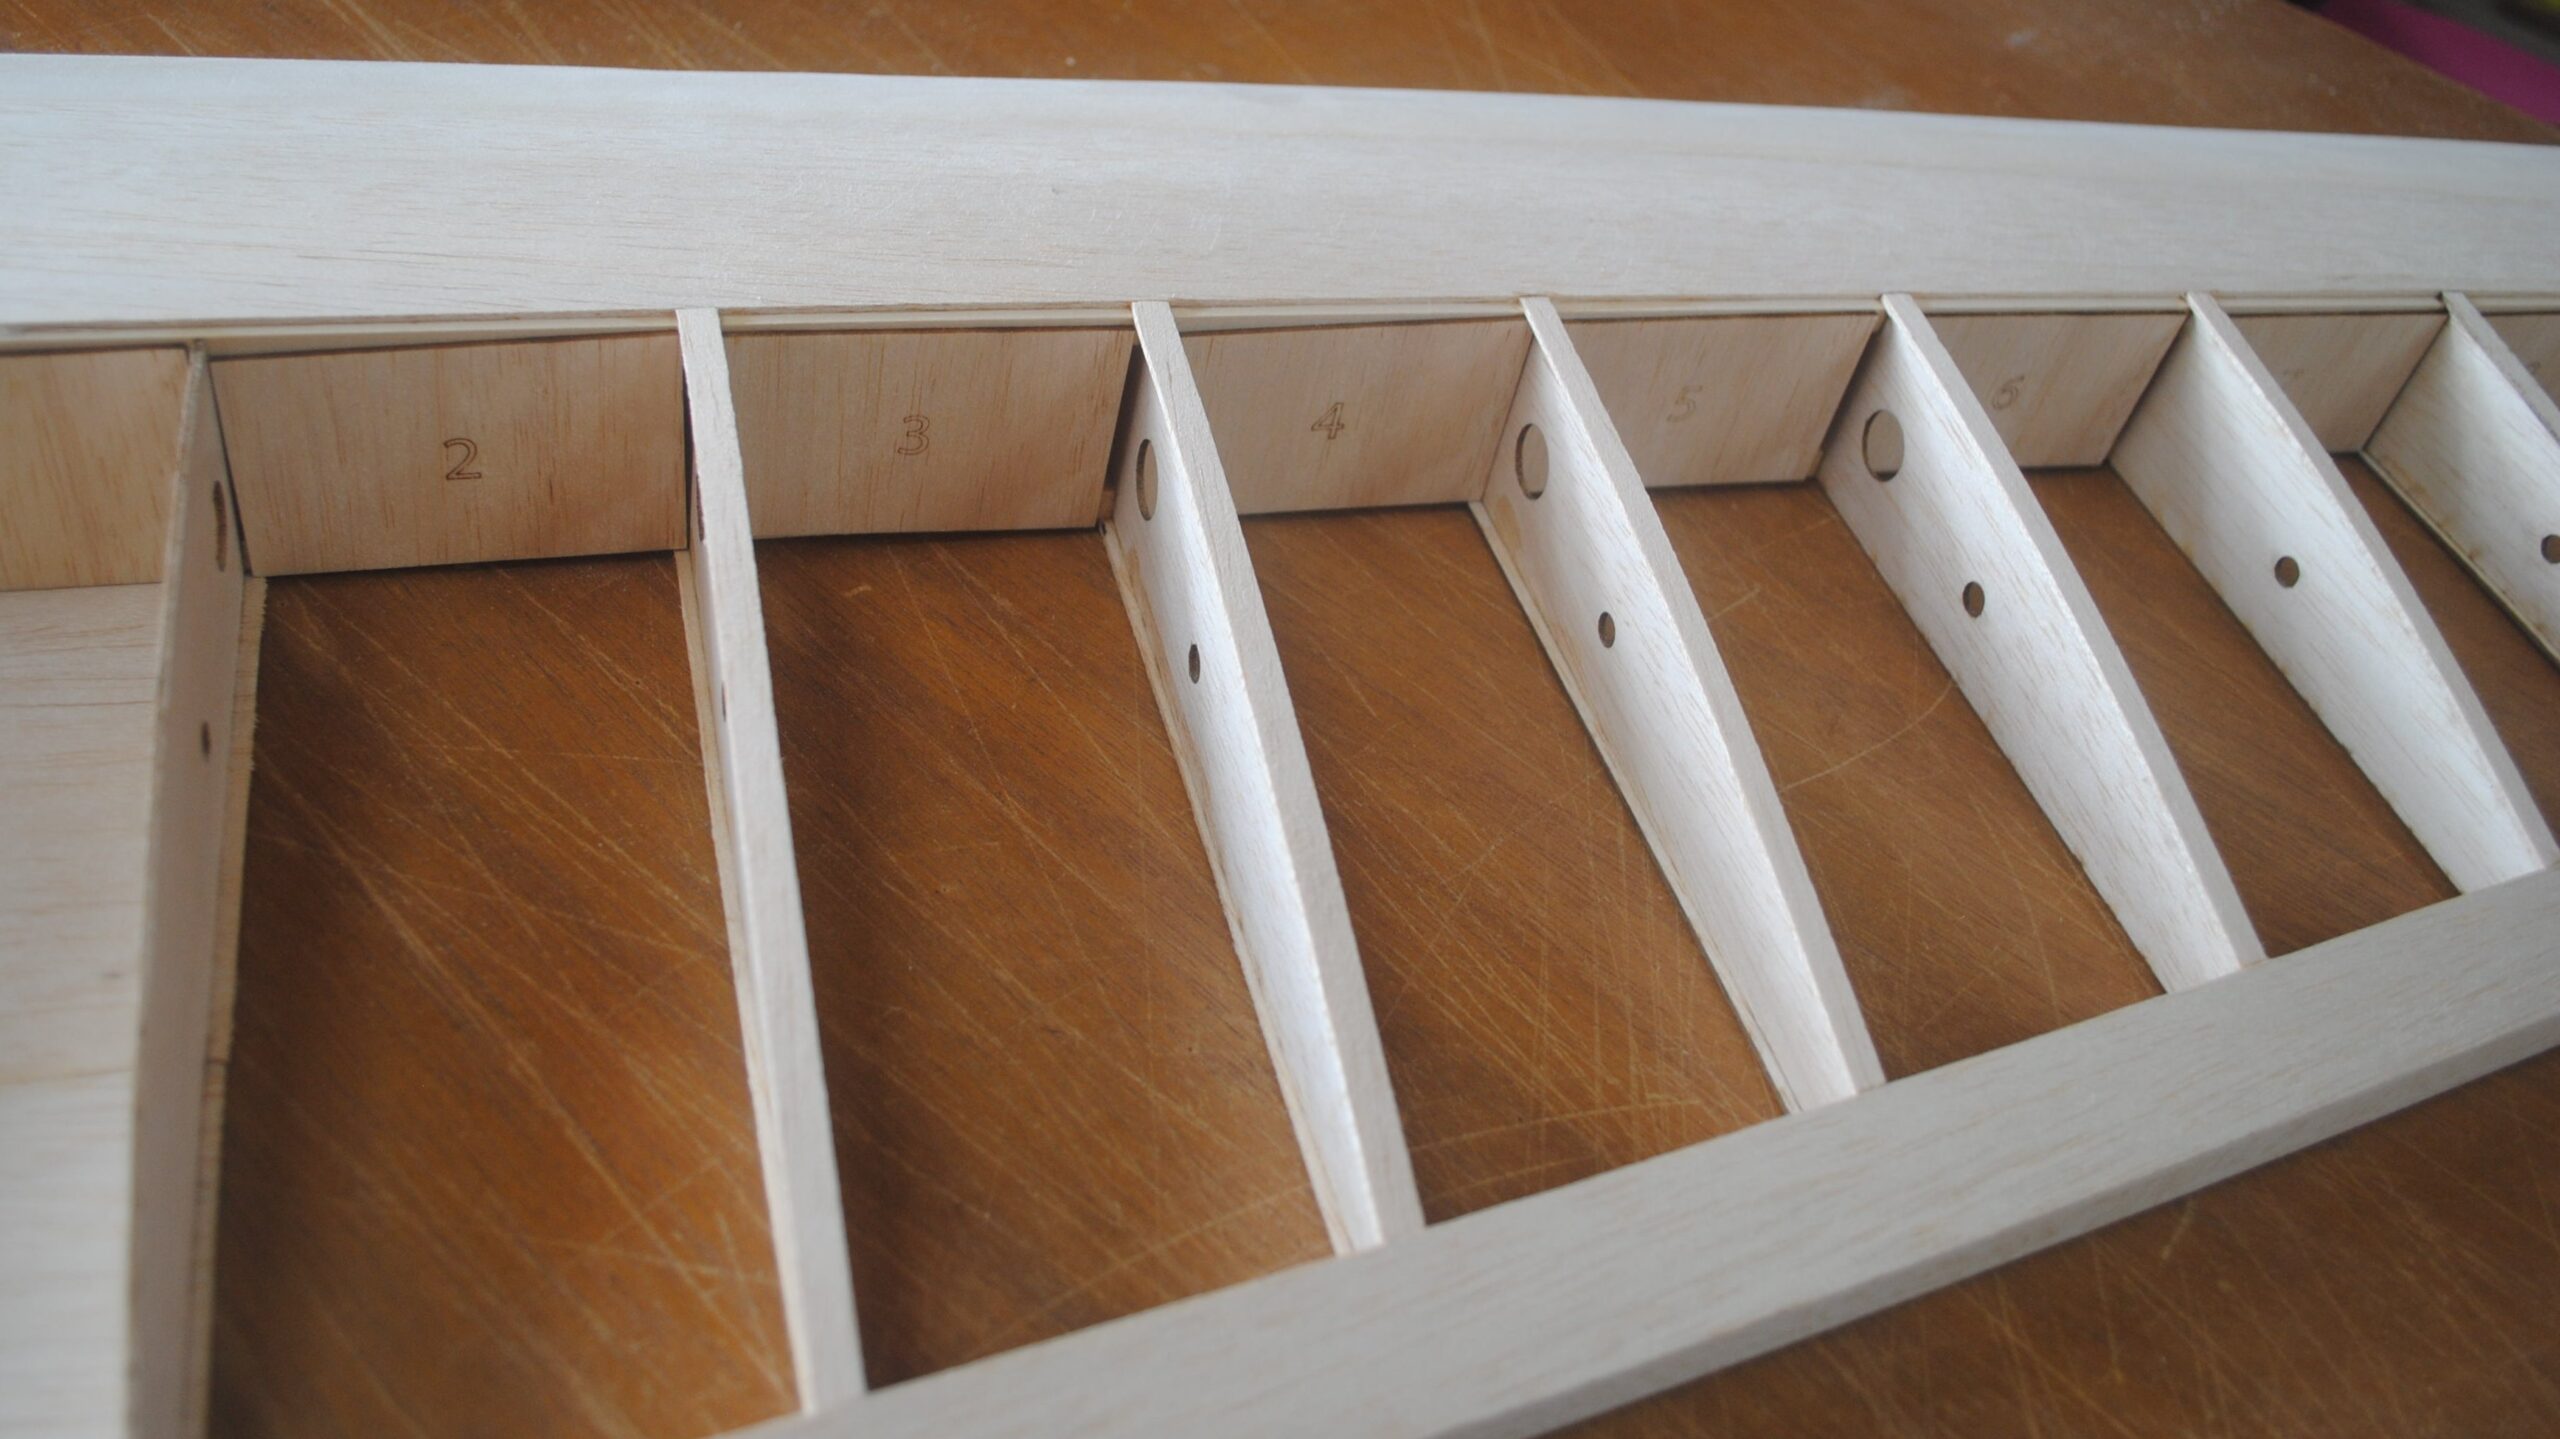
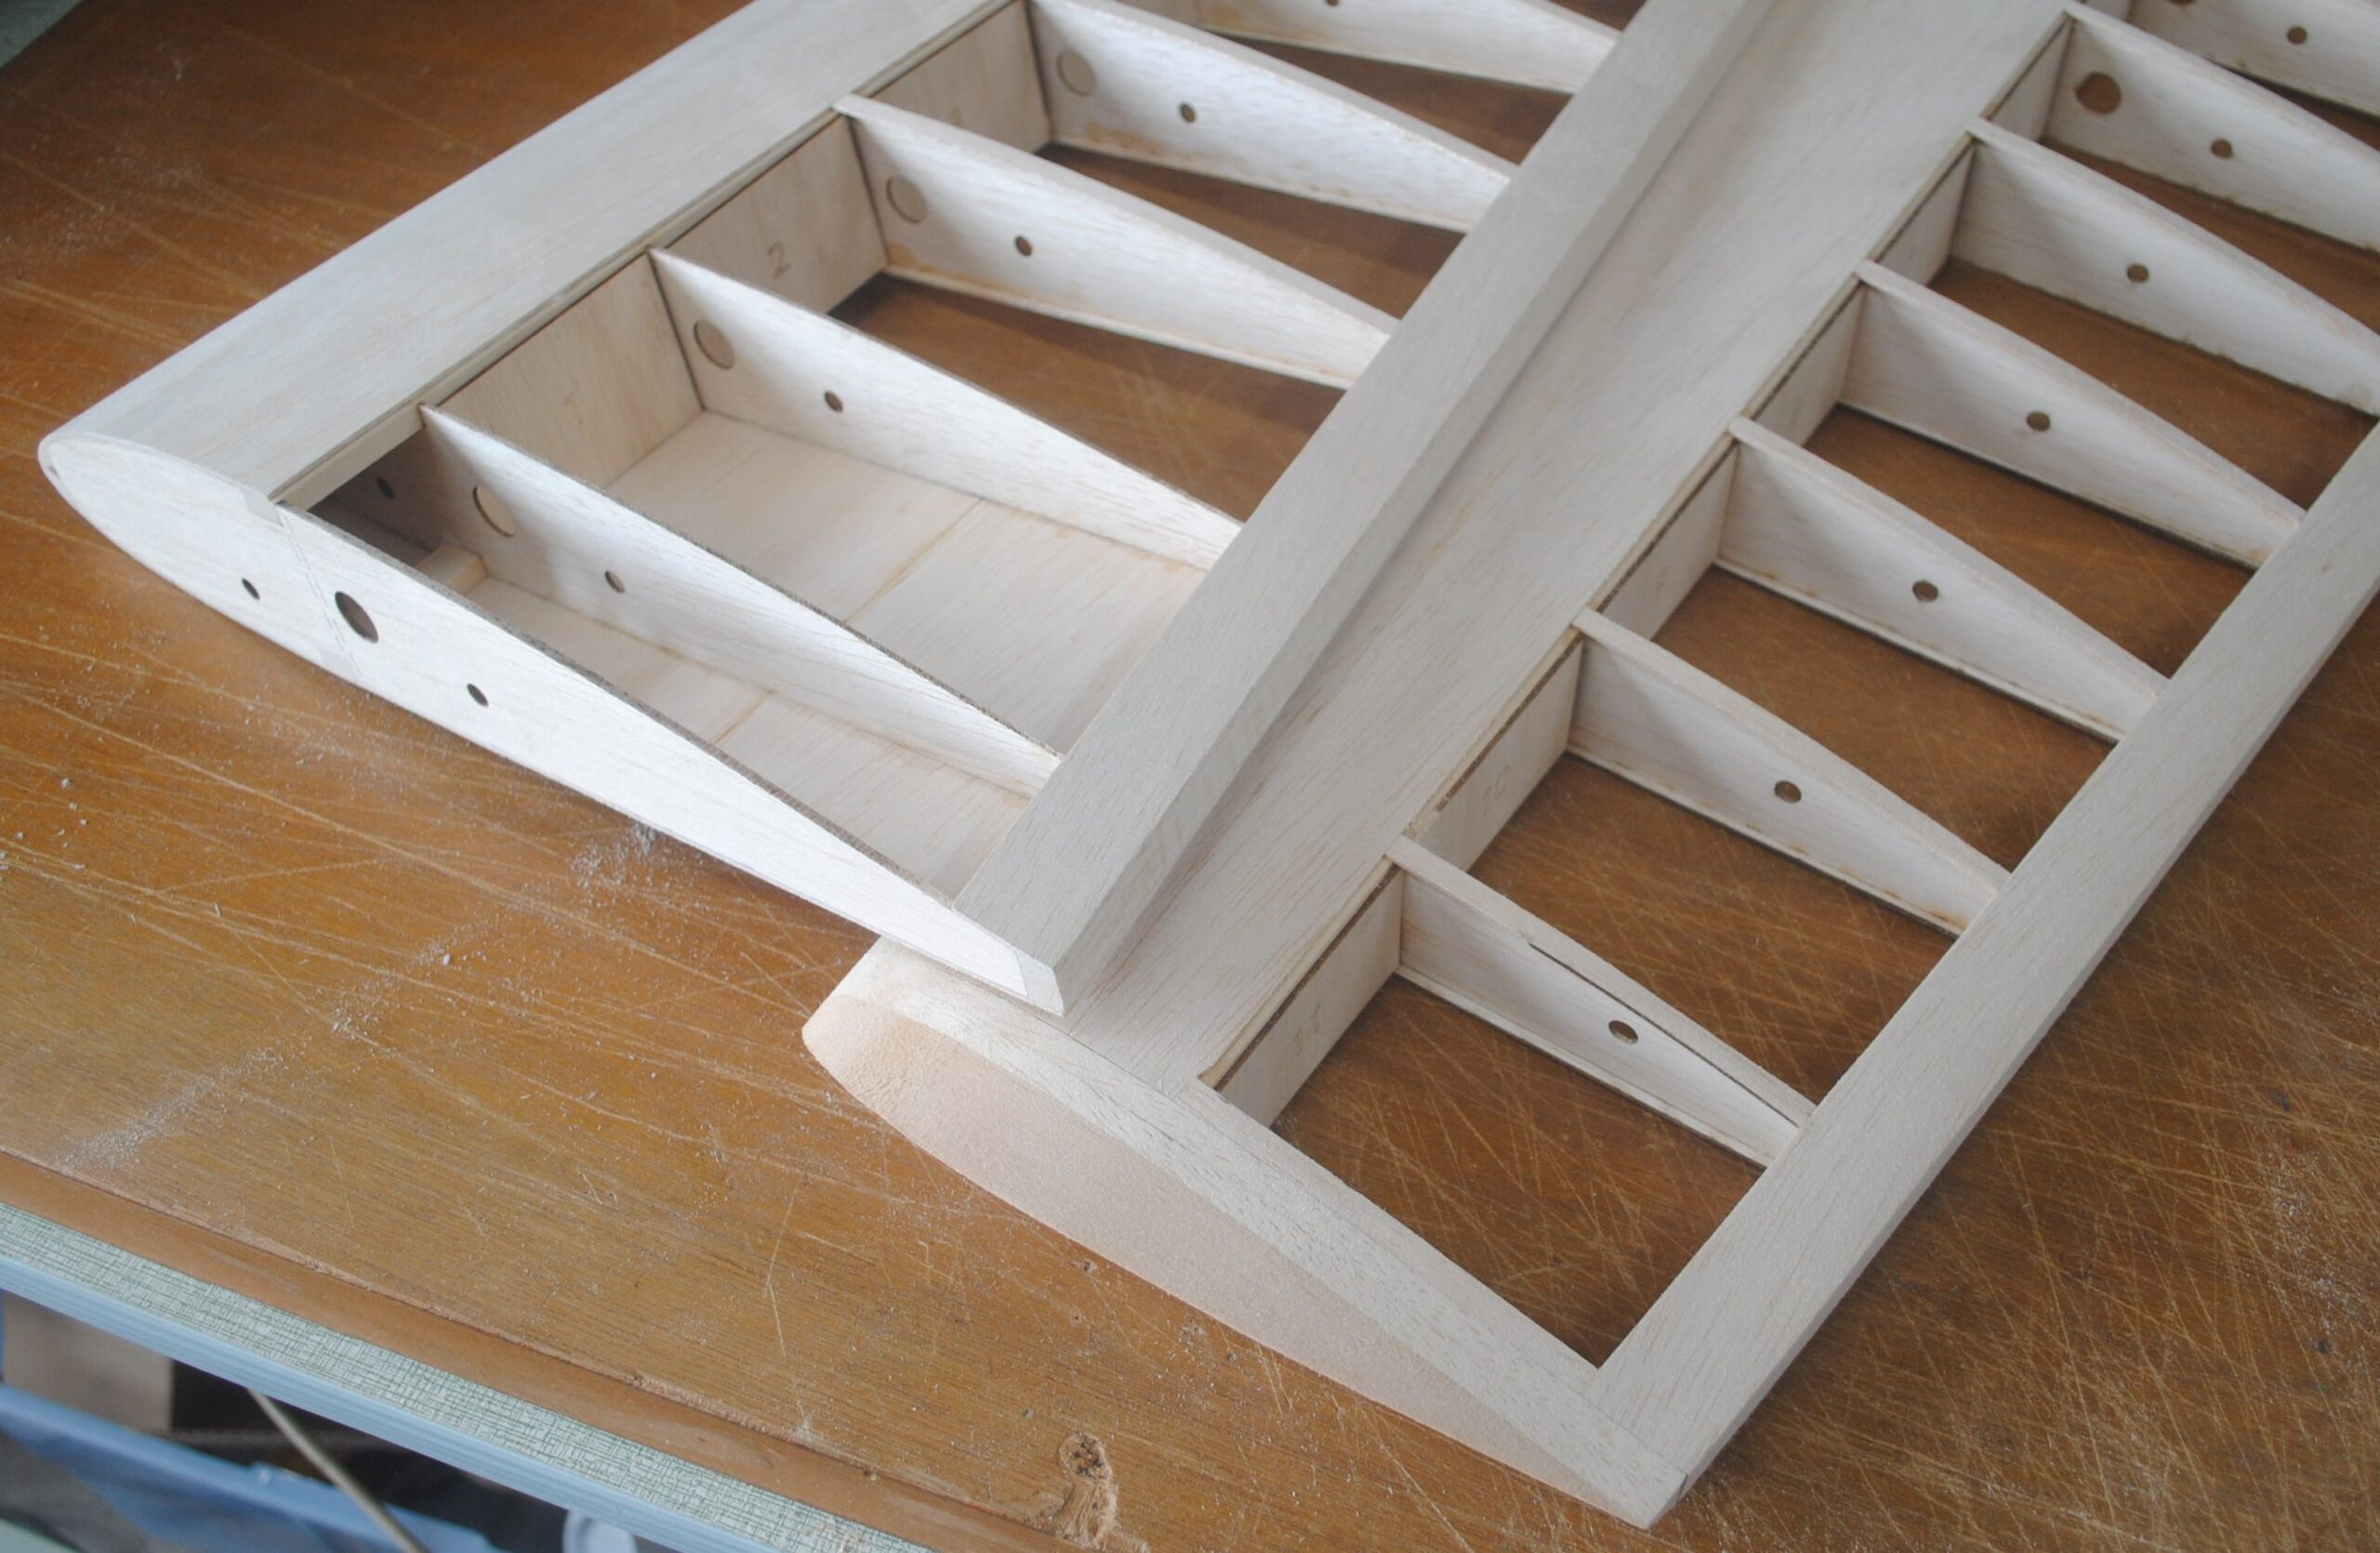
Find rib #1 (root rib, the biggest one) and set it aside for now. Starting with rib #2, attach the rest of the ribs to the bottom spar. Make sure the spar is fully seated in the notch, and use a square to make sure the ribs are standing up straight.

Glue the rib to the bottom spar. Continue to the tip until all the ribs except #1 are glued to the bottom spar.
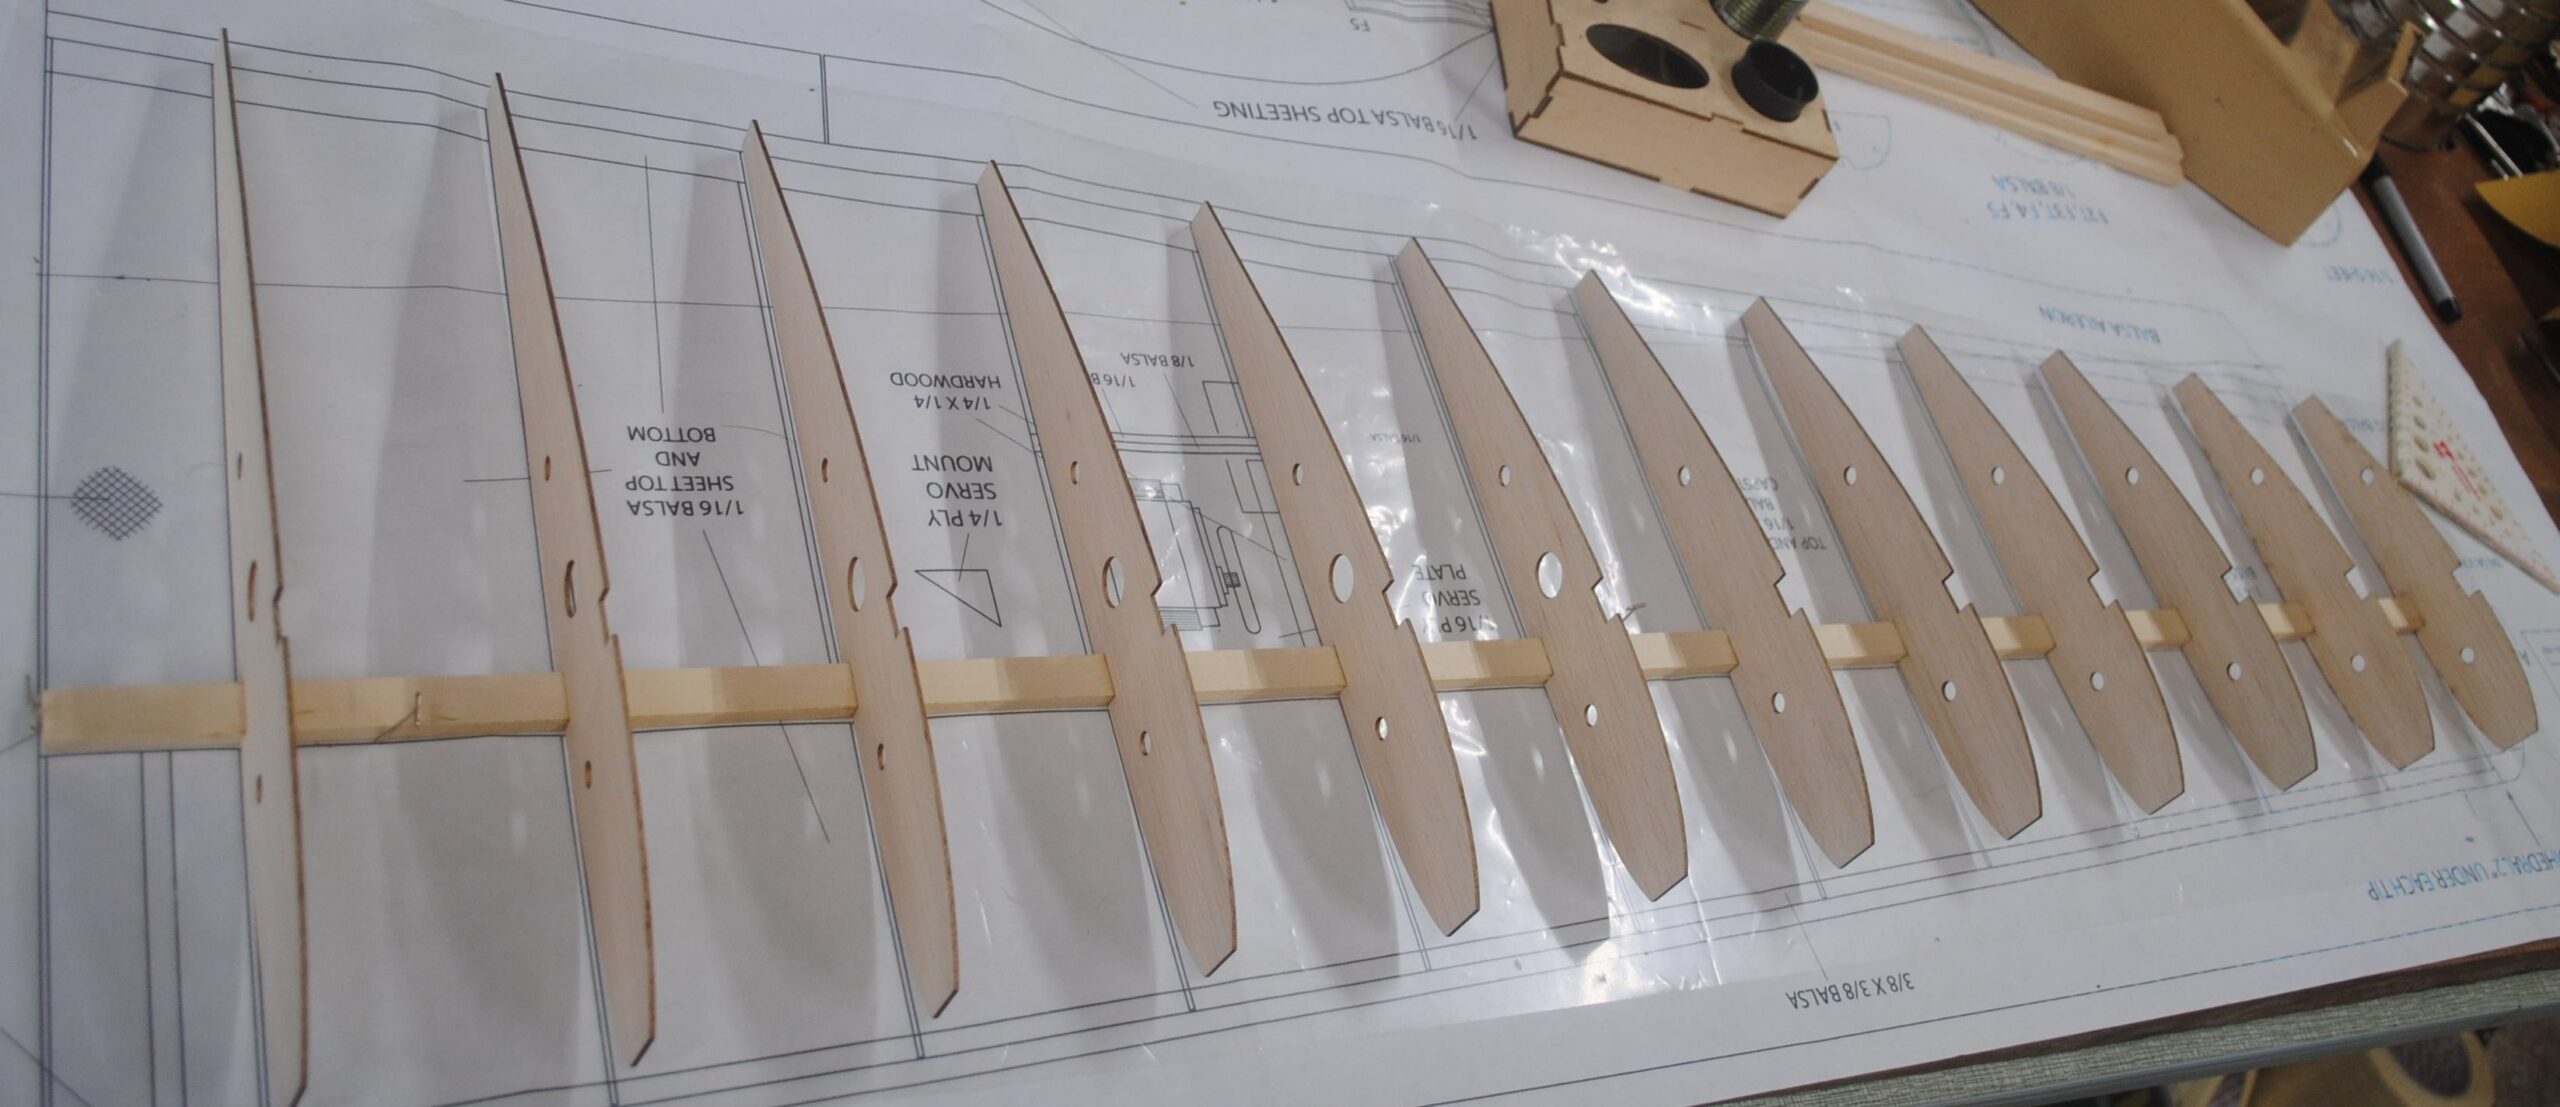
Add the 3/8 x 1/2 x 36 balsa trailing edge stick. While holding the rib and the stick flat on the table, glue the stick to the center most rib. Make sure the rib is straight, and pin the trailing edge to the table at this location.

Glue the tip rib to the trailing edge stick, and pin the trailing edge to the table at the tip.

Repeat the process at rib #2

Straighten and attach all the rest of the ribs to the trailing edge stick. When you make these joints, hold the rib and the stick tightly to the table and make sure the stick isn’t leaning and leaving a gap. Every time you add something to the wing, make sure everything is flat, fully seated, and as straight as possible. This is the #1 way to make sure you are building a straight wing.

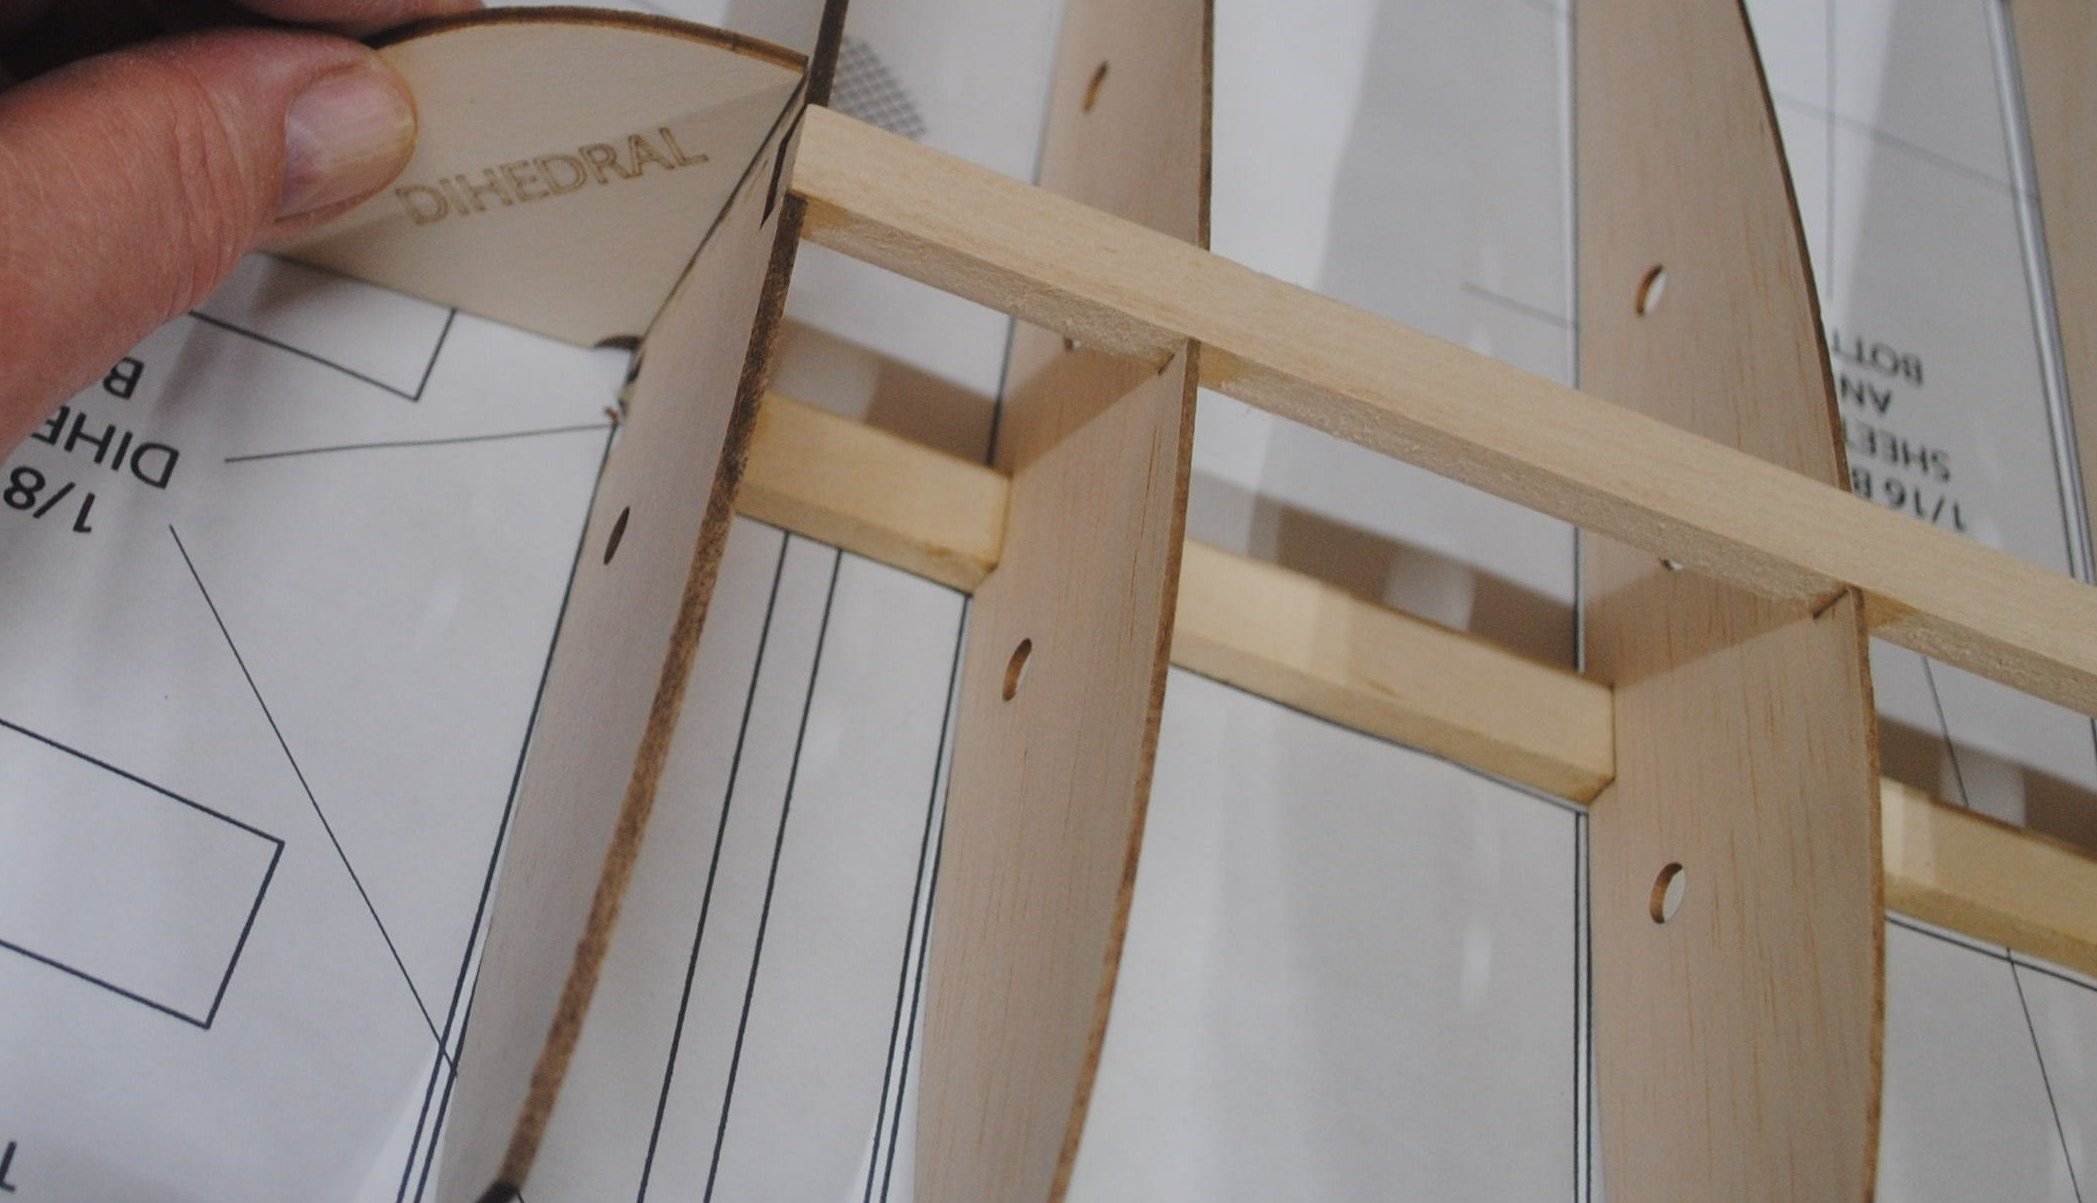
Put the top spar into place and set the length at the wing root with the dihedral gauge. It’s a lot easier to put the spar in the right place now than it is to sand it off later.

Sharp corners may cause difficulty when you try to press the top spar into the notches. It will help if you use a sanding block to slightly chamfer the bottom corners of the top spar before installing it.
Put rib#1 in place and double check the angle with the dihedral gauge.
Now pull your pins, take the wing off the table, and build the other wing. You should have drawn the spar line 5 inches away from the spar location shown on the plan, so you can install the ribs facing the other direction for this wing. When you finish, you should have a left wing and a right wing.
Now it’s time to cut sheeting. The leading edge sheeting is tapered to match the wings. You’ll need a top sheet and a bottom sheet for the left wing and the right wing, for a total of four tapered sheets. On a piece of 1/16 x 4 x 36 balsa make a mark at one end 1 inch from the edge.

Turn the sheet around and mark the other end the same way. Put the marks on opposite edges, so cutting between these two marks will create two tapered sheets. Mark two pieces this way, so you’ll end up with four tapered sheets.

Make a center mark on each end of a 1/16 x 4 x 36 balsa sheet.

Splitting on the marks will make two 1/16 x 2 x 36. Split two sheets for a total of four pieces.
Now you should have four of each type.

Match these in pairs of one tapered piece and one rectangular piece, and edge join them to make four big tapered sheets 3 inches wide at one end and 5 inches wide at the other.
Use your favorite edge-gluing method to join the two parts. My favorite way is to tape the joint with masking tape, then bend it open and apply glue, then flatten it on the table and weigh it down. You can use Elmer’s glue, Fab Tac, or Titebond.

Or you can do it the fast way and just glue the pieces together with CA. CA will cause a line that’s visible through the covering, but it’s up to you. Here’s the glued sheet.

We also need four 1/16 x 1 x 36 trailing edge sheets. Mark each end of a 1/16 x 4 x 36 sheet at 1 inch intervals.

Cut on the lines to make four 1/16 x 1 x 36 sheets.

Attach a piece of 1/16 x 1 x 36 trailing edge sheeting to the bottom of each wing panel.

As always, make sure the wing is flat when you add something. It’s worth noting that if your trailing edge has an arch in it, flattening the wing while attaching the sheet will help to eliminate the arch.
The leading edge sheeting is tapered, which means the grain may not be parallel to both edges. There are three possible ways to orient the grain, and your choice will depend on how you constructed your sheets. You want the grain to be parallel to the leading edge. It can also be parallel to the spar, but that’s not as important. Choose one of the three configurations in the following diagram.

In any case, the sheet will conform to the curve at the leading edge better if the grain is parallel to the leading edge.
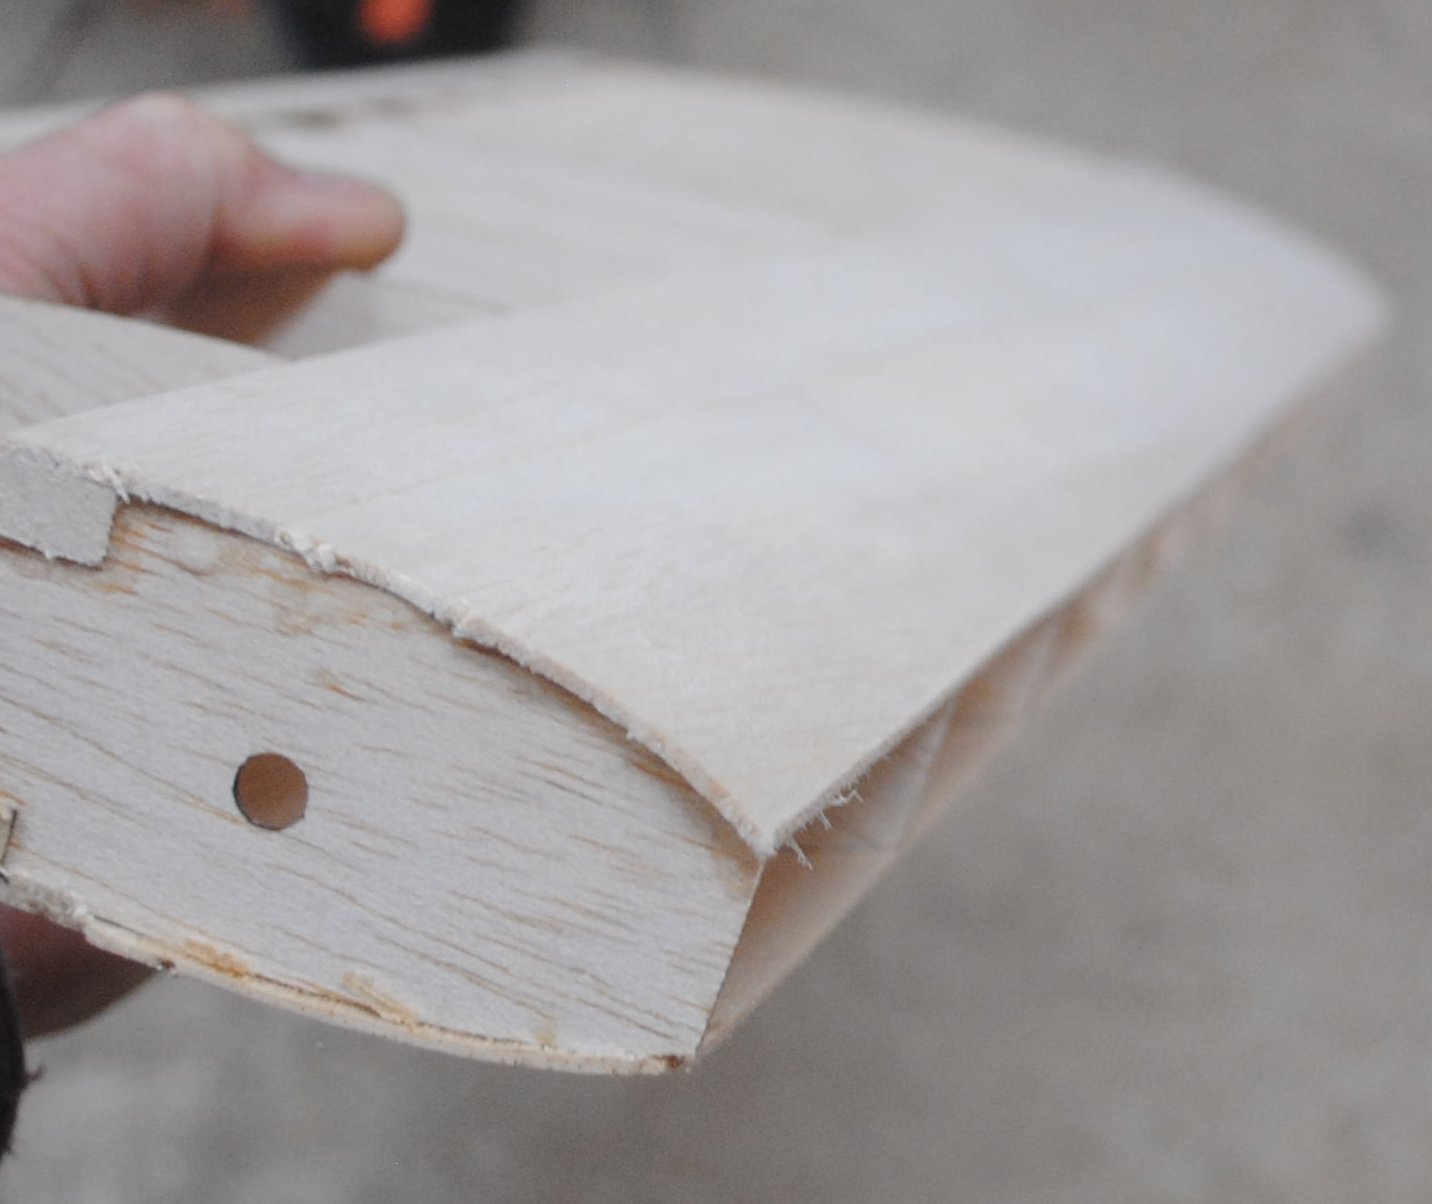
Apply glue to the bottom sheeting where the bottom spar will attach to it.

Set the spar on top of the sheet and press firmly to attach it. The rear edge of the sheeting should be very close to the rear edge of the spar, just leaving 1/8 inch or so of the spar showing, as seen in this photo.

You want to attach the sheeting to the ribs while the wing is flat on the table, but it’s difficult to get your fingers under there to pull the sheeting into place on the bottom of the ribs. Here’s one way to do it. Set the wing at the edge of the table so the spar is sitting firmly on the table and the ribs in front of the spar are hanging out in space.

The part of the wing that’s still on the table should be held down with heavy weights to keep the wing flat. Pull the leading edge sheeting up against the ribs and attach it with thin CA. If you prefer Titebond, you’re on your own.
Now you can put the whole wing on the table, hold it down with heavy weights again, and attach the top leading edge sheeting.

If your sheeting doesn’t want to roll easily over the curve of the airfoil you can wet the outside surface of it and it will bend a lot more easily. Don’t sand wet balsa. Wait until it dries.
Experienced builders have favorite types of glue and their own ways of attaching sheeting. If you don’t like the looks of my way, there are lots of guys on the online forums who can give you good advice for attaching sheeting. Once the leading edge sheeting is attached to the top and bottom, add the bottom sheeting to the first two rib bays. Don’t sheet the top of this area yet.

Plane and sand the top of the trailing edge stick to conform to the contour of the airfoil. Attach the top trailing edge sheeting.

Sand the trailing edge flat. You may want to use a planer to take off any sheeting that sticks out way too far before you switch over to sand paper.

Trim off the excess sheeting that hangs over the leading edge of the ribs.

When you get it pretty close, sand it flush with the ribs using a sanding block with sharp sand paper. If you use worn out sand paper you will have to push hard. The sheeting will deflect and the result will be a wavy edge.

Point the wing at your eye and look along the leading edge to make sure you’ve sanded a straight line.
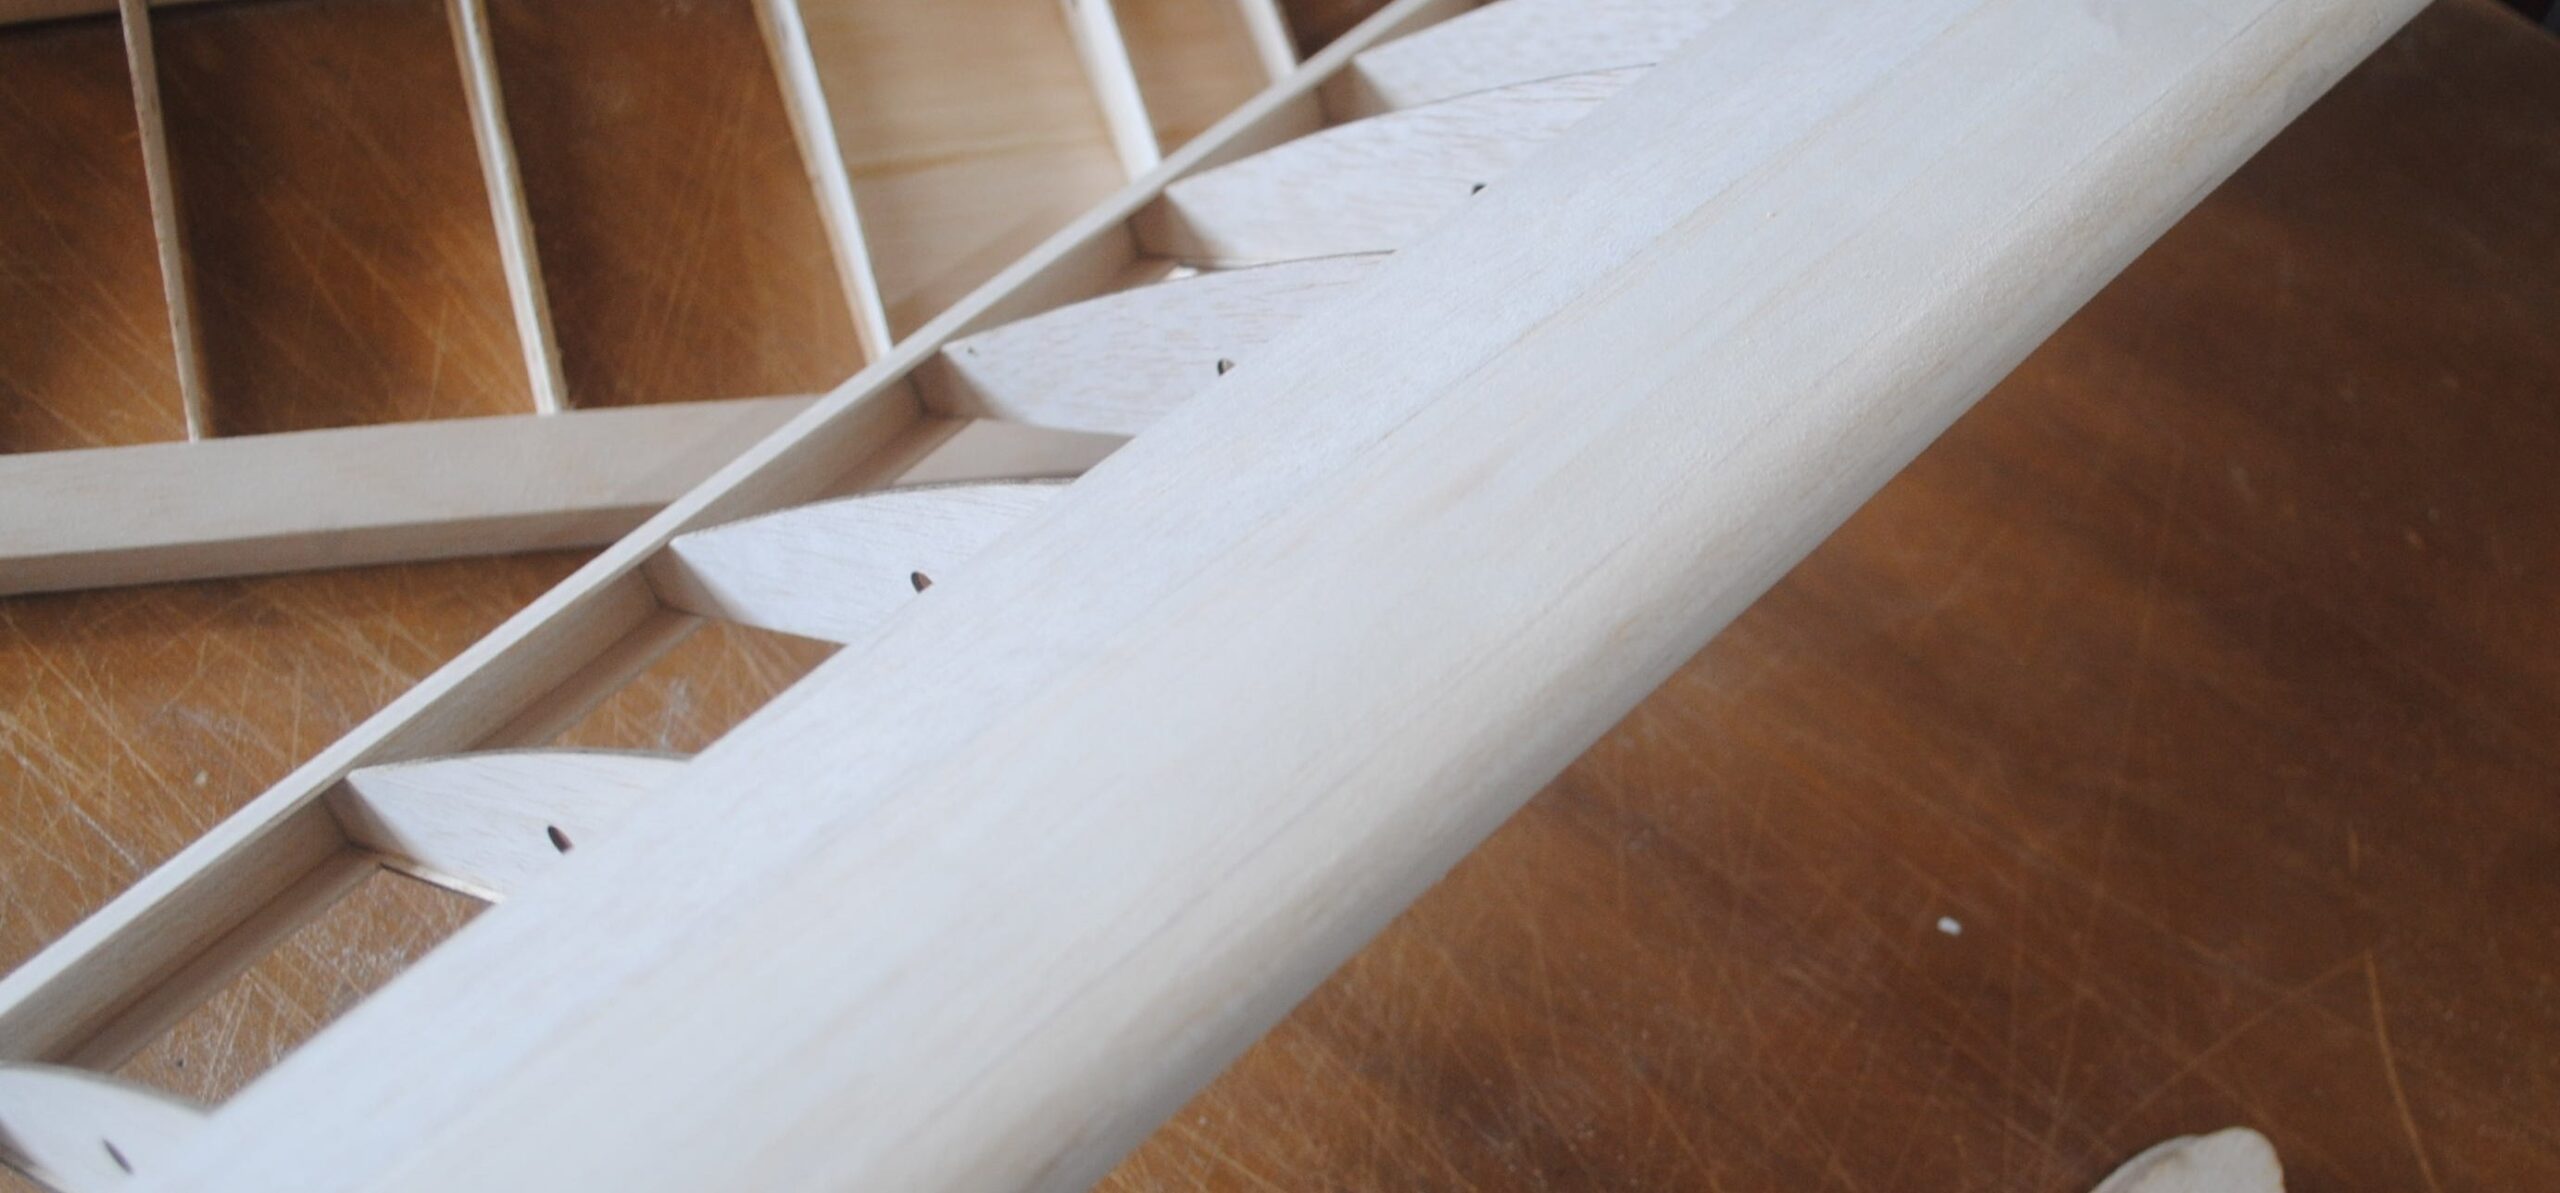
Apply glue to the front of each rib and the front edge of the top and bottom sheeting. Set the wing flat on the table and hold it flat with heavy weights again. Attach the 3/8 x 1 balsa leading edge stick. Pick up the wing and look at the joint. If you see cracks you should press the stick in until it contacts the sheeting. A little bit of thin CA can keep it attached. Don’t add so much that it runs along the seam and drips out the end onto your pants. Tiny bits of accelerator can help in this situation, too.

Turn the wing around so the trailing edge is pointed at you. Put the weights on it to hold it flat. Get the numbered shear webs ready. Please note that these webs are tapered to fit the non-rectangular spaces. The numbers will face out on the left wing and inward on the right wing. #1 goes in the first full size bay, which is actually the second bay because the first bay is half size and the dihedral brace goes there. Check the fit of each web in its bay and trim any webs that need it. Later you’ll be putting glue on the web, and that’s not when you want to discover that it doesn’t quite fit.

My favorite way to attach webs is to lightly spritz the rear edge of the spars with accelerator (not a lot), then apply medium CA to the web. It will adhere quickly without the need for holding it in place for a long time with fingers or pins. Also, it avoids the problem of thin CA running everywhere. Titebond or other slow glues can be used, and of course the wing would have to be left flat and the webs pinned in place until the glue dries.
Left wing: numbers out.

Right wing: numbers in.

You may notice that the bottom cap strips are present in these photos. Adding the bottom cap strips first can help you place your webs accurately. If you choose to do this, please note that you should not place bottom cap strips on ribs #5 and #6 because that’s where the servo bay is, and we’re going to build something different there instead of standard cap strips. I had some leftover space on one of the wing rib sheets, so I used it to make a few 1/4″ wide cap strips to get you started.
Now that the shear webs are in place the wing can no longer be twisted, and the flat table is no longer necessary. At this time it’s customary to place the fuselage on top so you can admire your work and make zoom-zoom noises if you are a wet fuel pilot. Electric pilots can make whirring noises if they are inclined.

There are a few details that are easier to add to the wings while they are still small. You can do these things later when the wing is six feet long, but it’s a lot easier now.
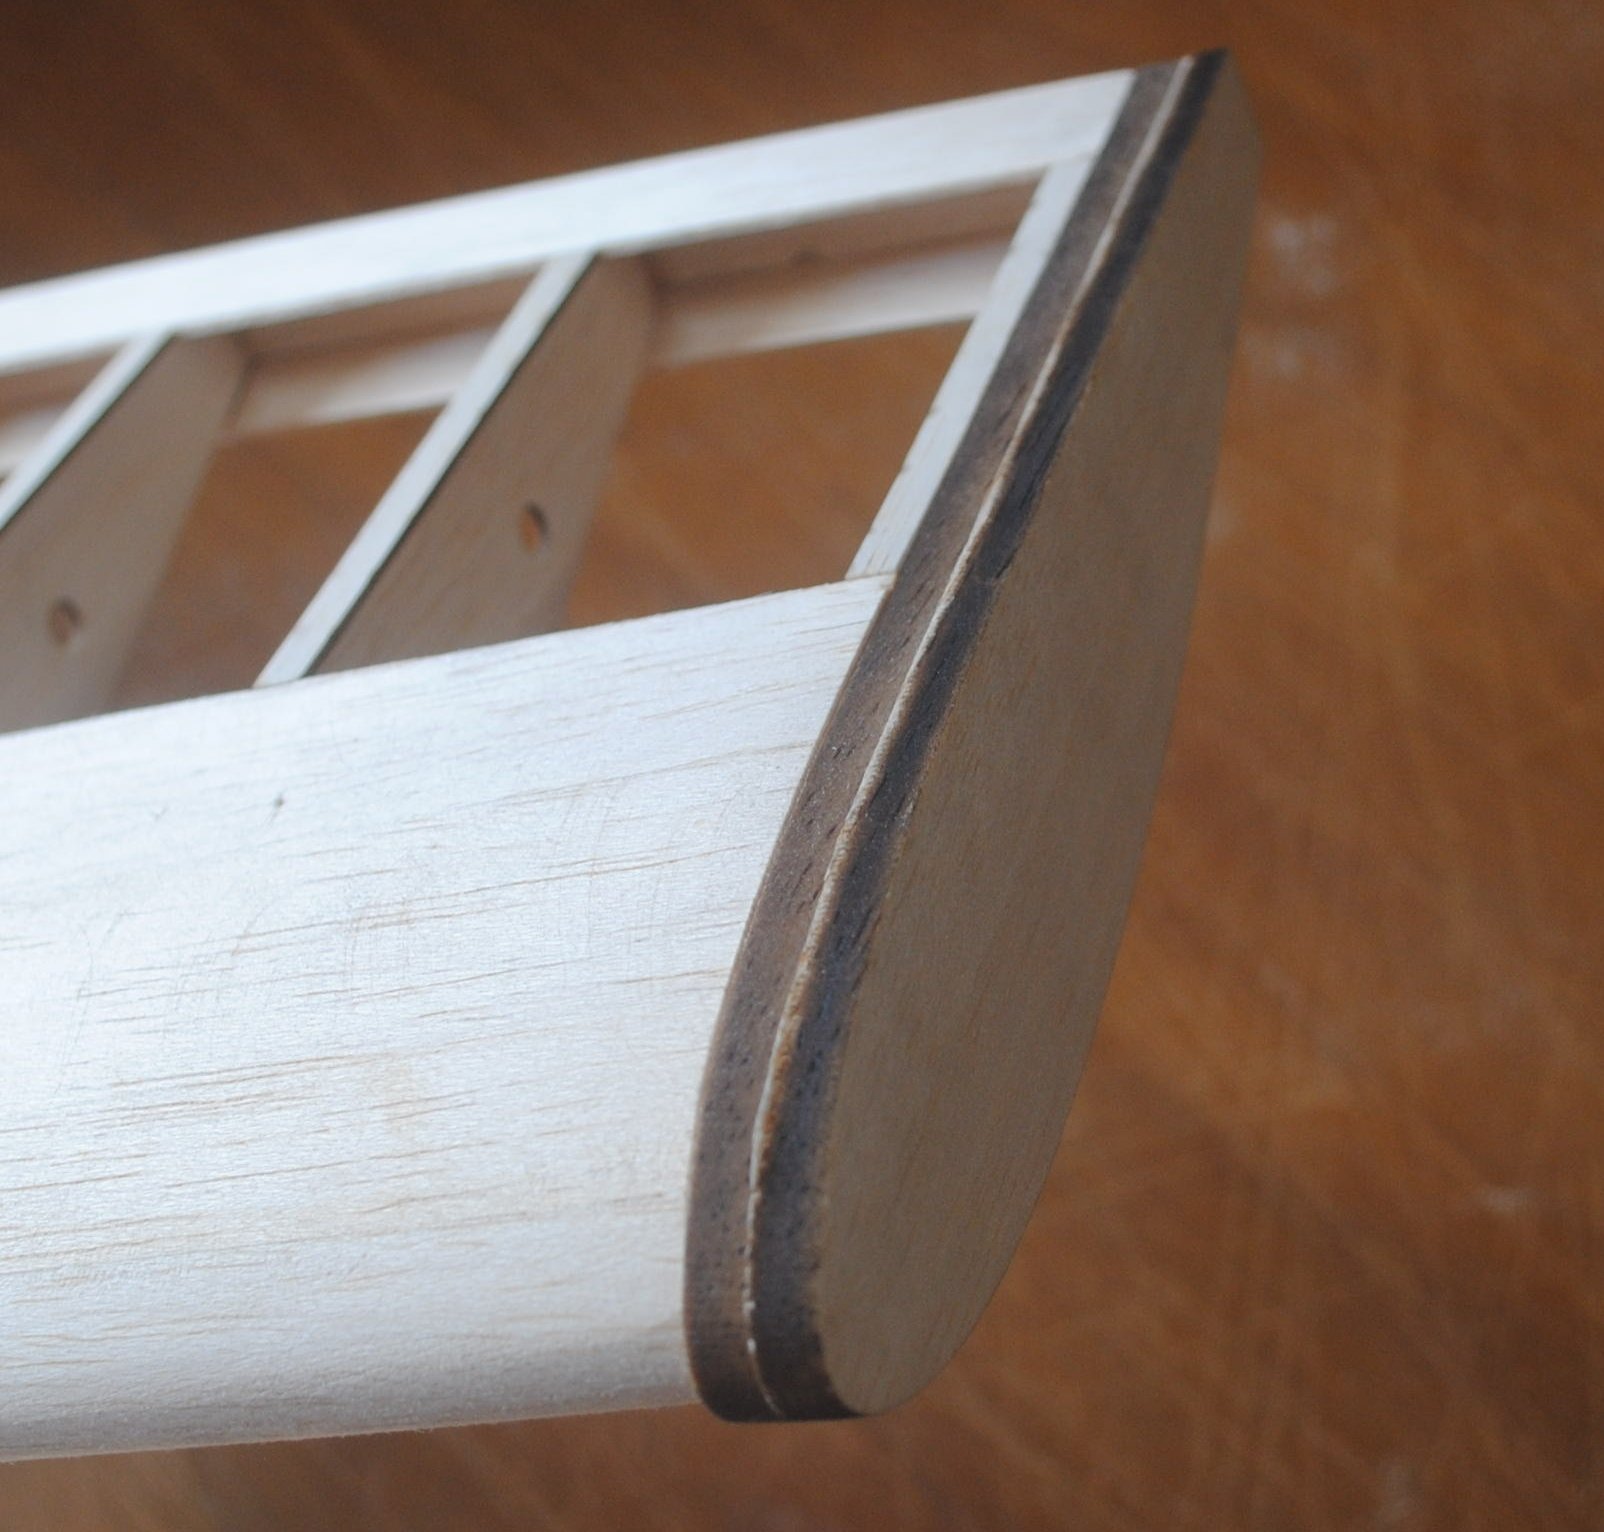
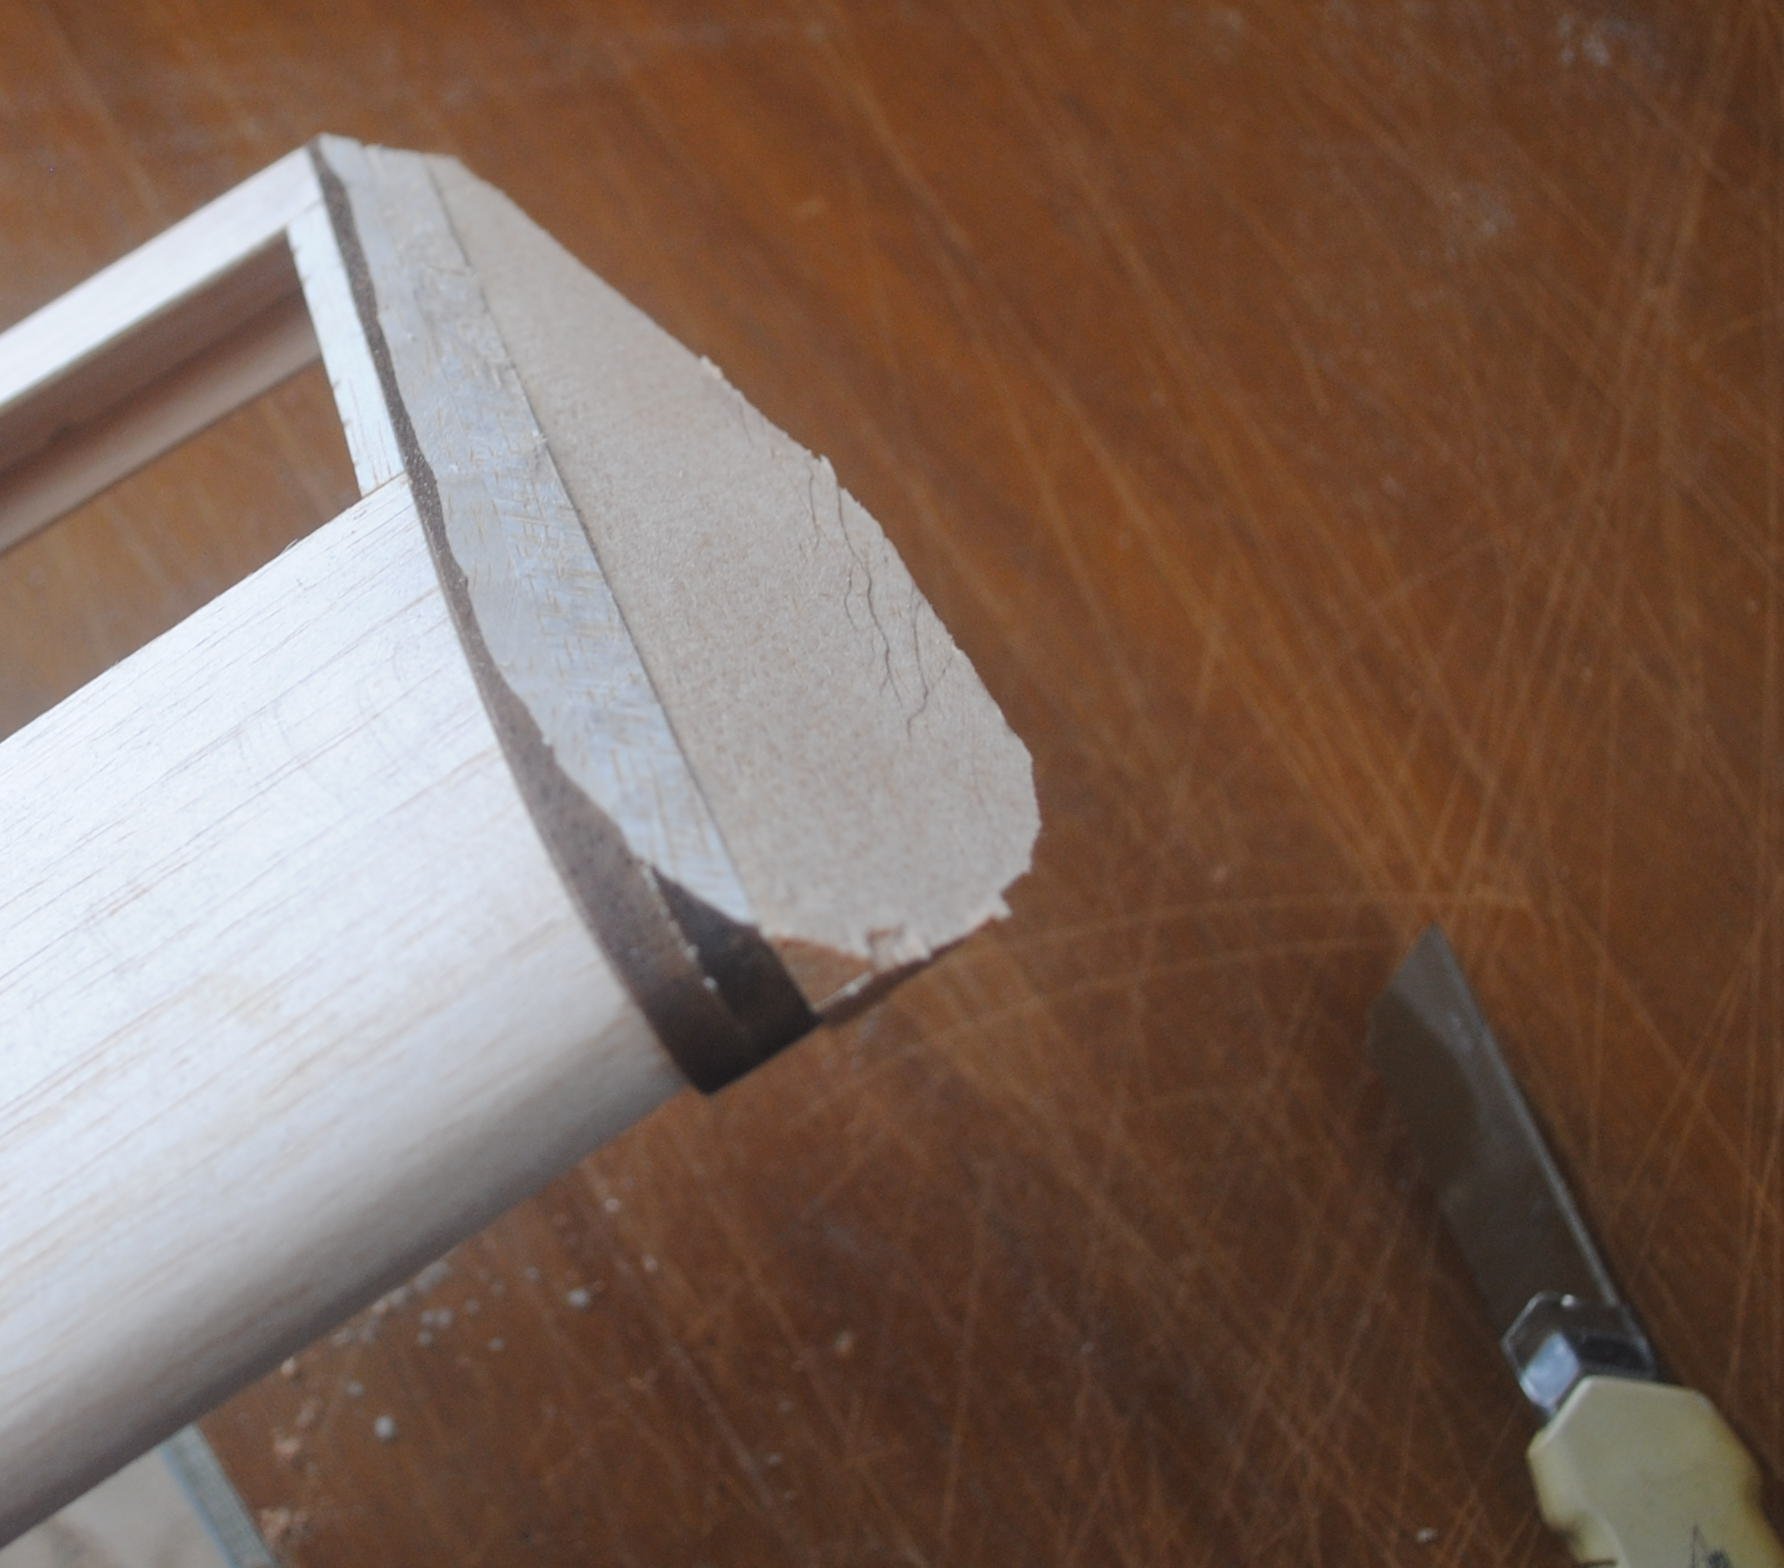
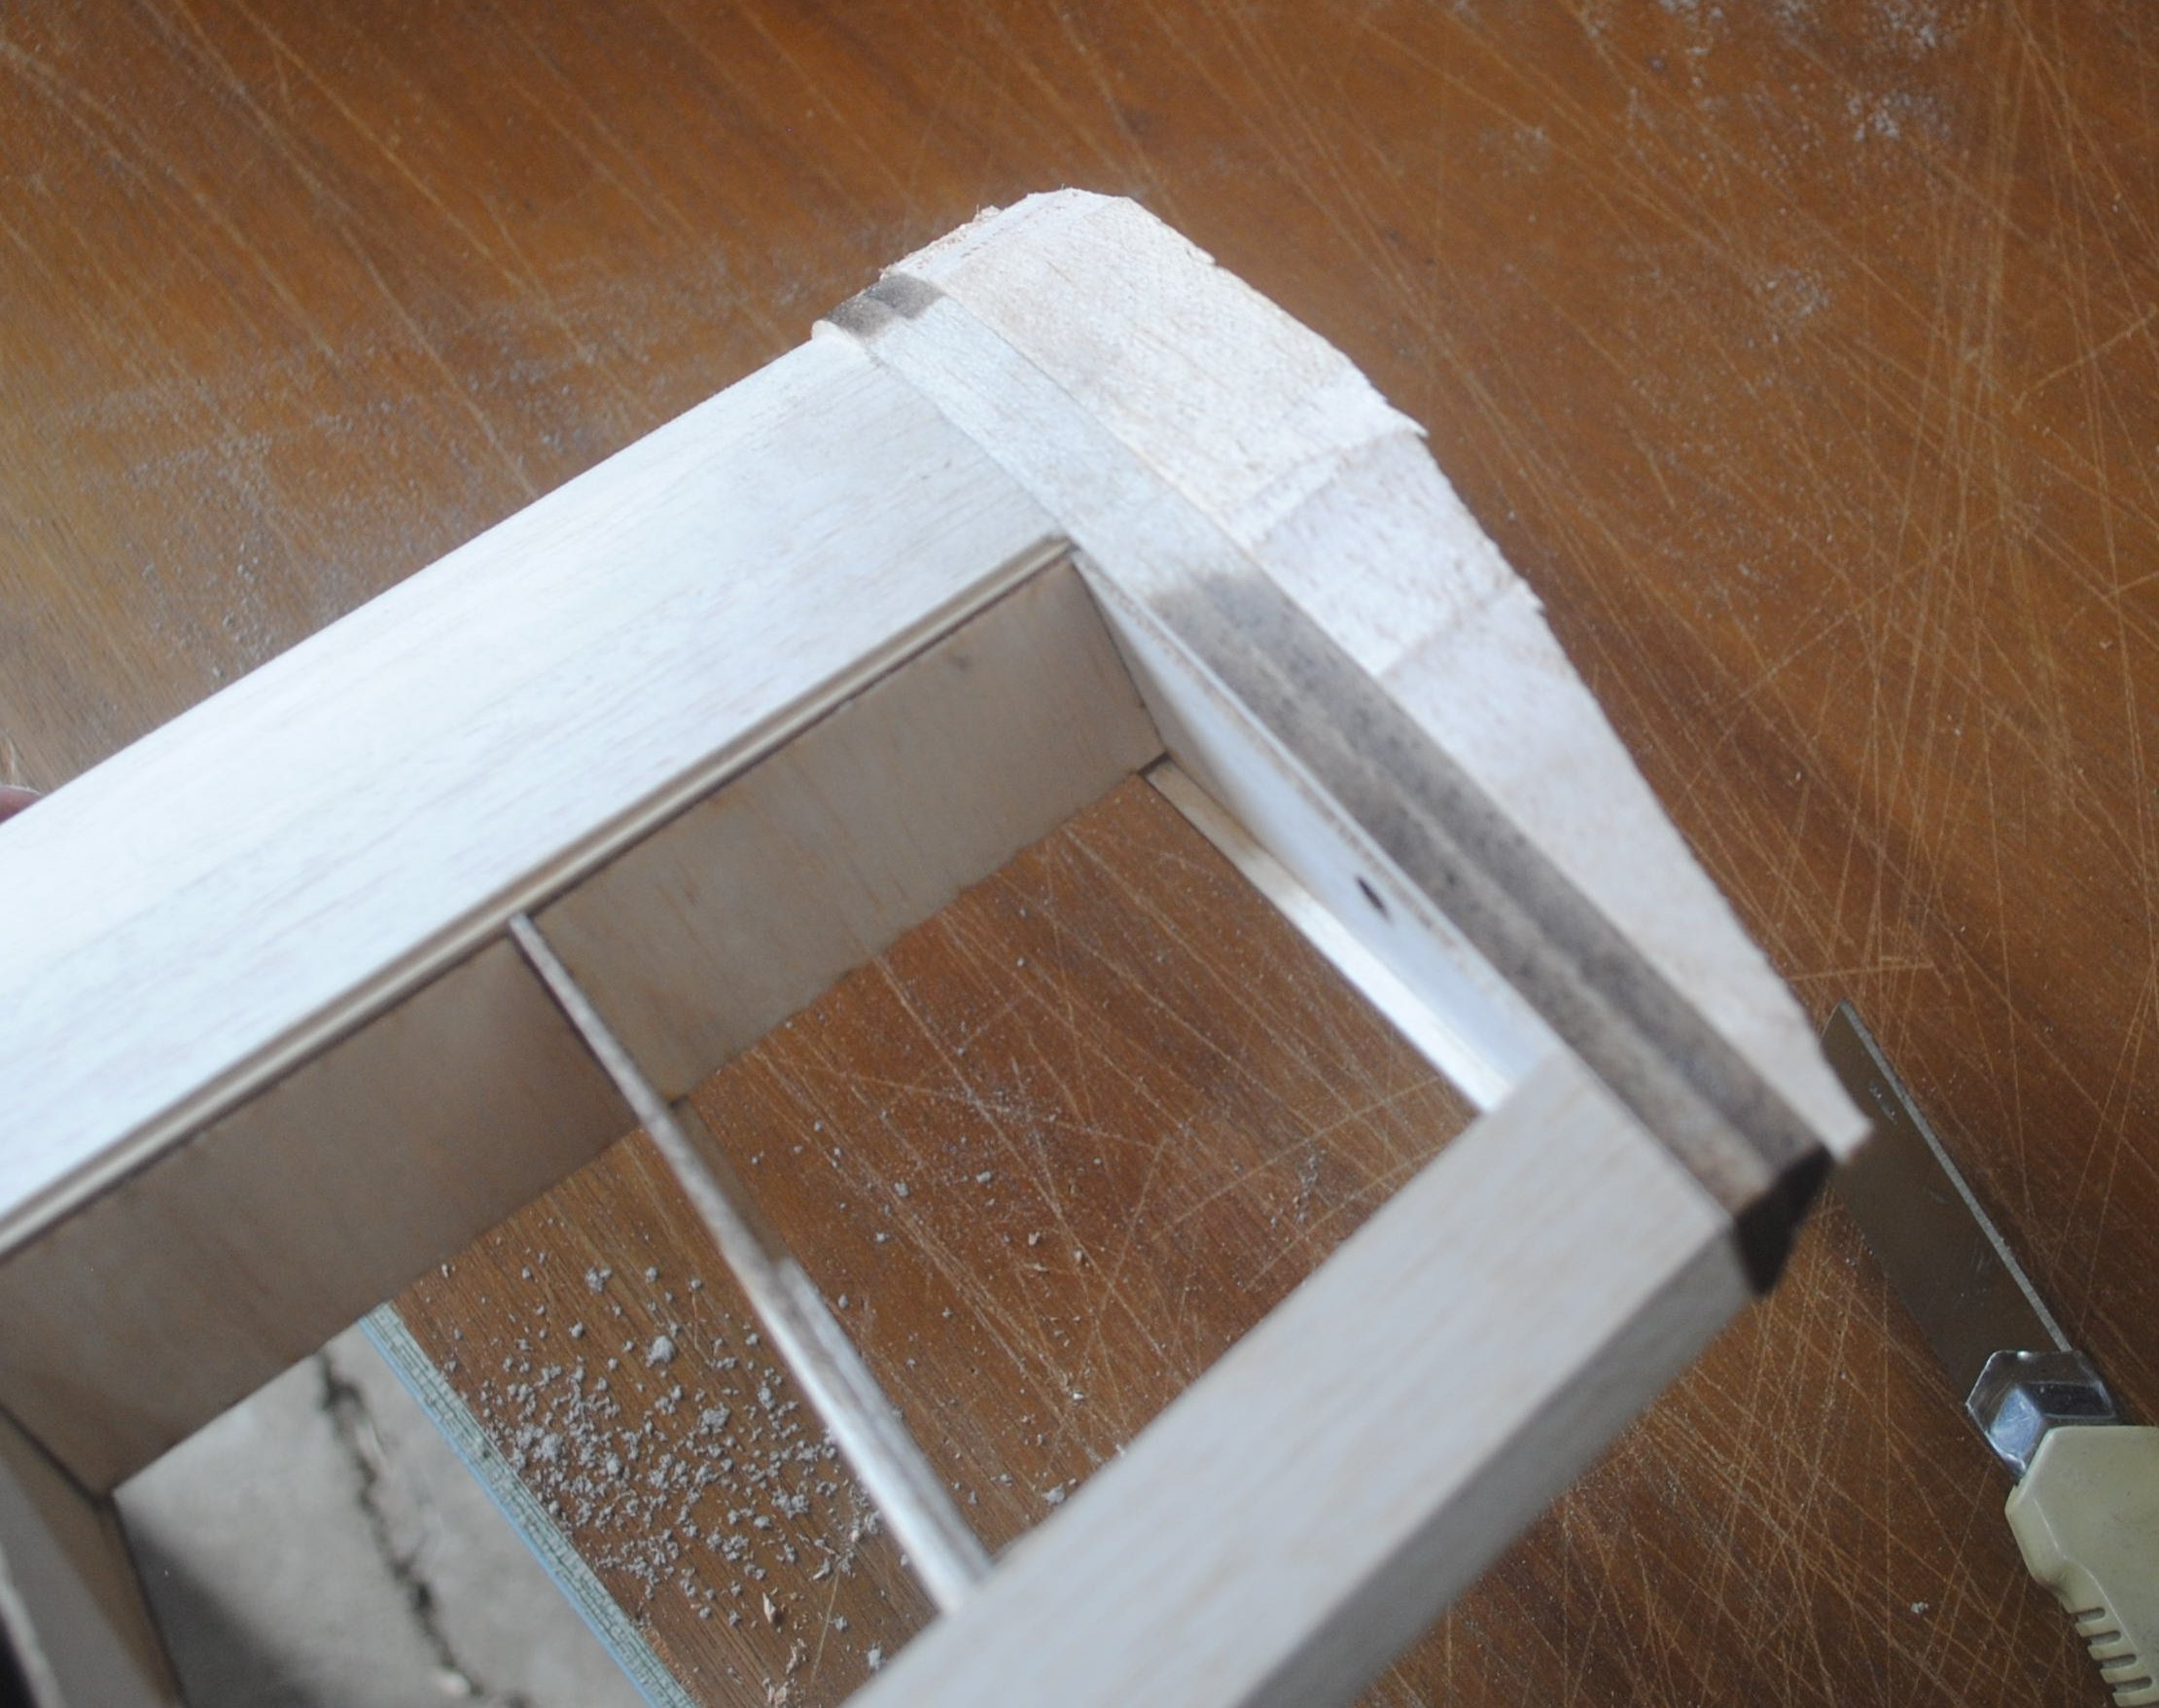
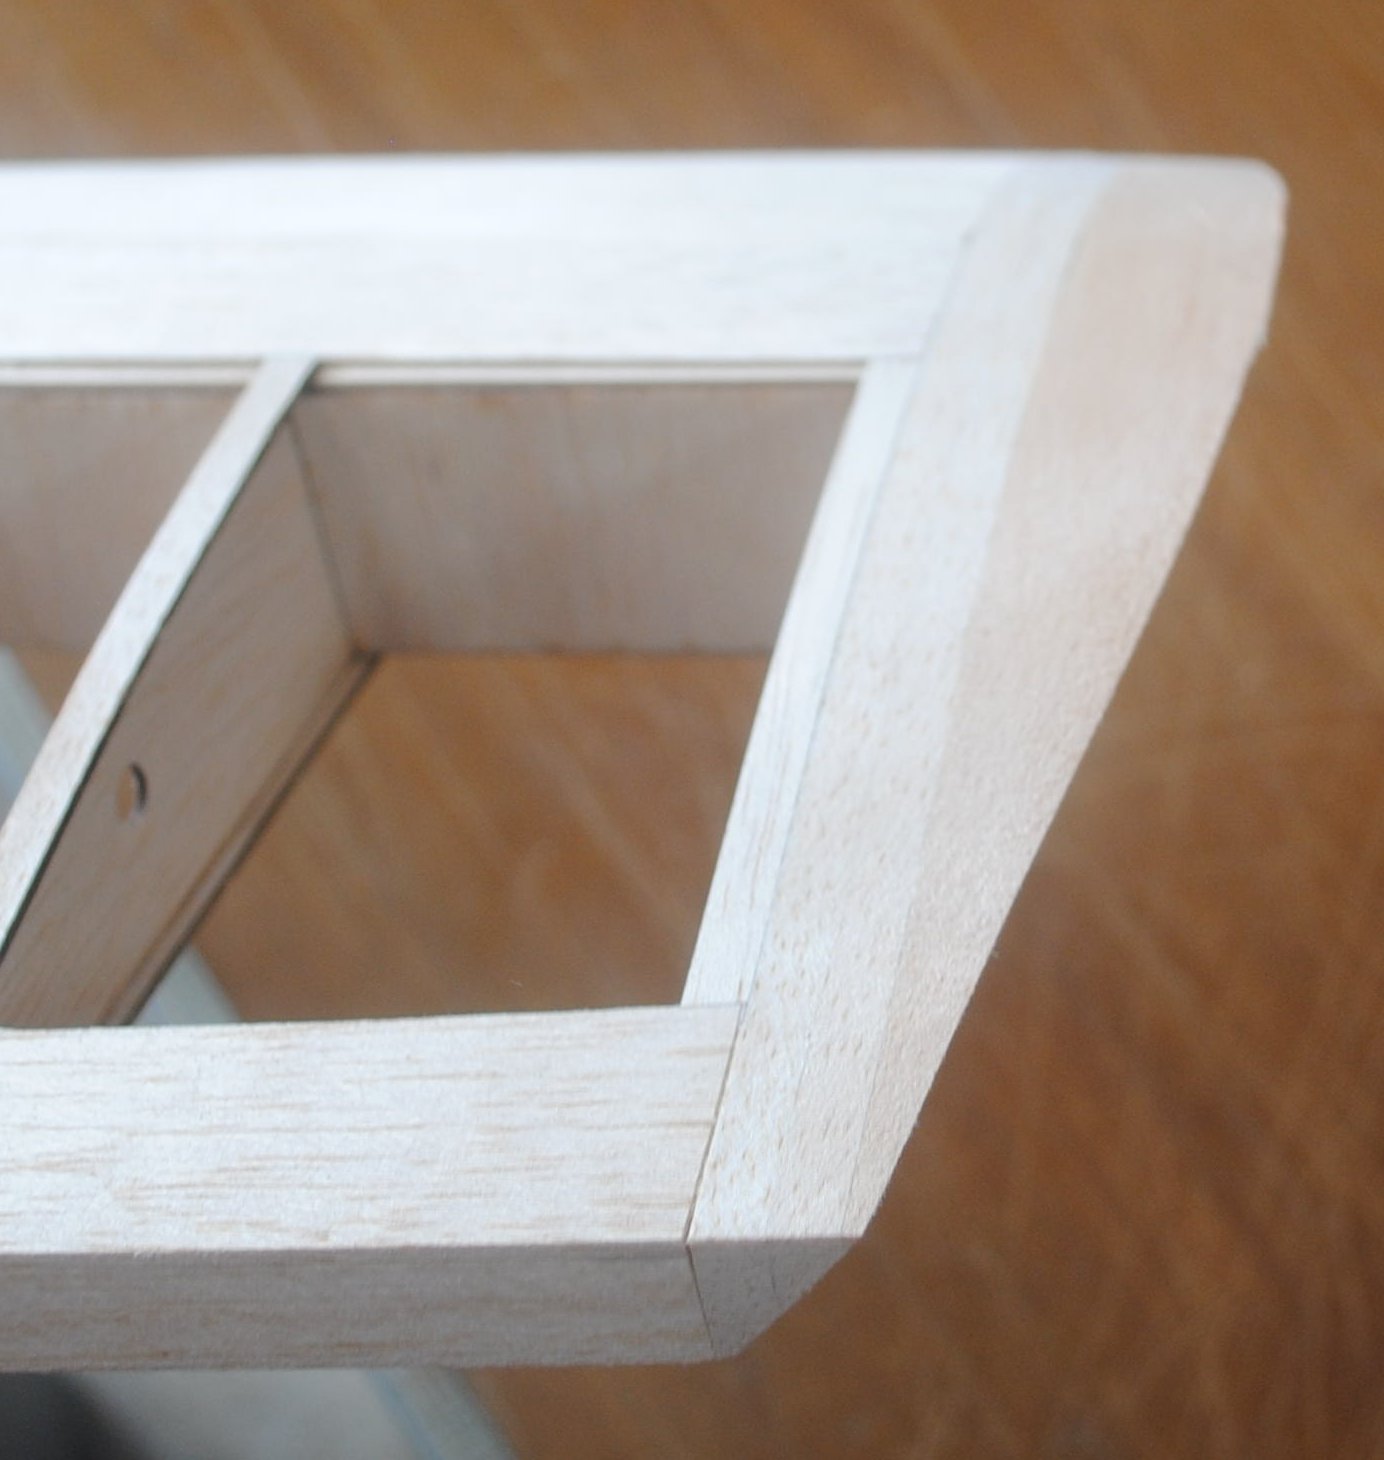
Trim the excess length of the spars and wing sheeting off, then use a sanding block to sand the roots and tips flush.

Round off the leading edges.
Put the cap strips on the tops of the ribs. Cap strip width is not critical. Some 1/4 inch strips are supplied in the kit but you can cut your own to whatever width you prefer. Remember not to put strips on the bottom of rib #5 and #6 yet because that’s the servo bay and we need to do something else there.
The wing tips are made from a balsa triangle that isn’t big enough, plus two layers of 1/4 inch balsa to make up the extra space. Attach the two layers of 1/4 inch balsa first.
Then attach the balsa triangle with the top high enough to reach the peak of the airfoil, and the bottom parallel to the flat section of the airfoil.

Use a long bladed utility knife to carve the protruding part of the 1/4 inch balsa layers so they are almost flush with the triangle stock on the underside of the wing.
Carve the top of the balsa triangle to match the airfoil. Just get it close.
Now use a sanding block to sand the tips to match the airfoil outline. It’s easier to match the airfoil outline if you use a long block that reaches back to the next rib.
Sand the bottom of the 1/4 inch balsa pieces flush with the triangle stock.

This section is getting long enough, so I’ll split it to make a second part.