The next thing you’ll want to do is decide what kind of engine cowling you want. You could cut the bottom plank in half so it doesn’t extend ahead of the firewall, and install just the cowl cheeks. This is a classic look for a toy airplane. Or you could leave the bottom intact so it extends all the way to the front of the cheeks for a simple look. Another option would be to sand the rear edge of each cowl cheek to a slight angle and install them slanted, so the engine bay narrows at the front. Or you could trim the bottom flush with the firewall, mount your engine upside down and add a thick plank to the top. You can attach the supplied ring and taper the entire cowl to the ring. Or you could leave the cowl off entirely, as I did with prototype #1.
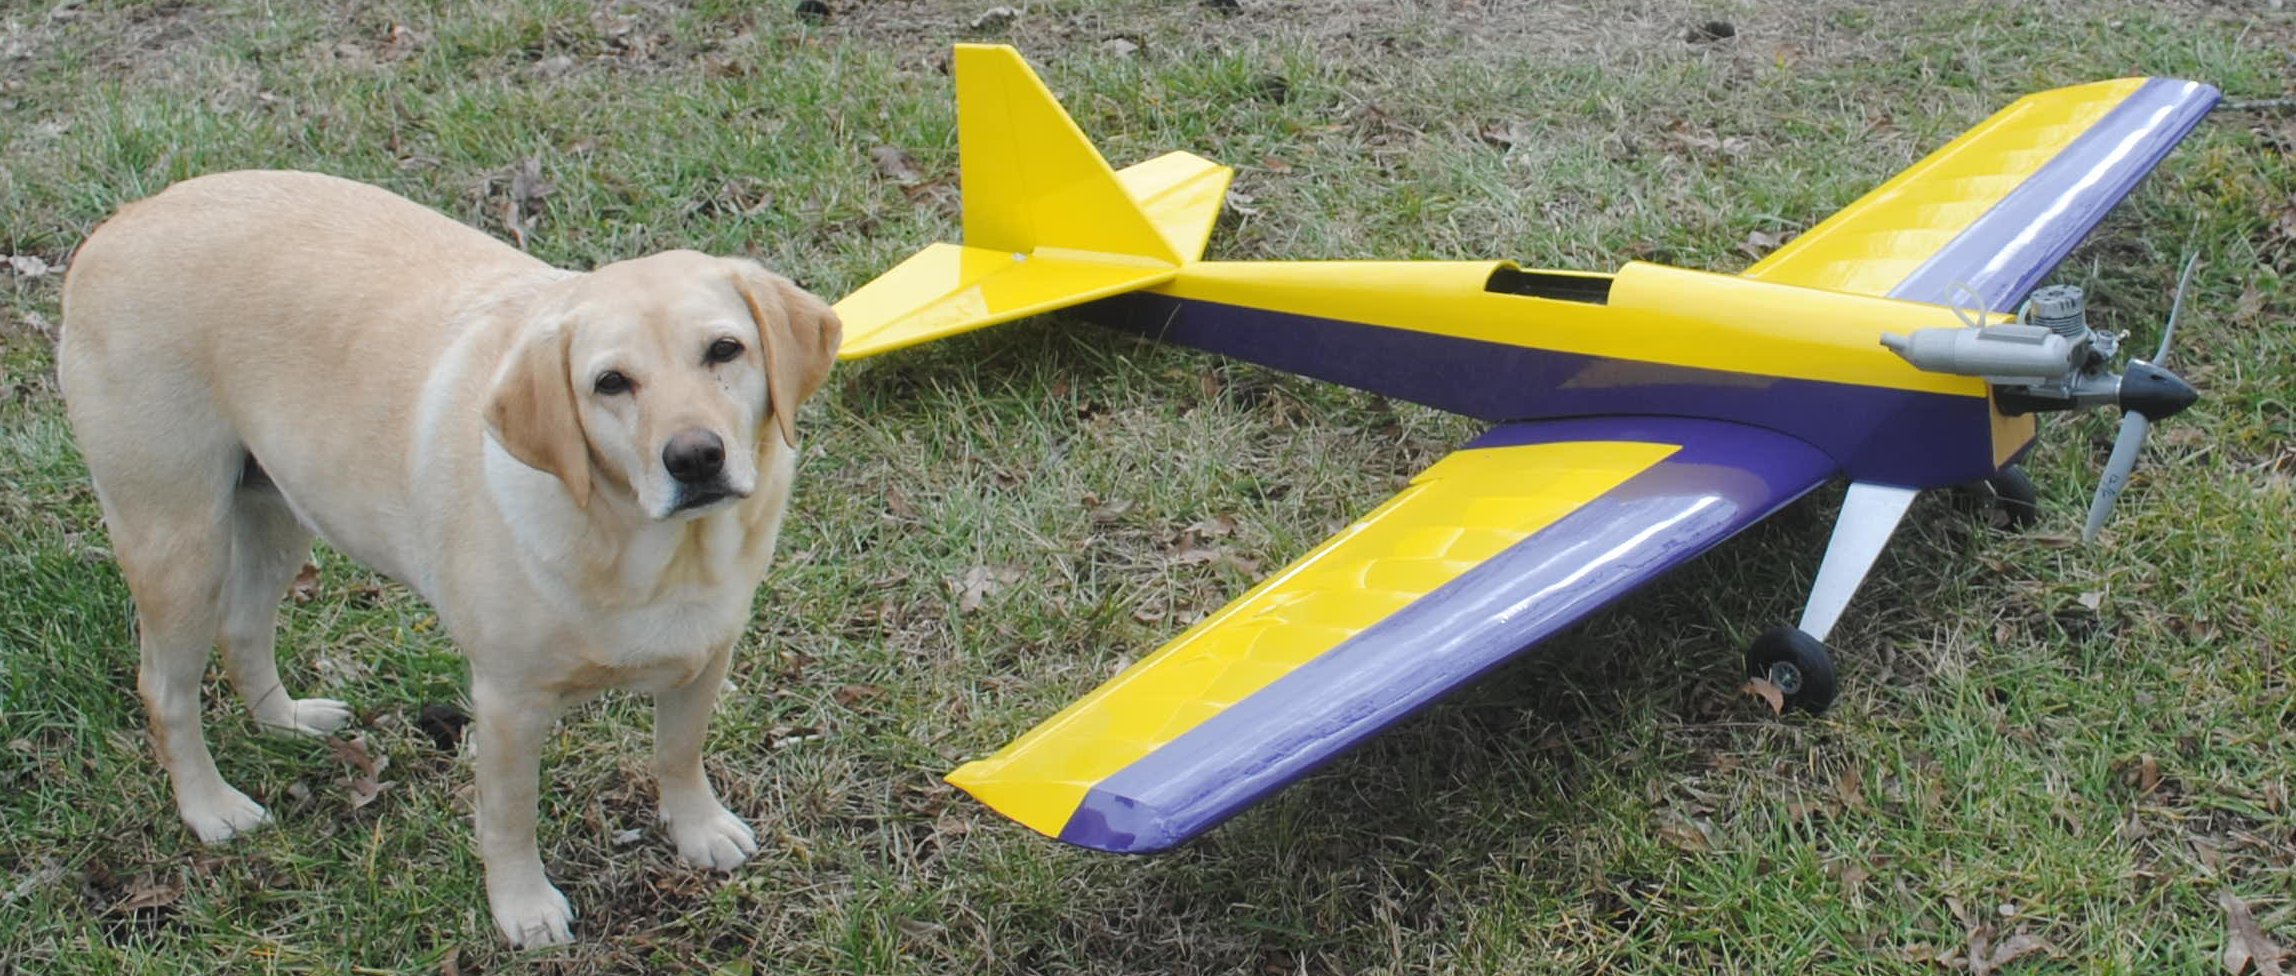
That’s Margo. She likes to be in photos.
You could leave the cowl off and make or purchase a fiberglass cowl.
In any case, the possibilities are unlimited, and the kit includes parts to get you started. On the prototype built for the instructions I have elected to do something very basic.
The first thing to do is sand away the char on the top edge where it may be seen later.

Lay down a piece of plastic to avoid gluing the plane to the table. Lay the fuselage side down, and hold it and the cowl firmly against the table to align the outside surface. Use a straight block to align the bottom edge.
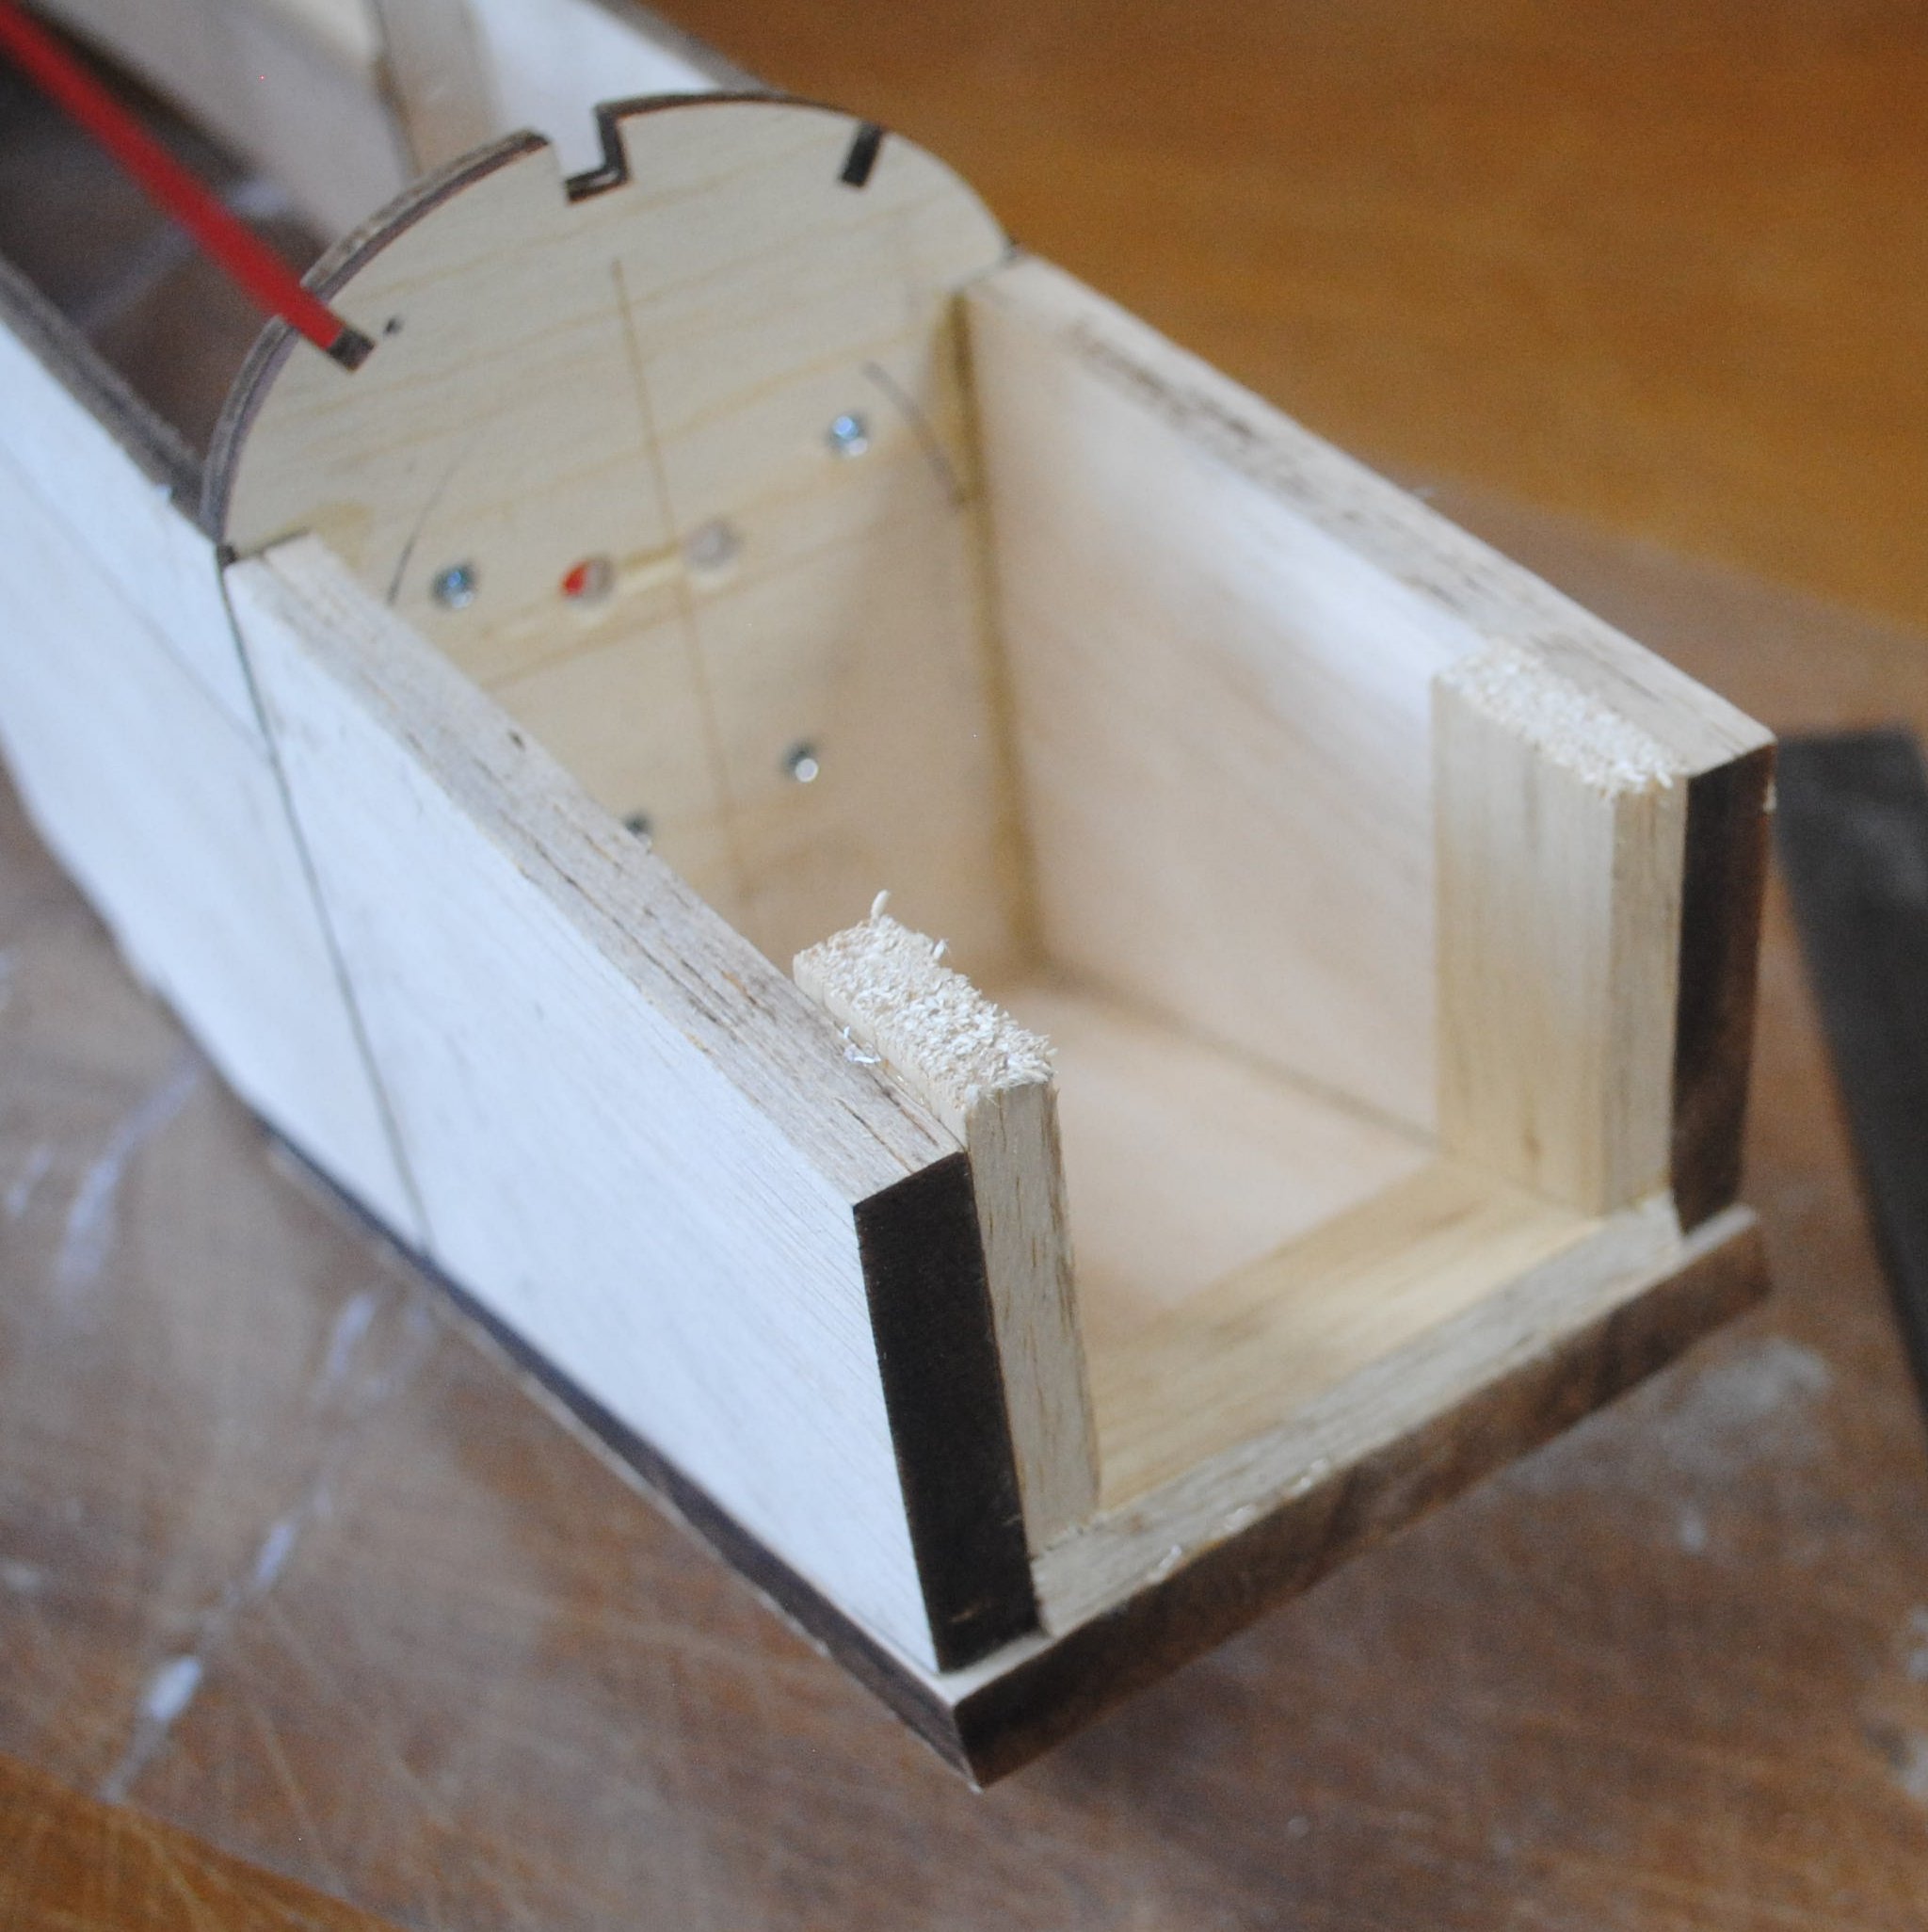
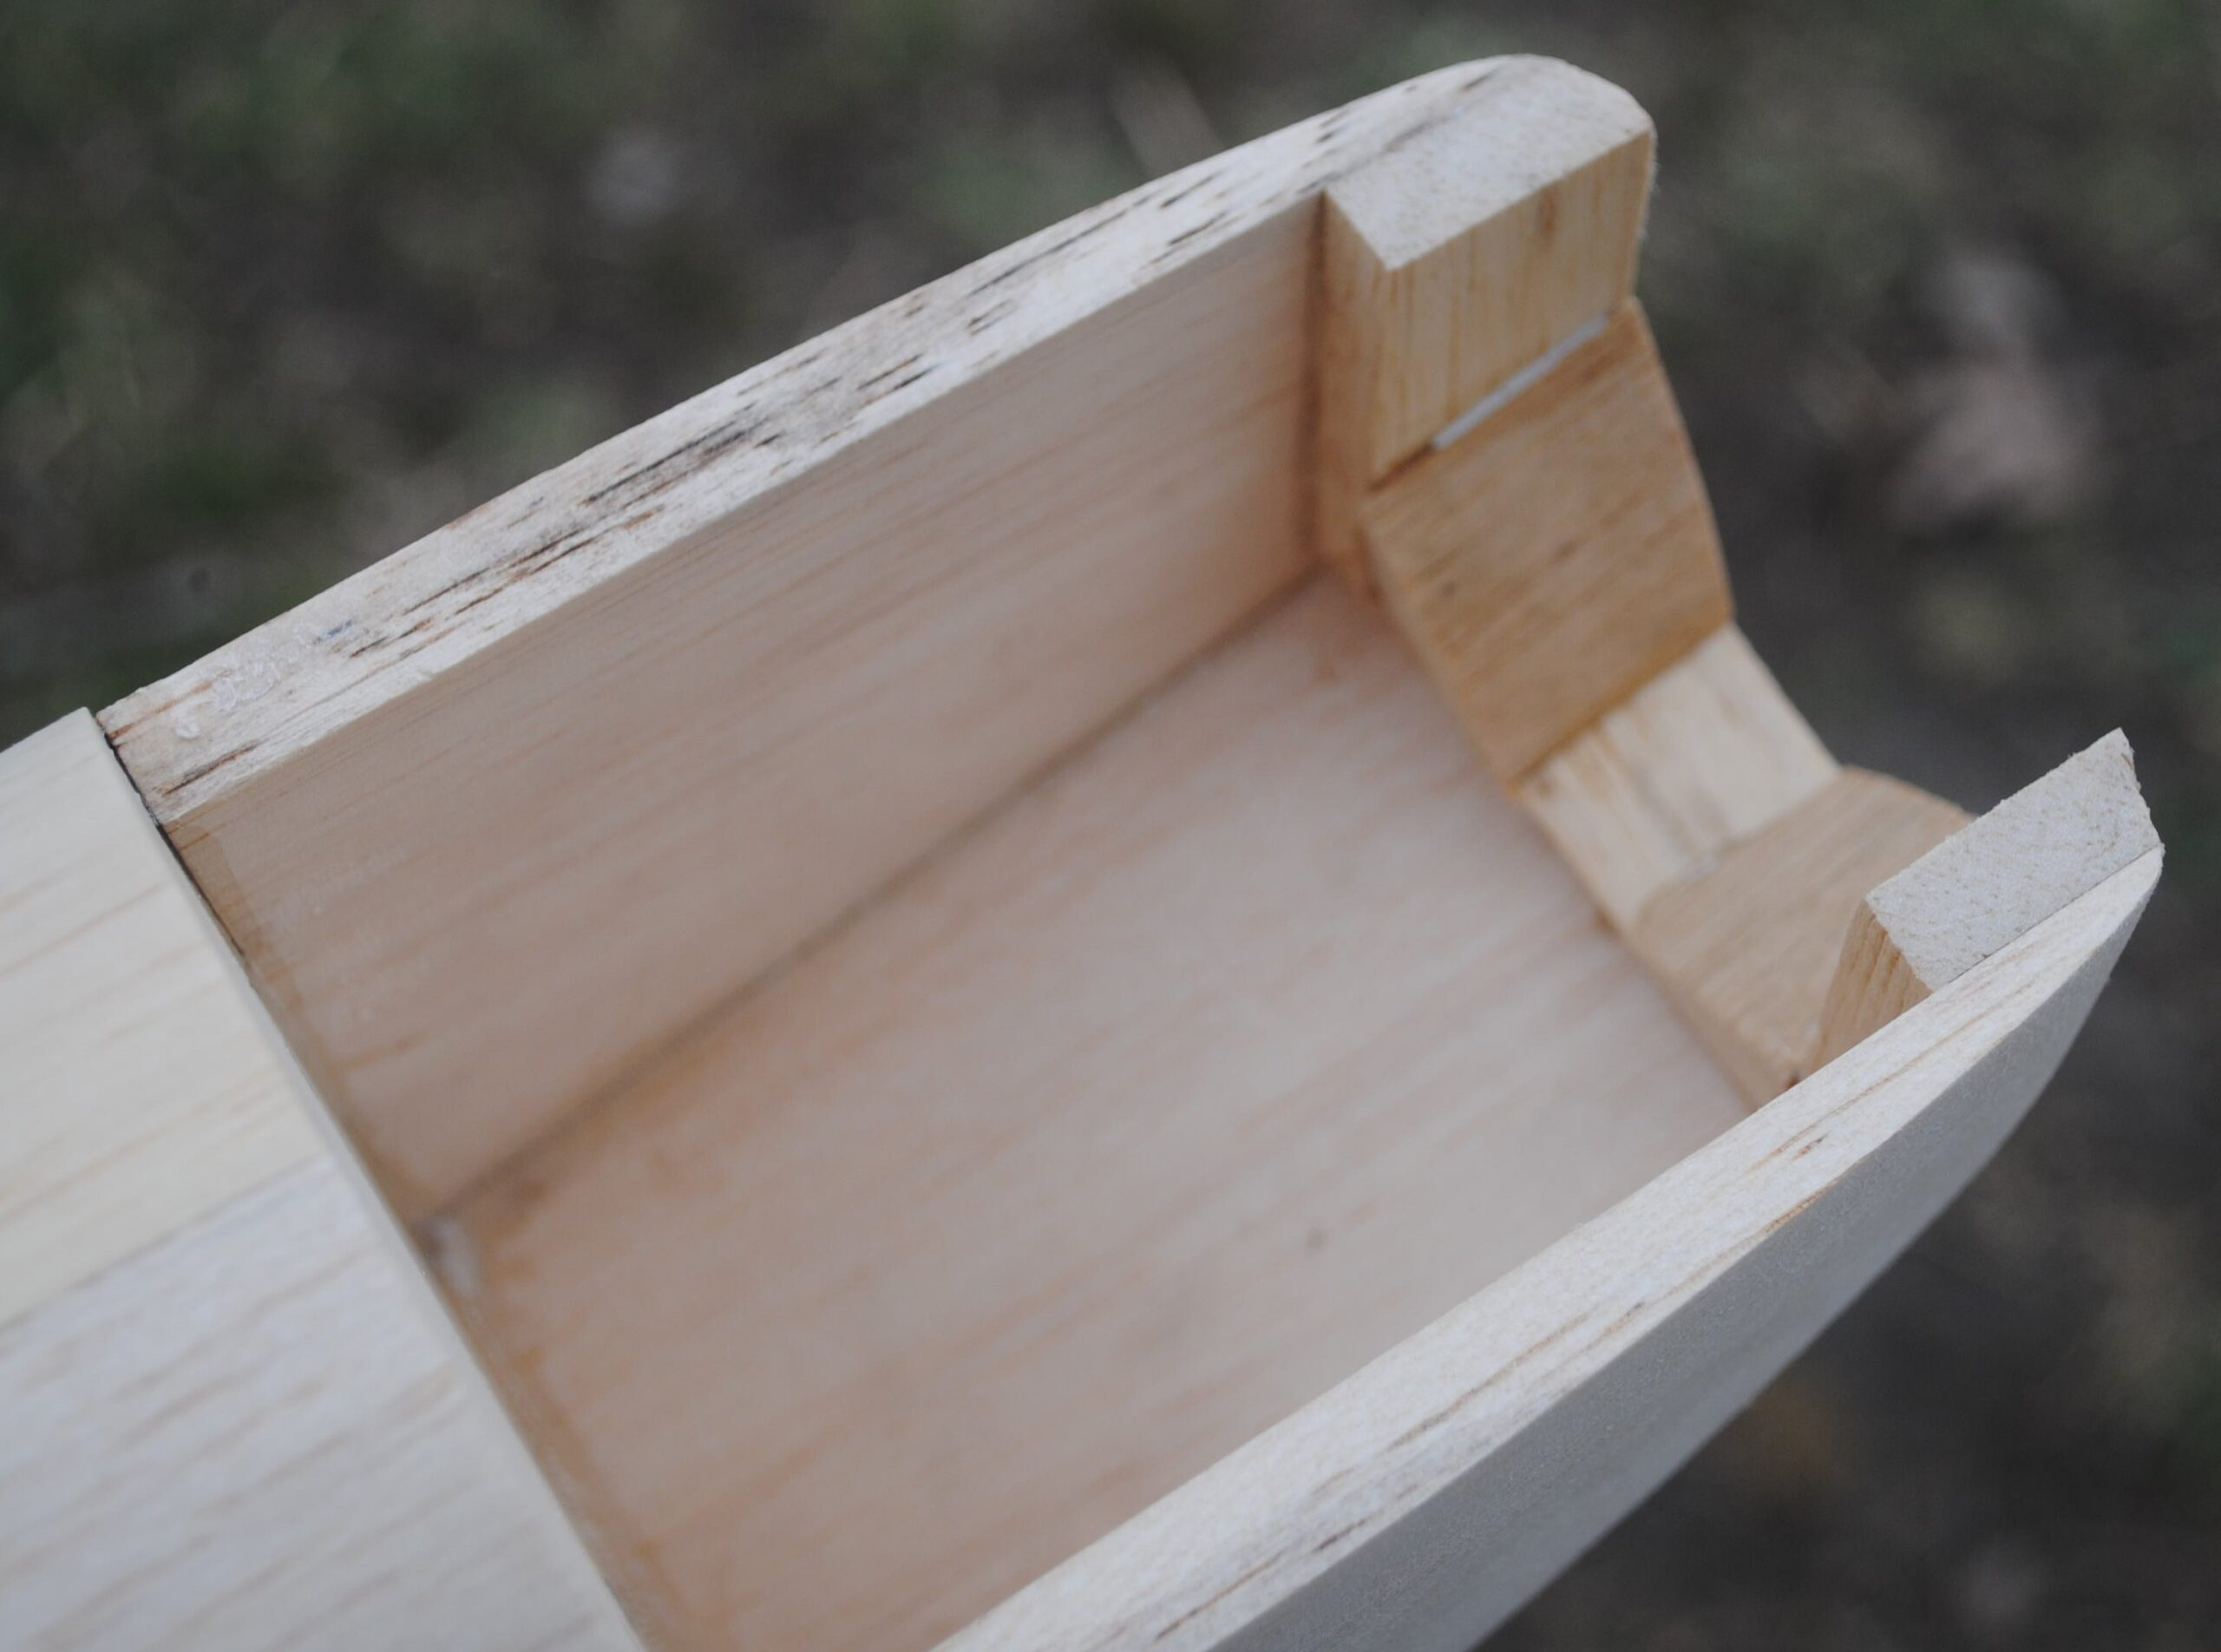
If you want to do a lot of aggressive sanding to really get the corners rounded, you can install the second layer inside the first. You can see it here, not pushed into place yet.
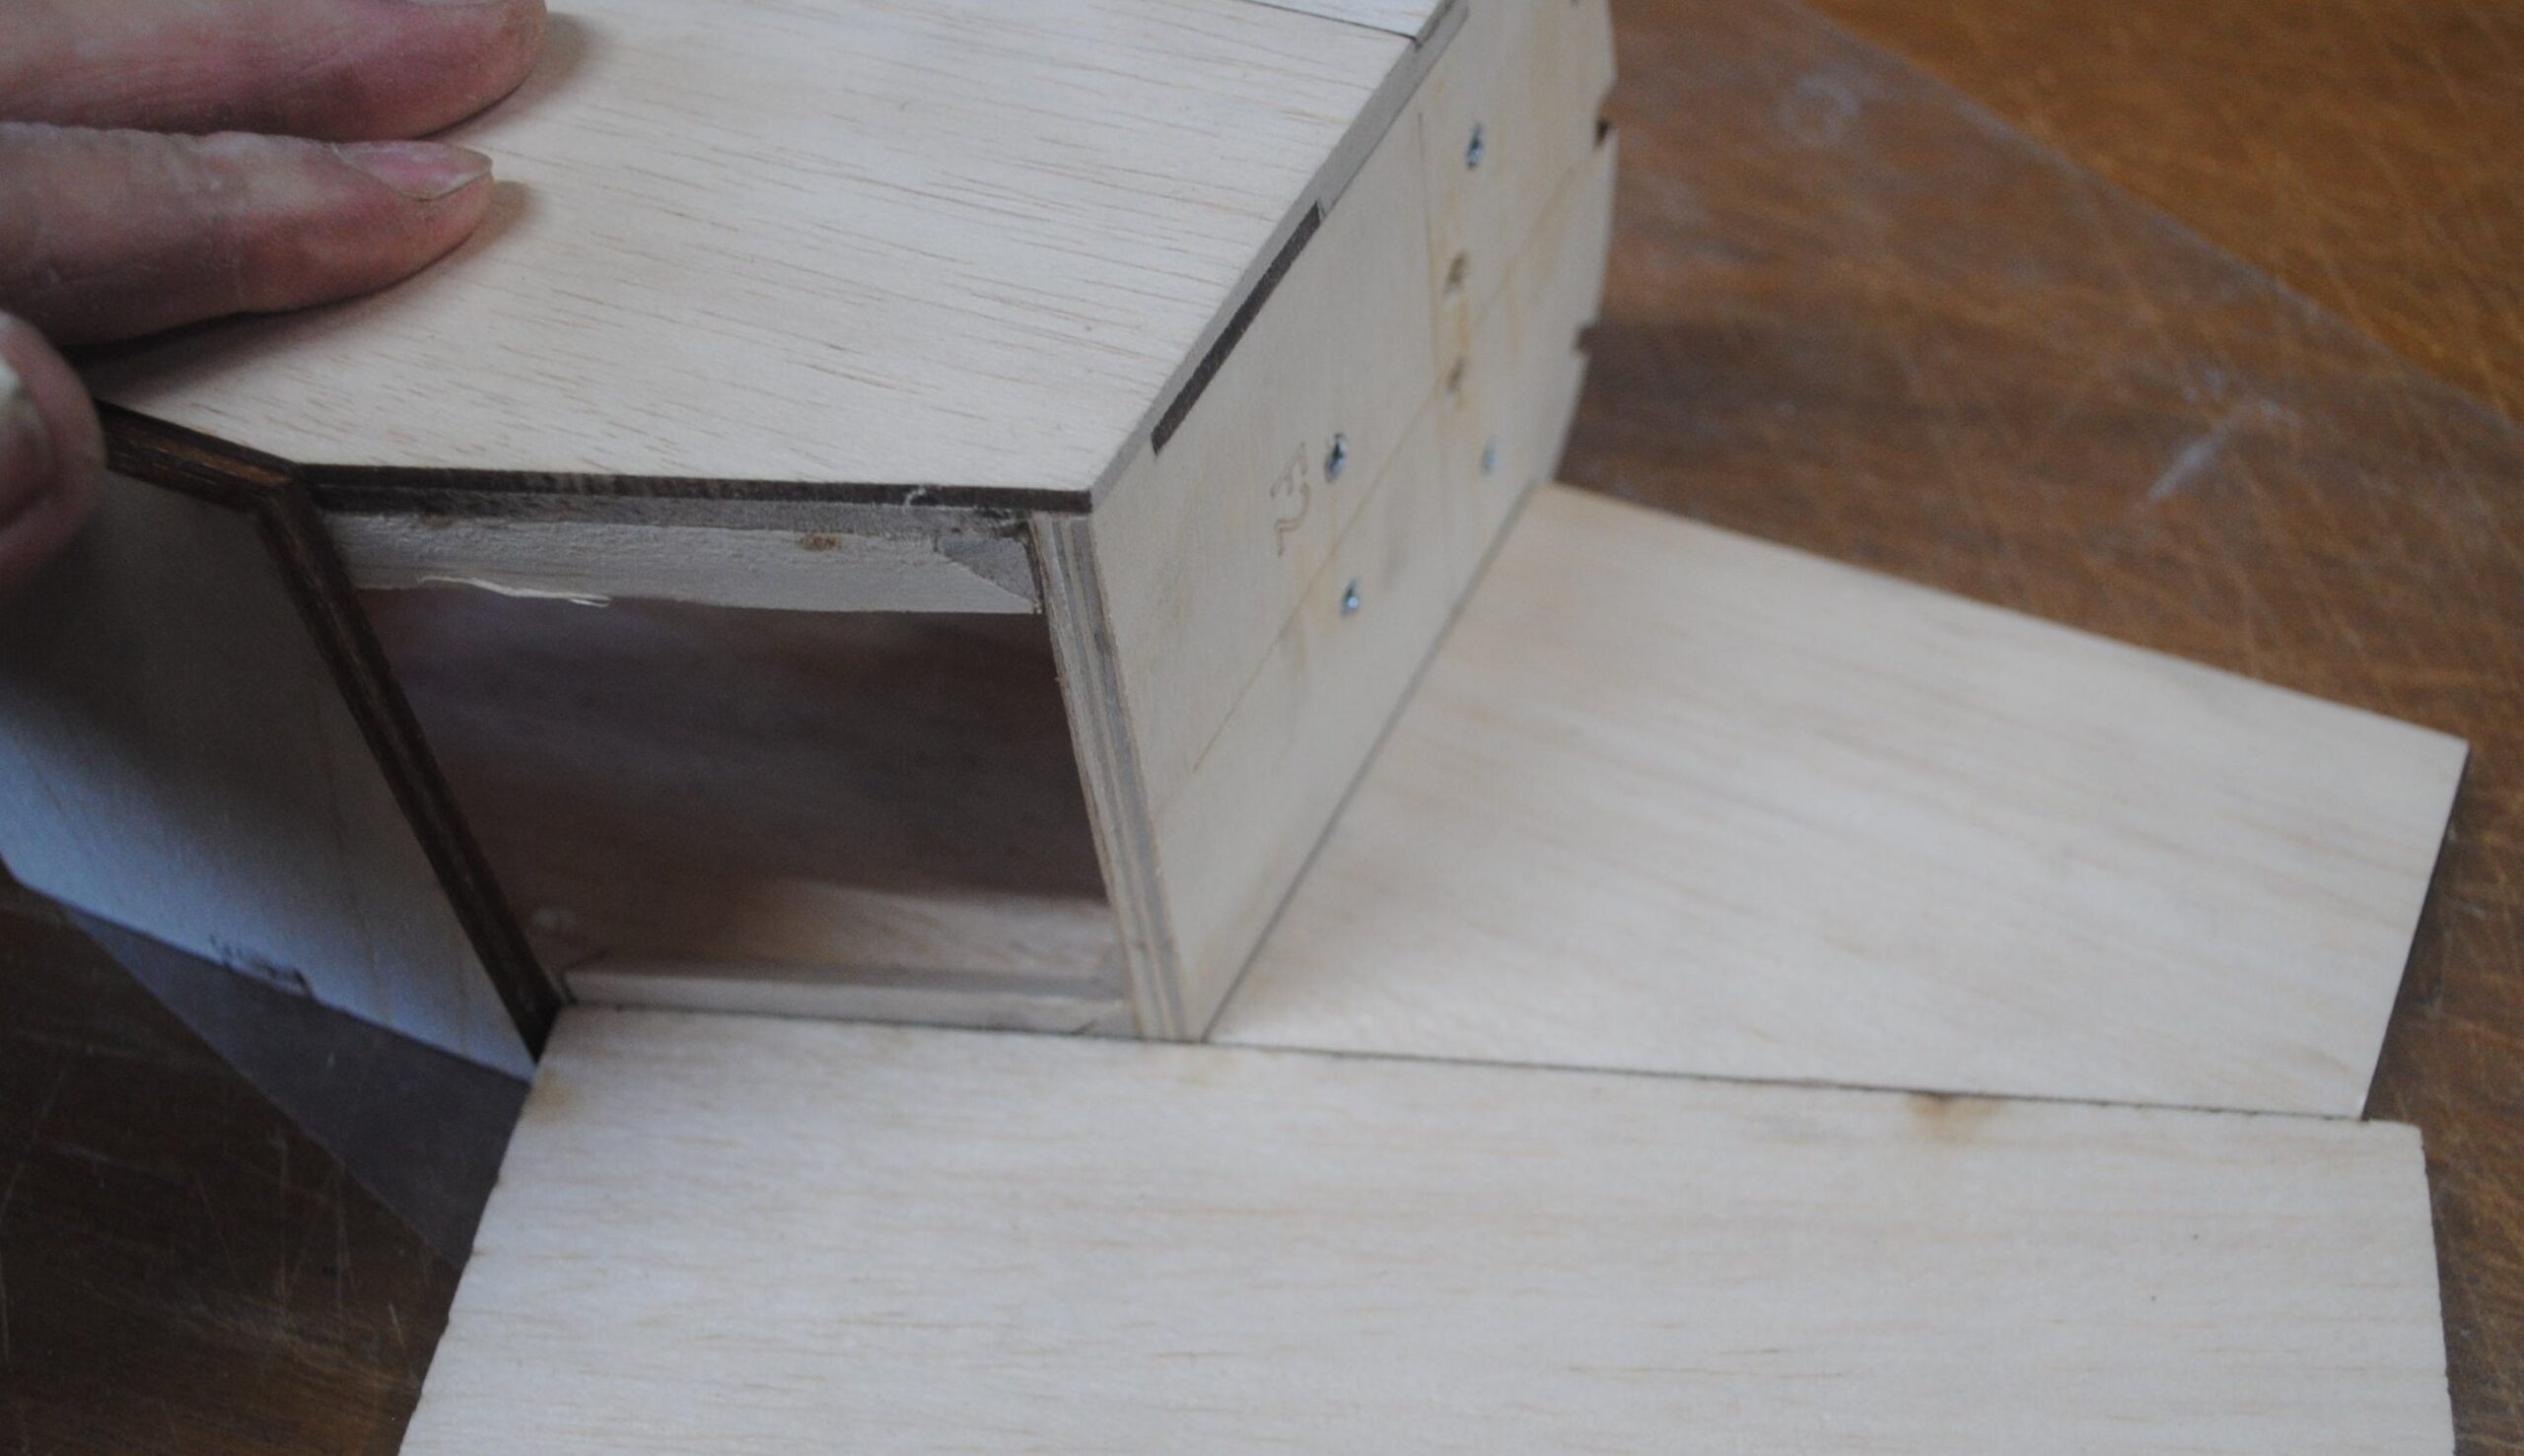
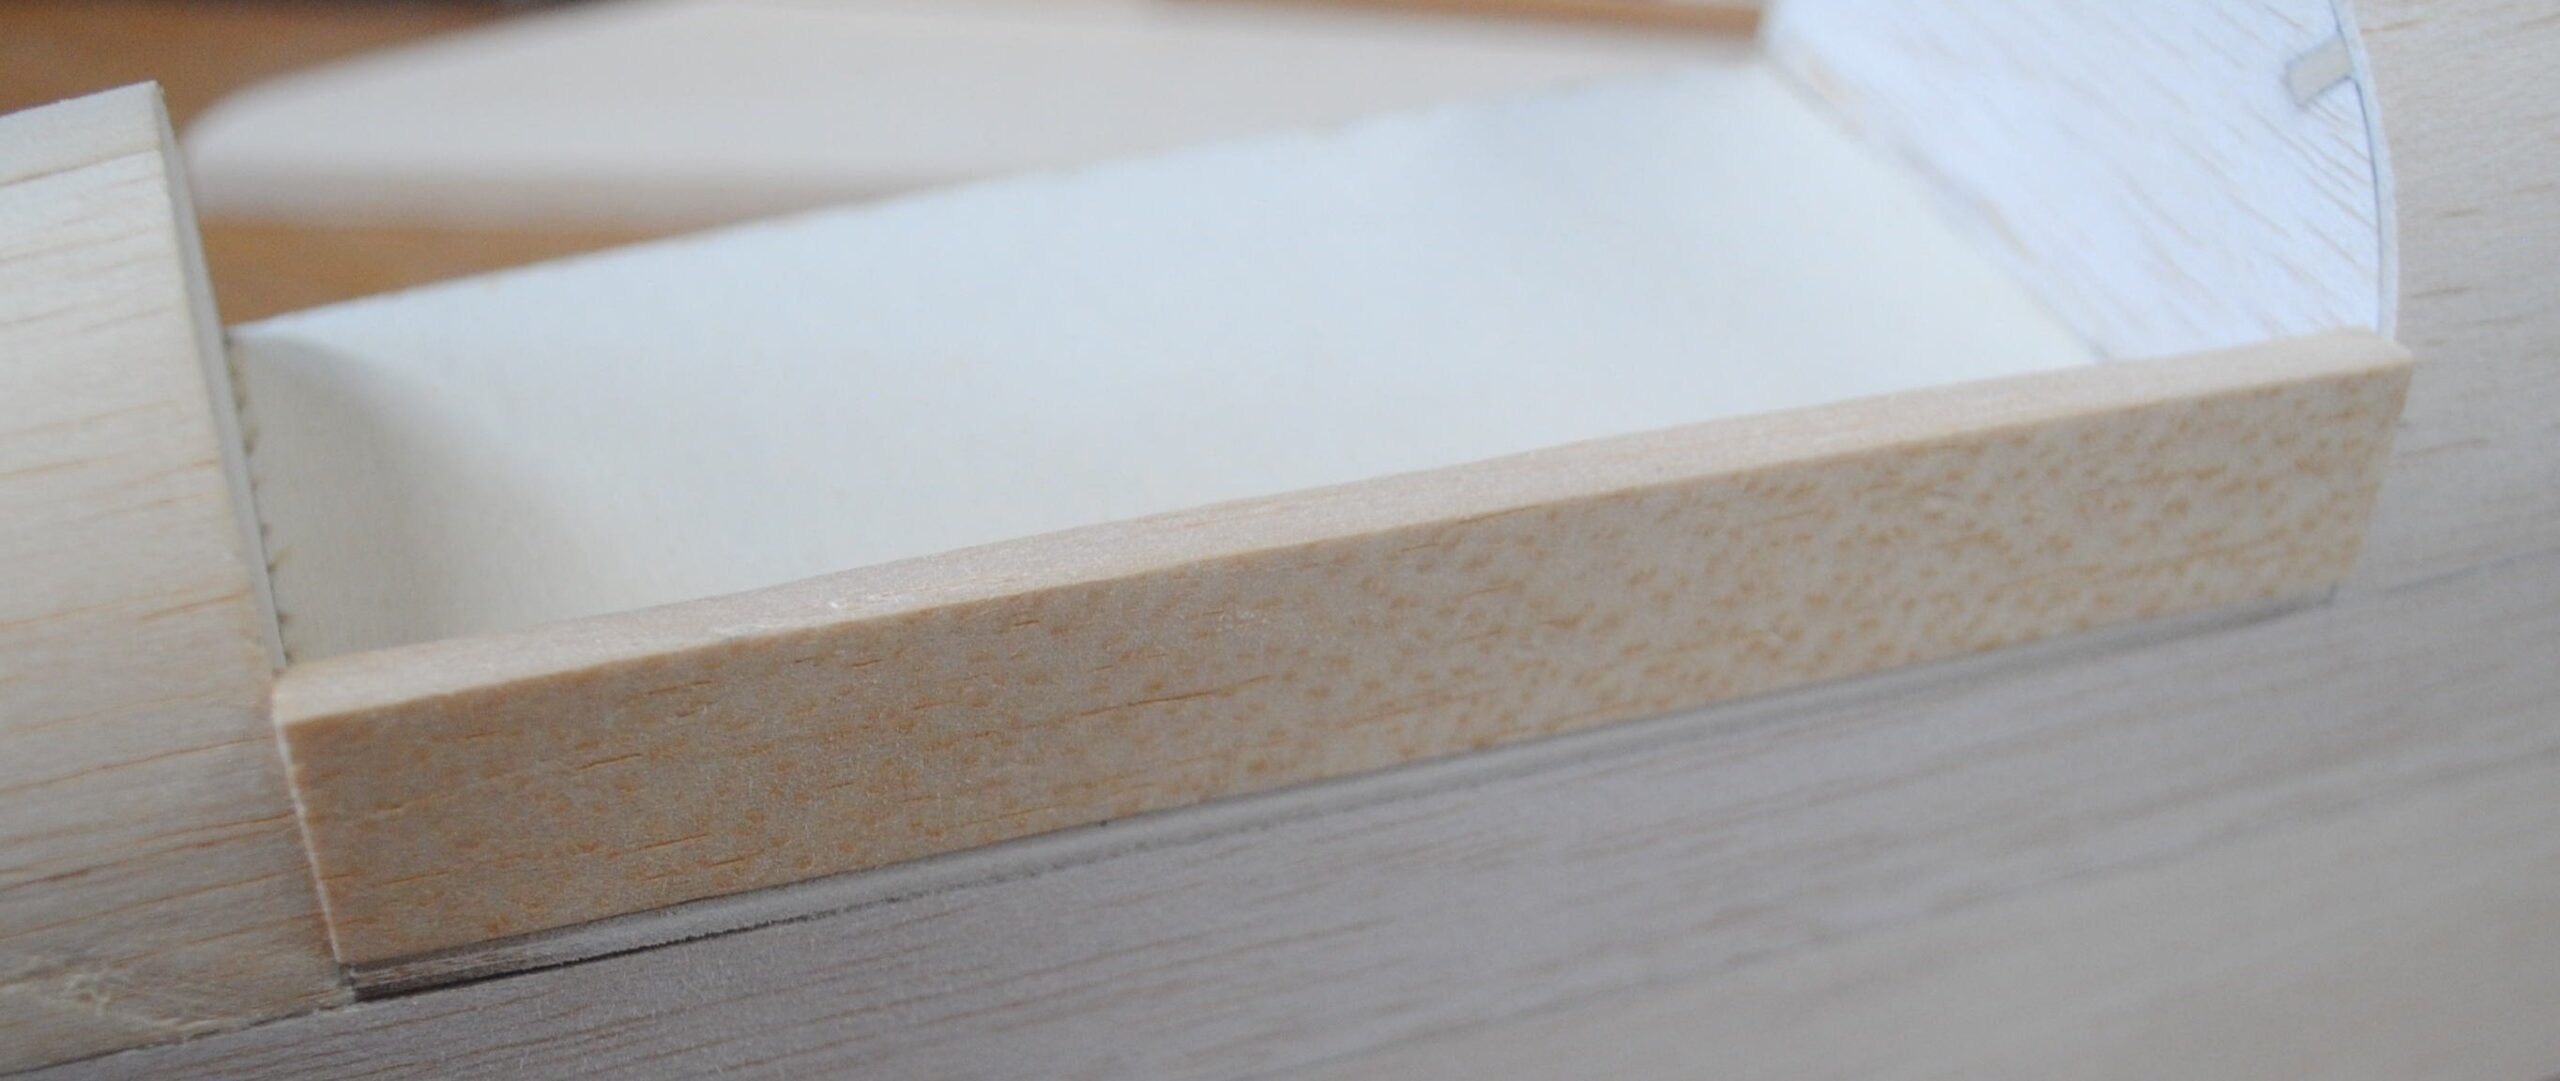
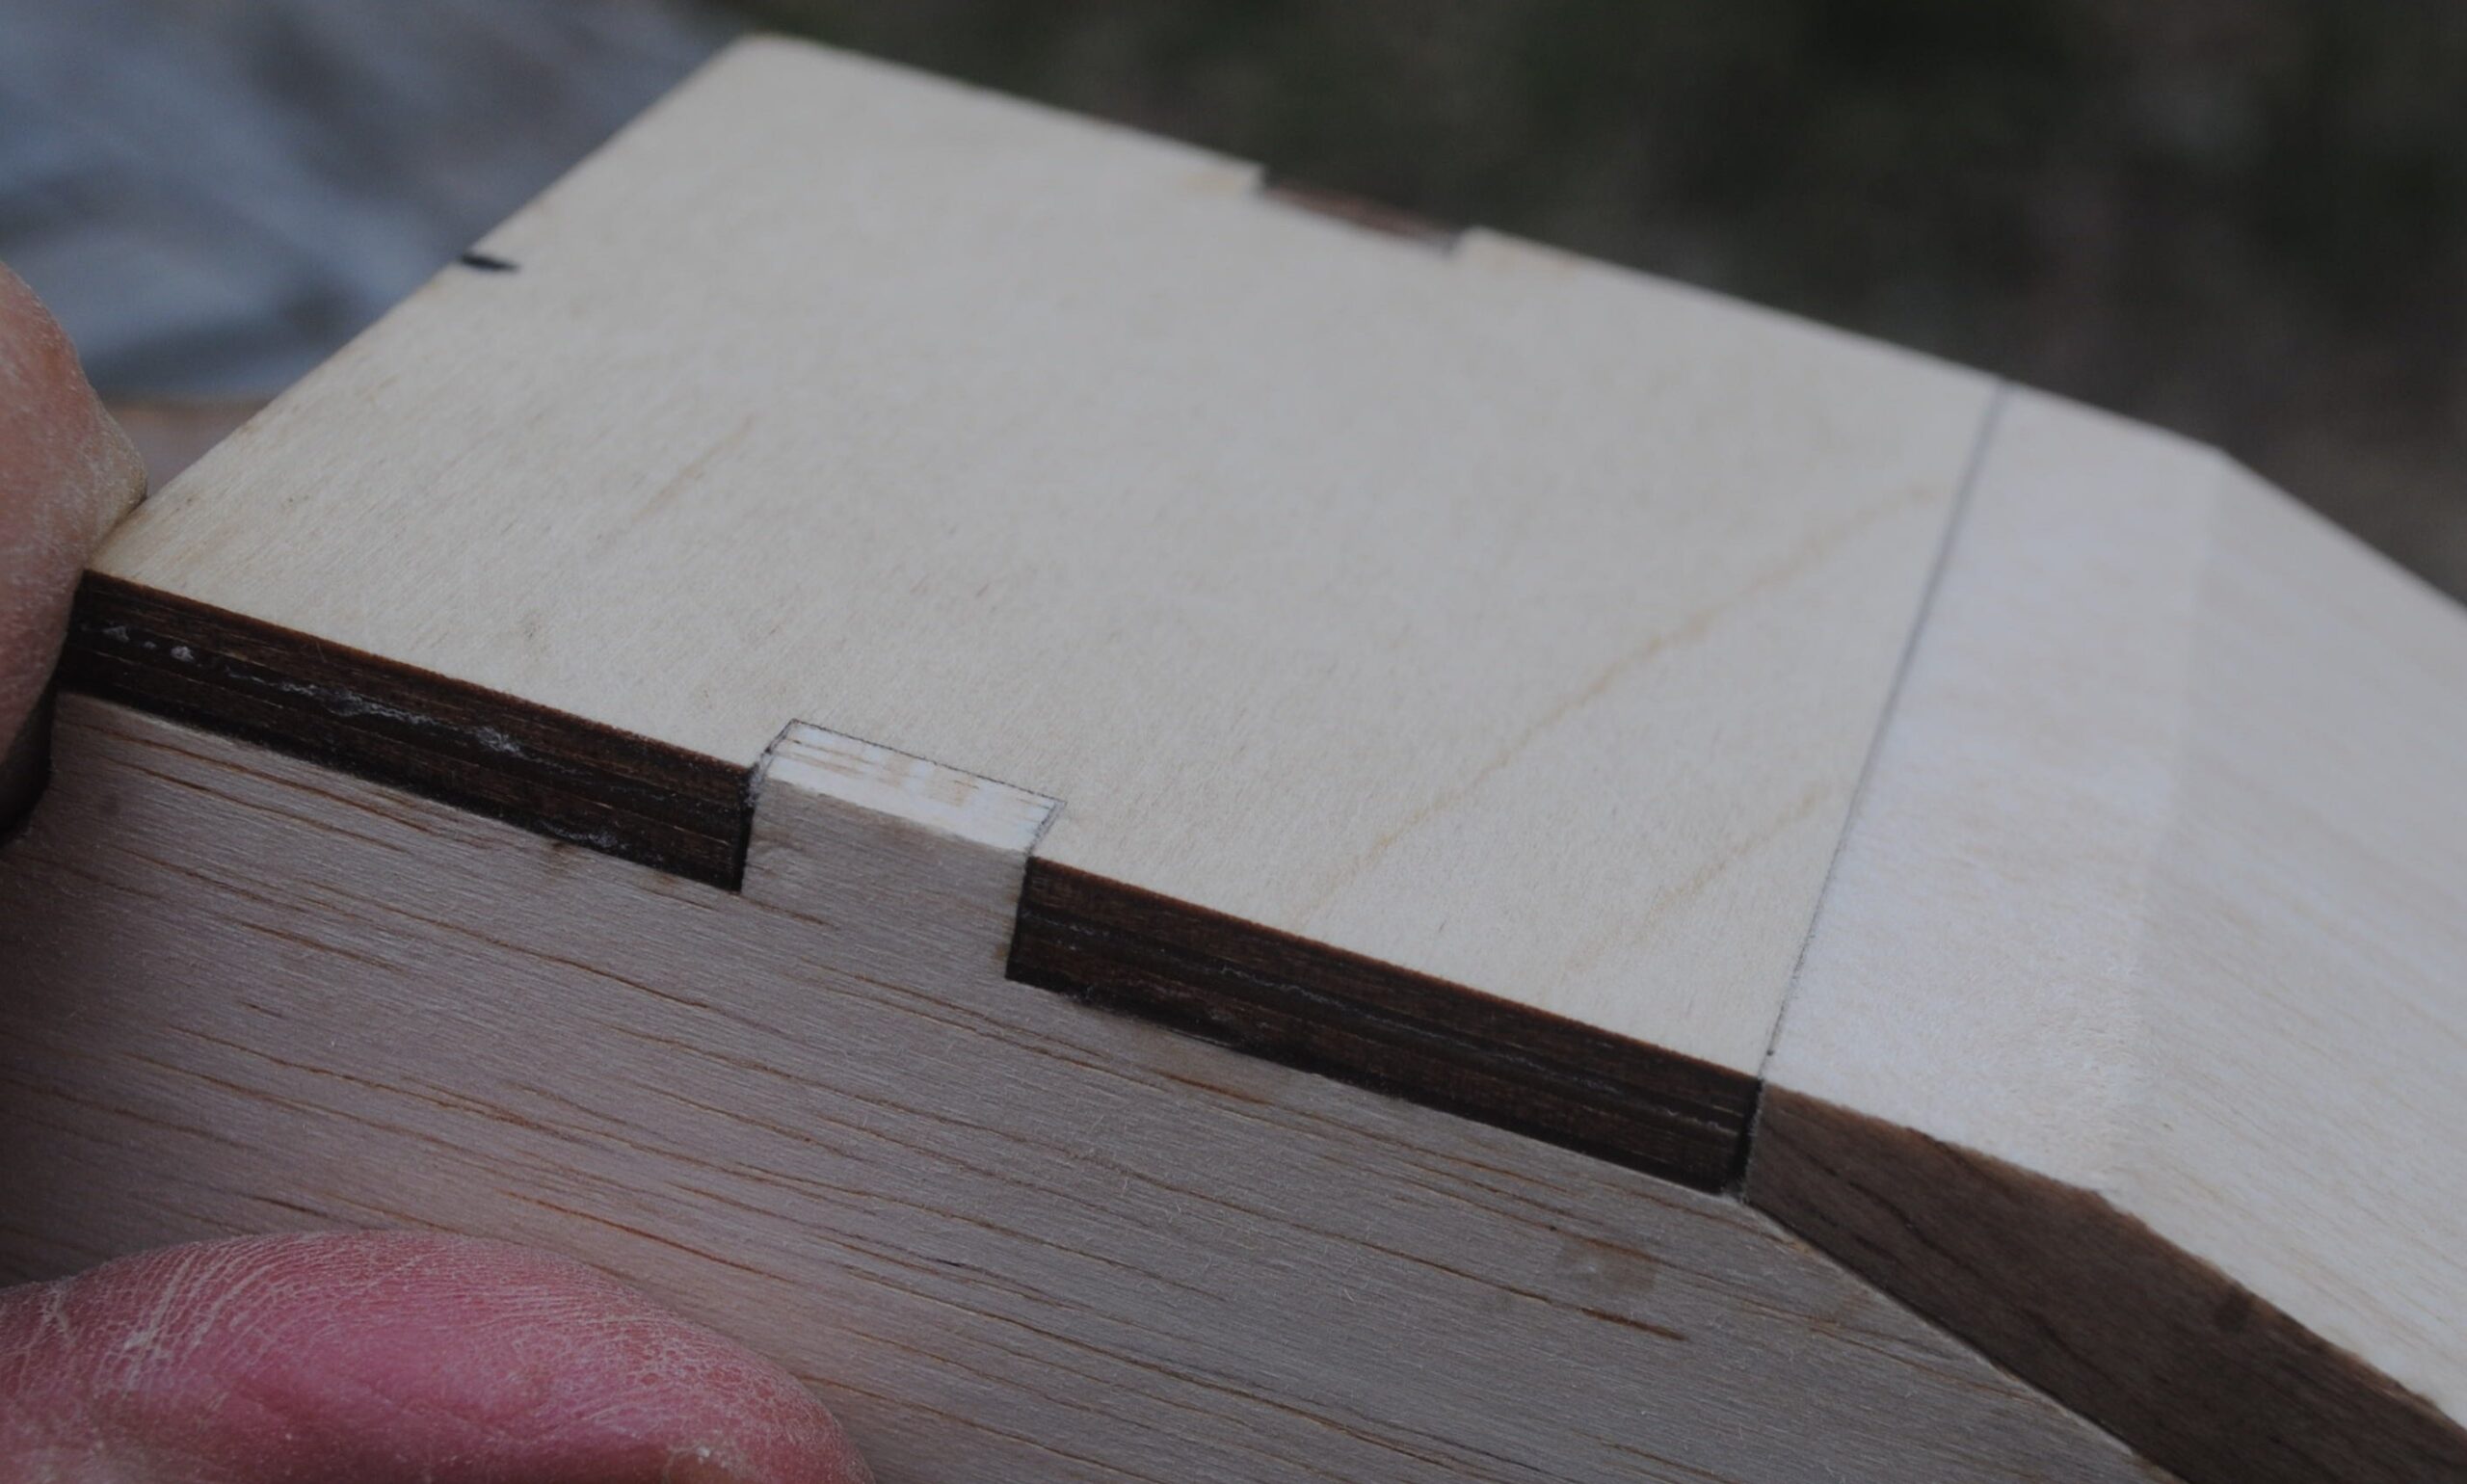
Once the sides are on you can install the bottom. Notice that it doesn’t fit correctly against F12.

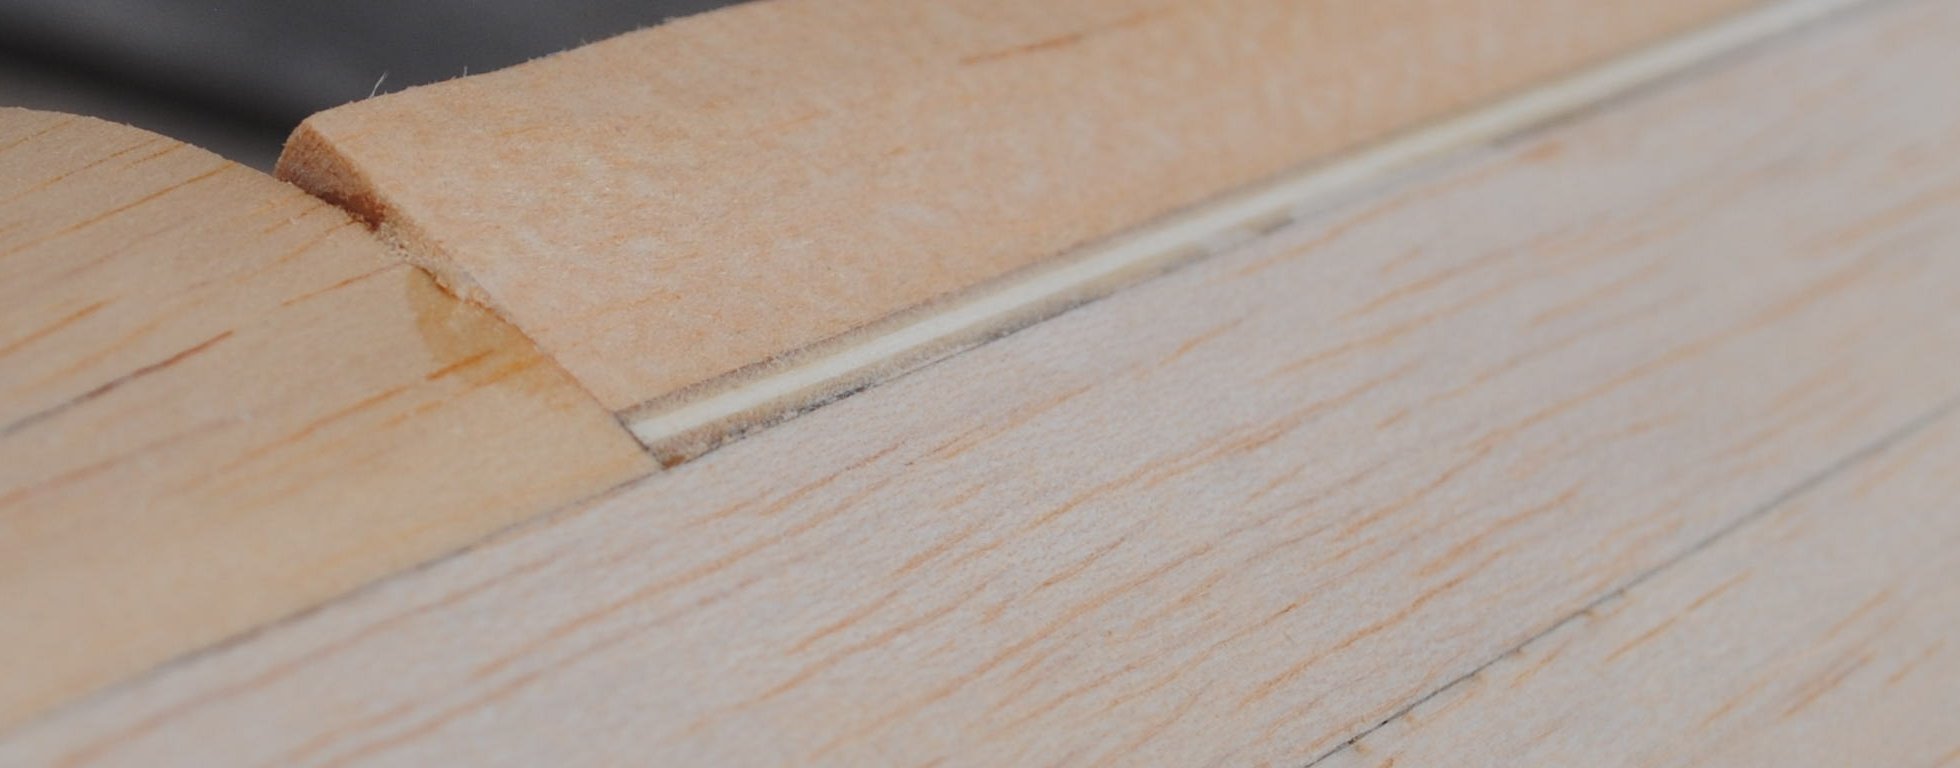
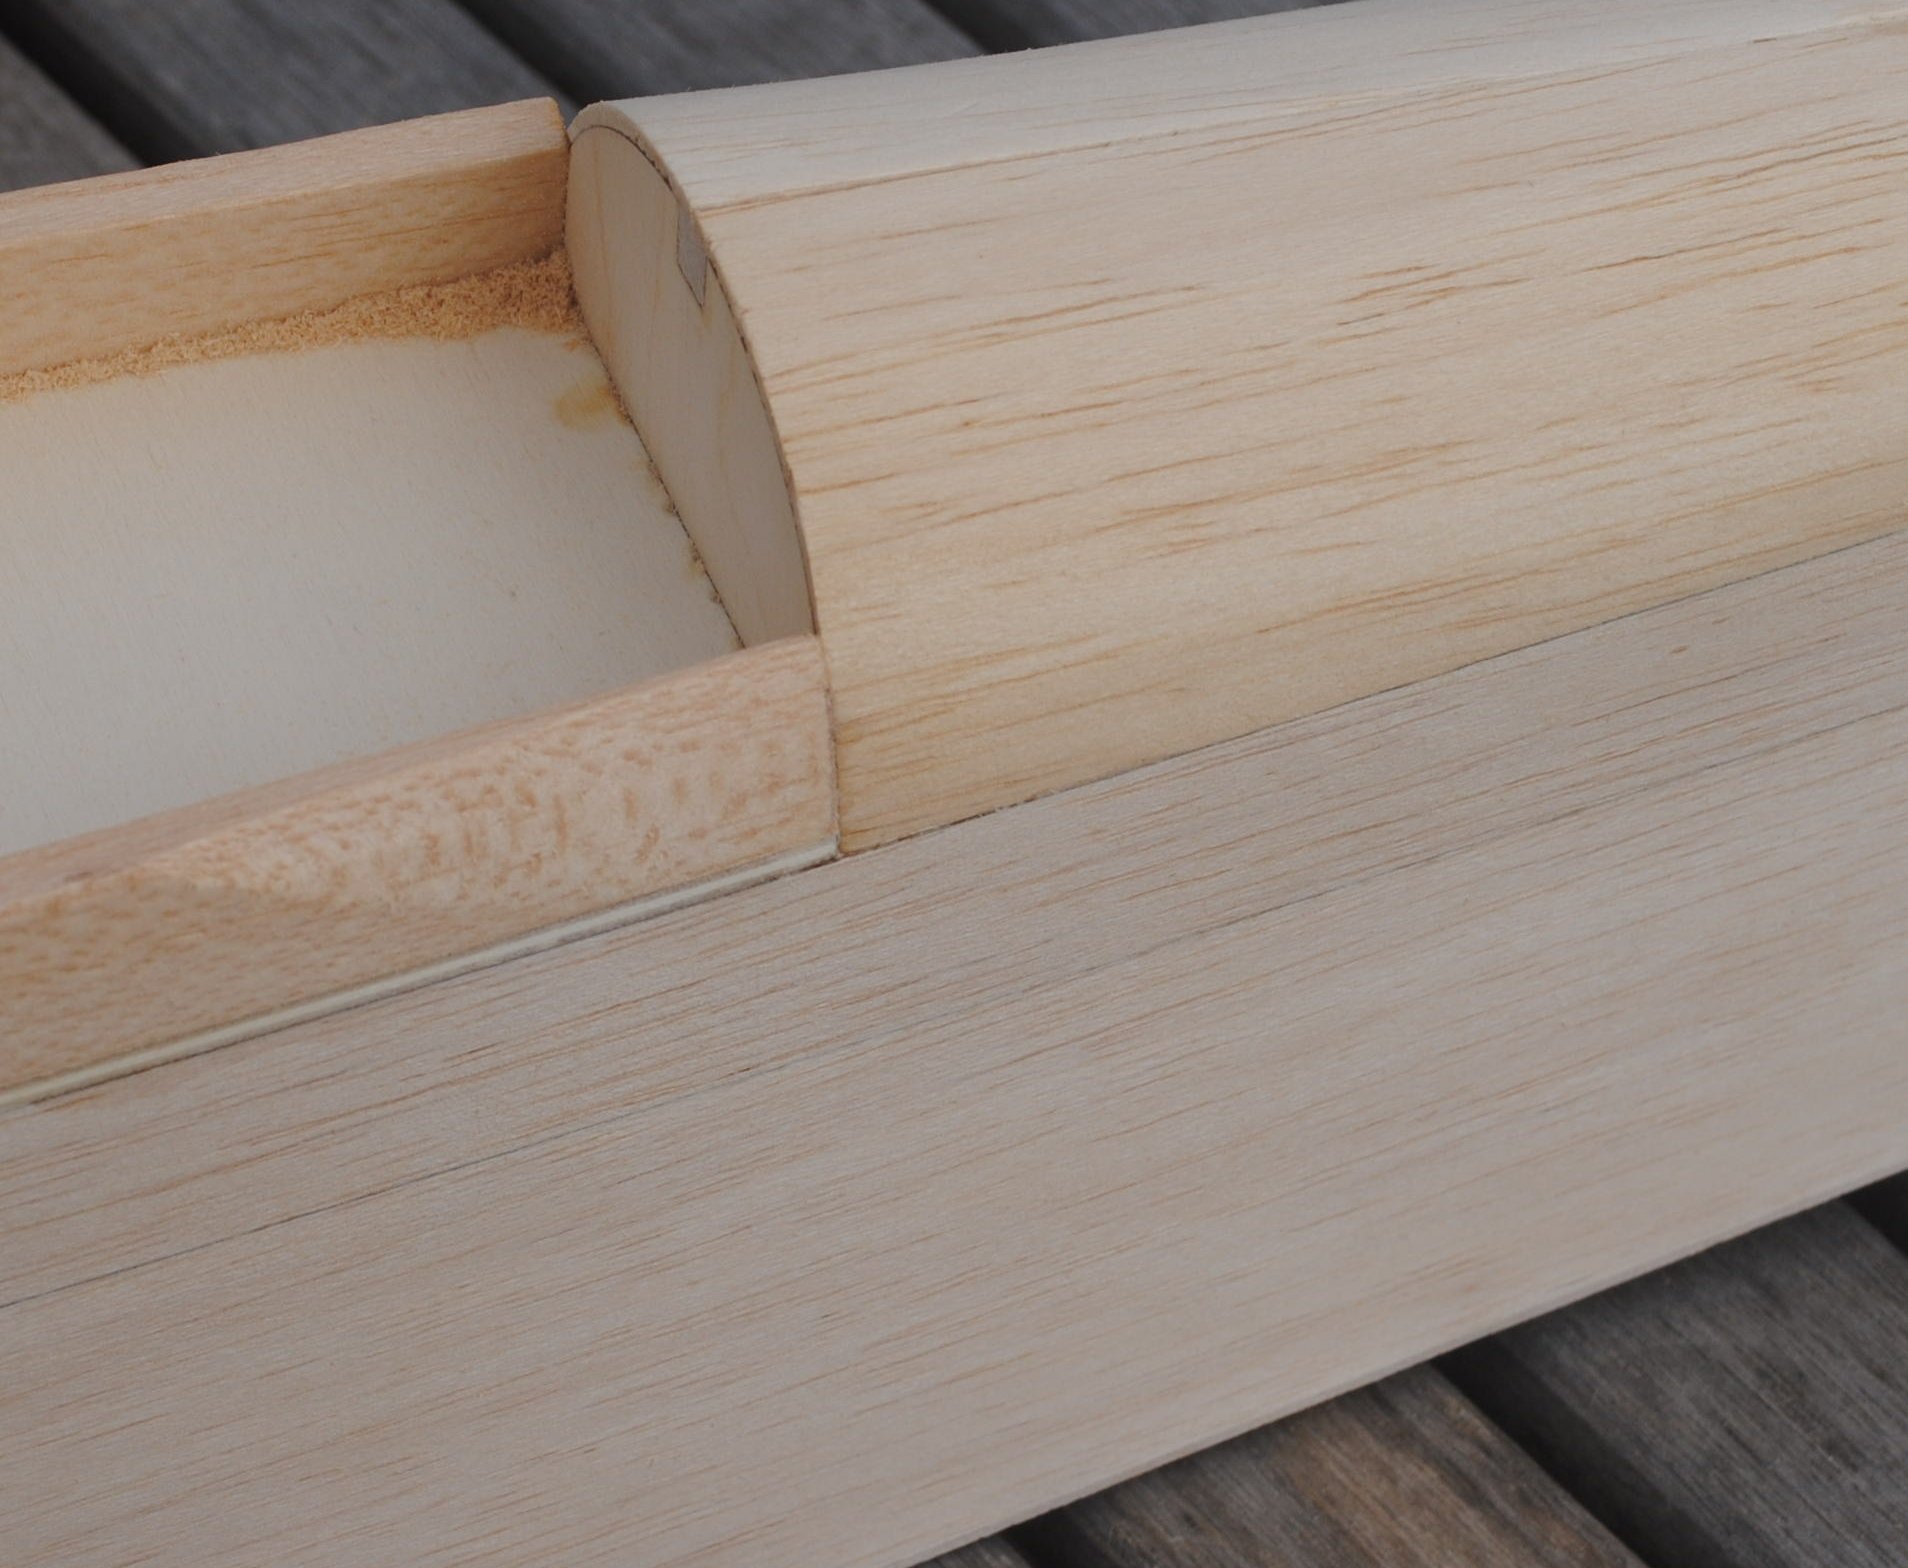
Sand the aft edge to an angle to make it fit.
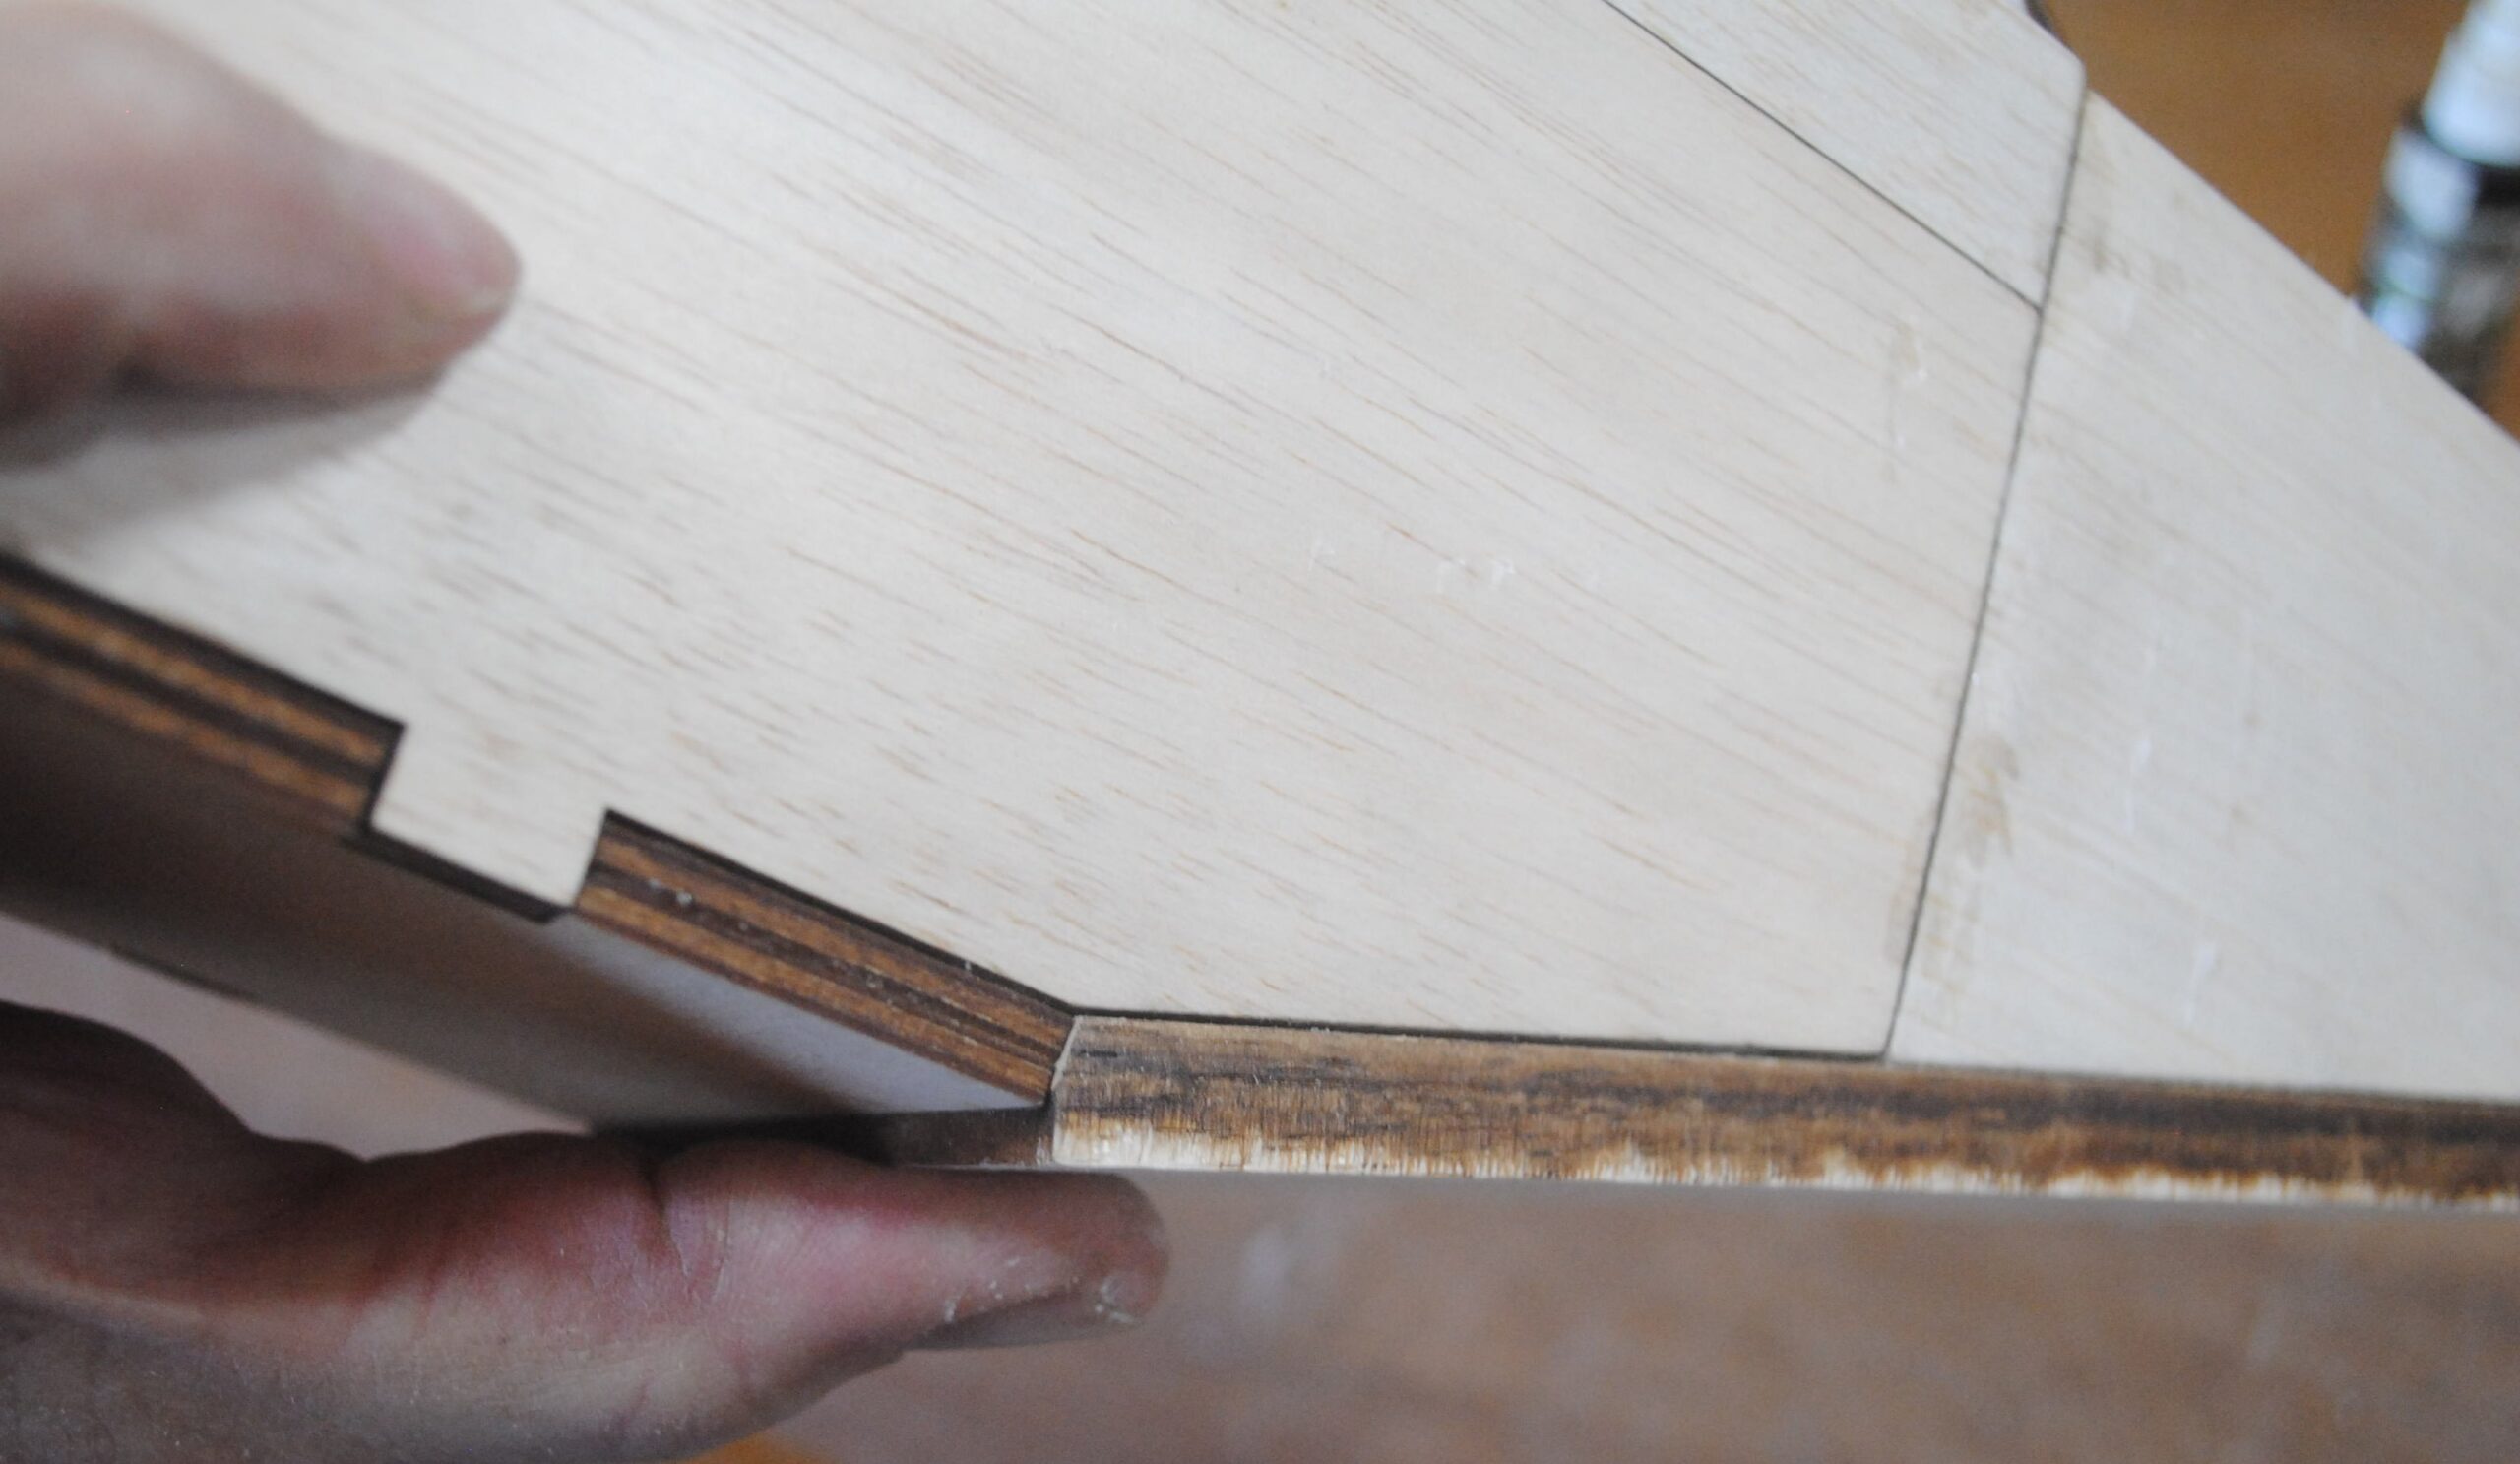
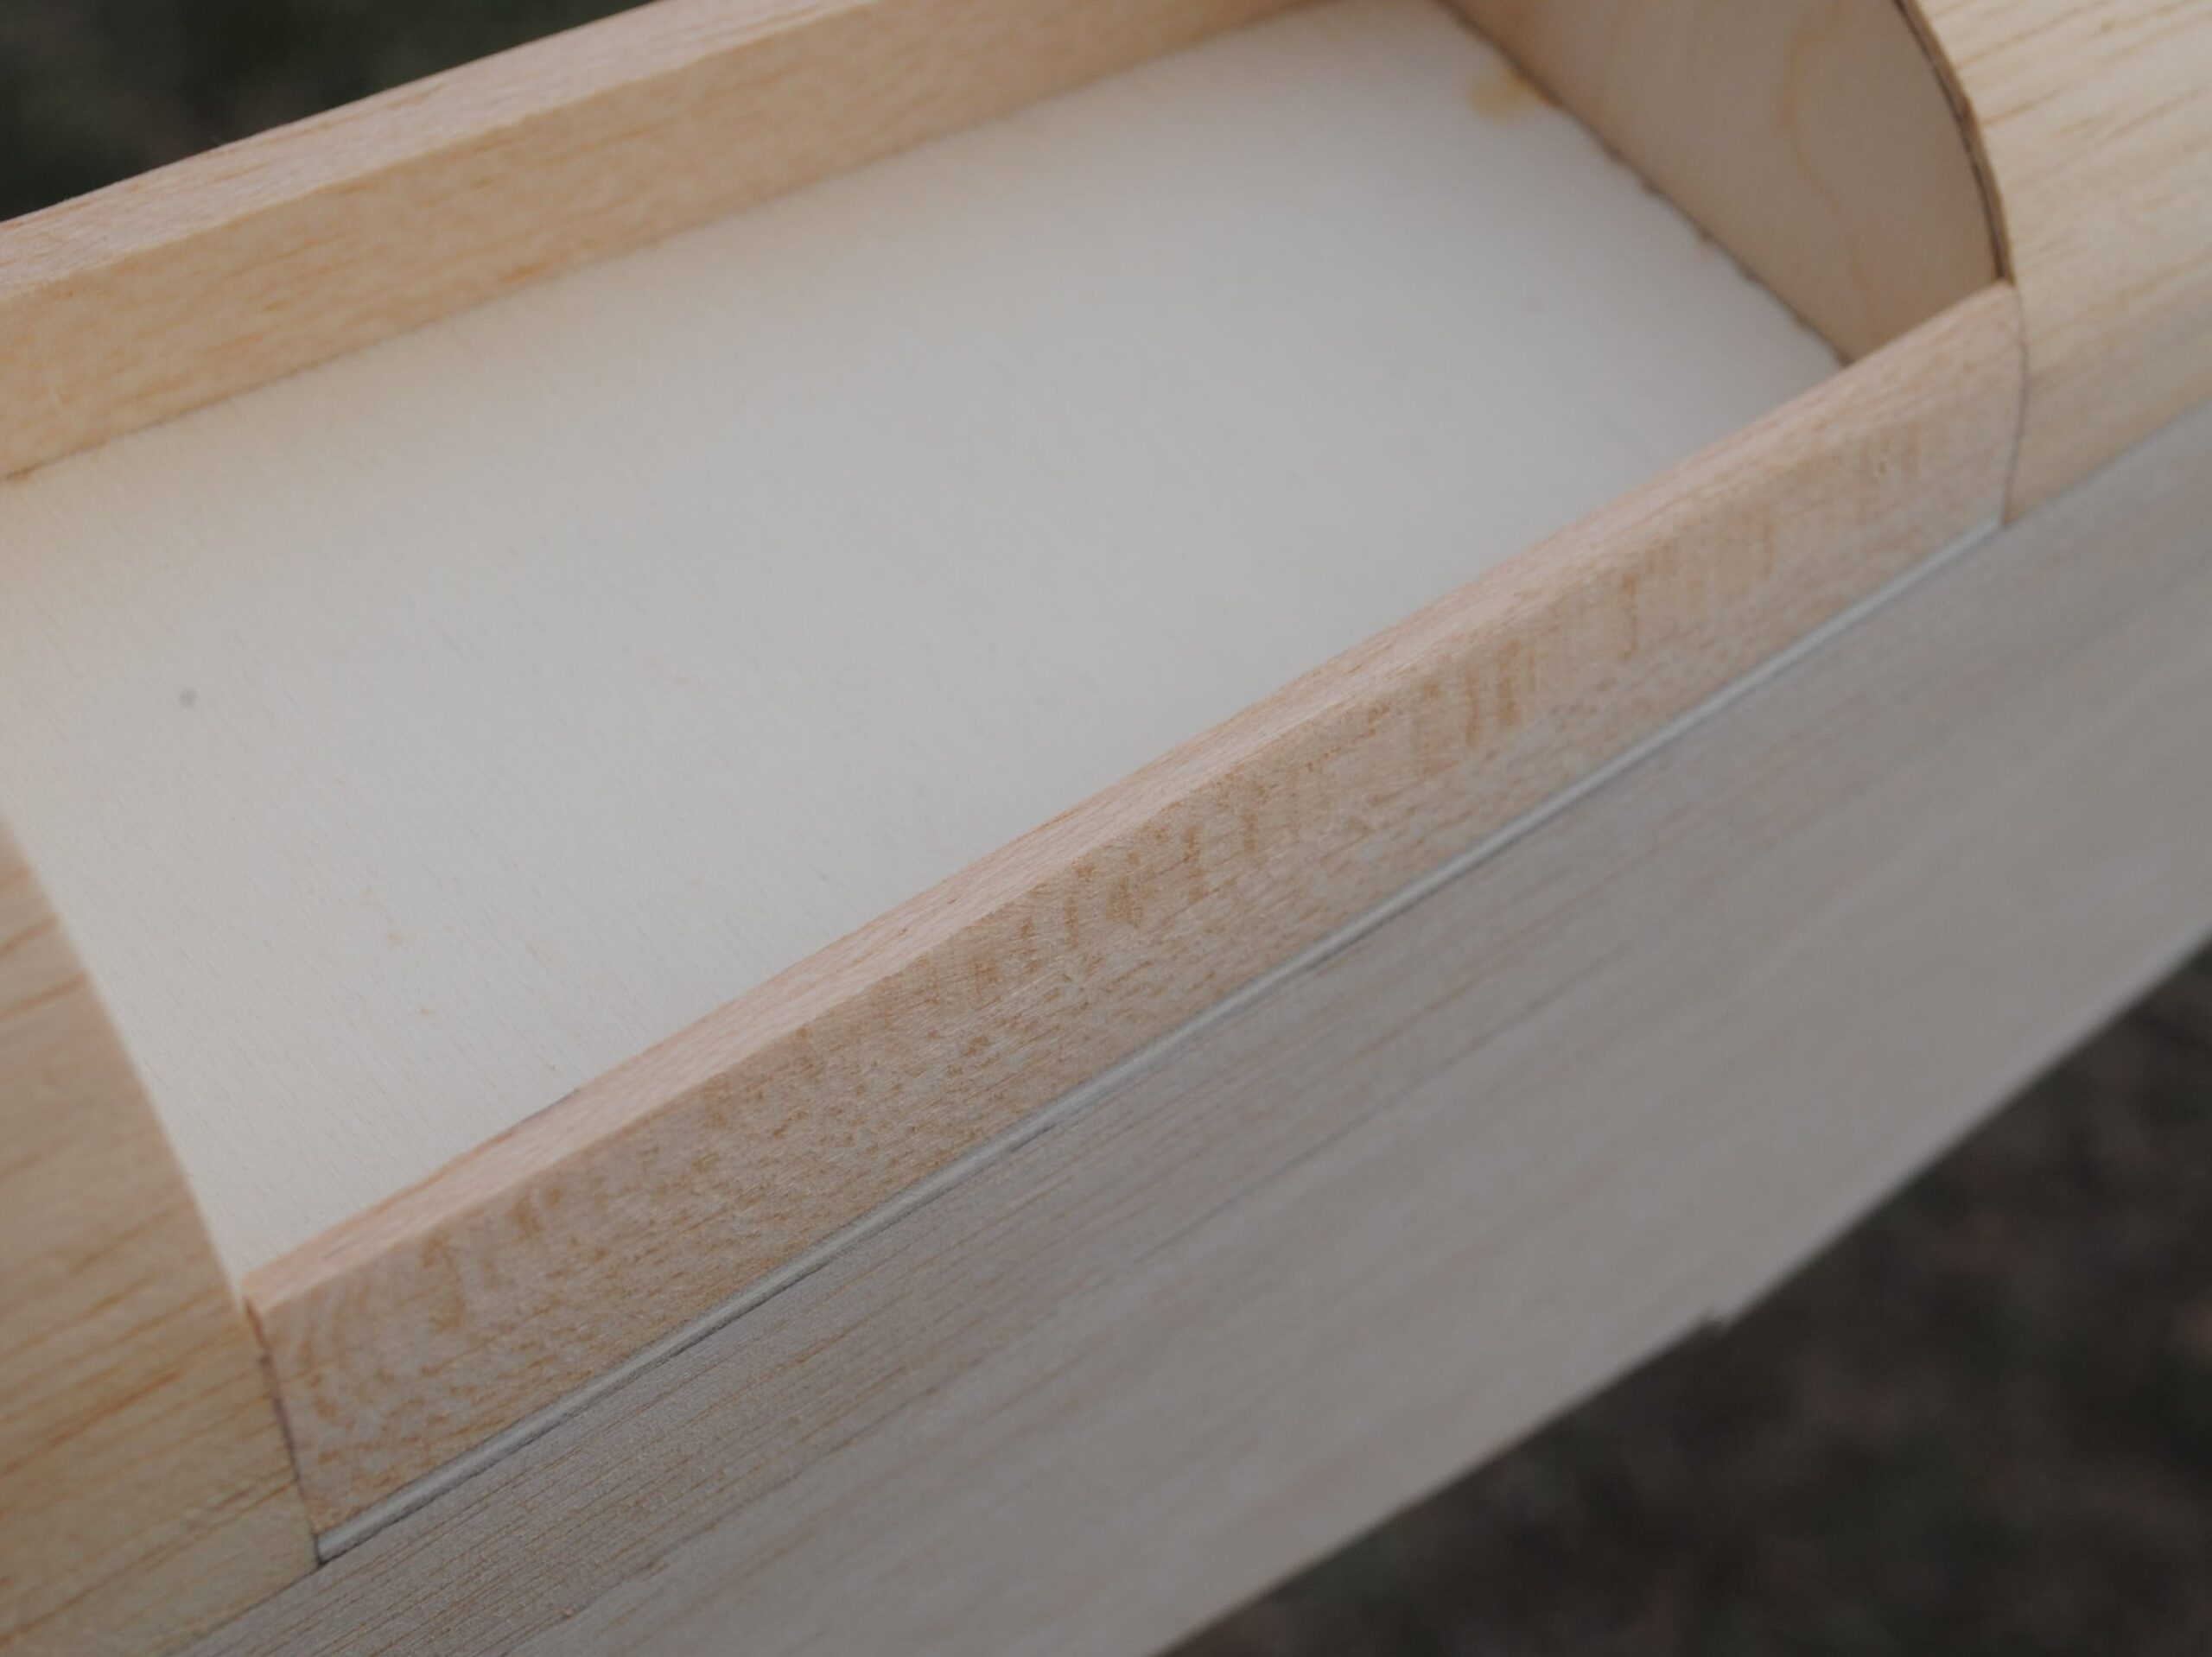
Now it can be glued in place. (Sharp eyed viewers will notice that the bottom edge of the cowl actually needs to be sanded flush with the fuselage first.)
At this point, the whole inside of the cowling can be filled with blocks and triangle stock to be sanded to any shape you want. On my plane I have decided to add some small blocks around the propeller, sand the corners and edges round, and leave it at that. I figure if you want to do a sleek cowl you’re probably better at it than I am.
Now that the bottom is on, the inside of the tank compartment can be fuel proofed. You can use dope, thinned epoxy, finishing resin, or whatever fuel proofing you like.

You could go to bed and wait until the next day while that’s drying, or you could work on the tail and get back to the fuselage later.
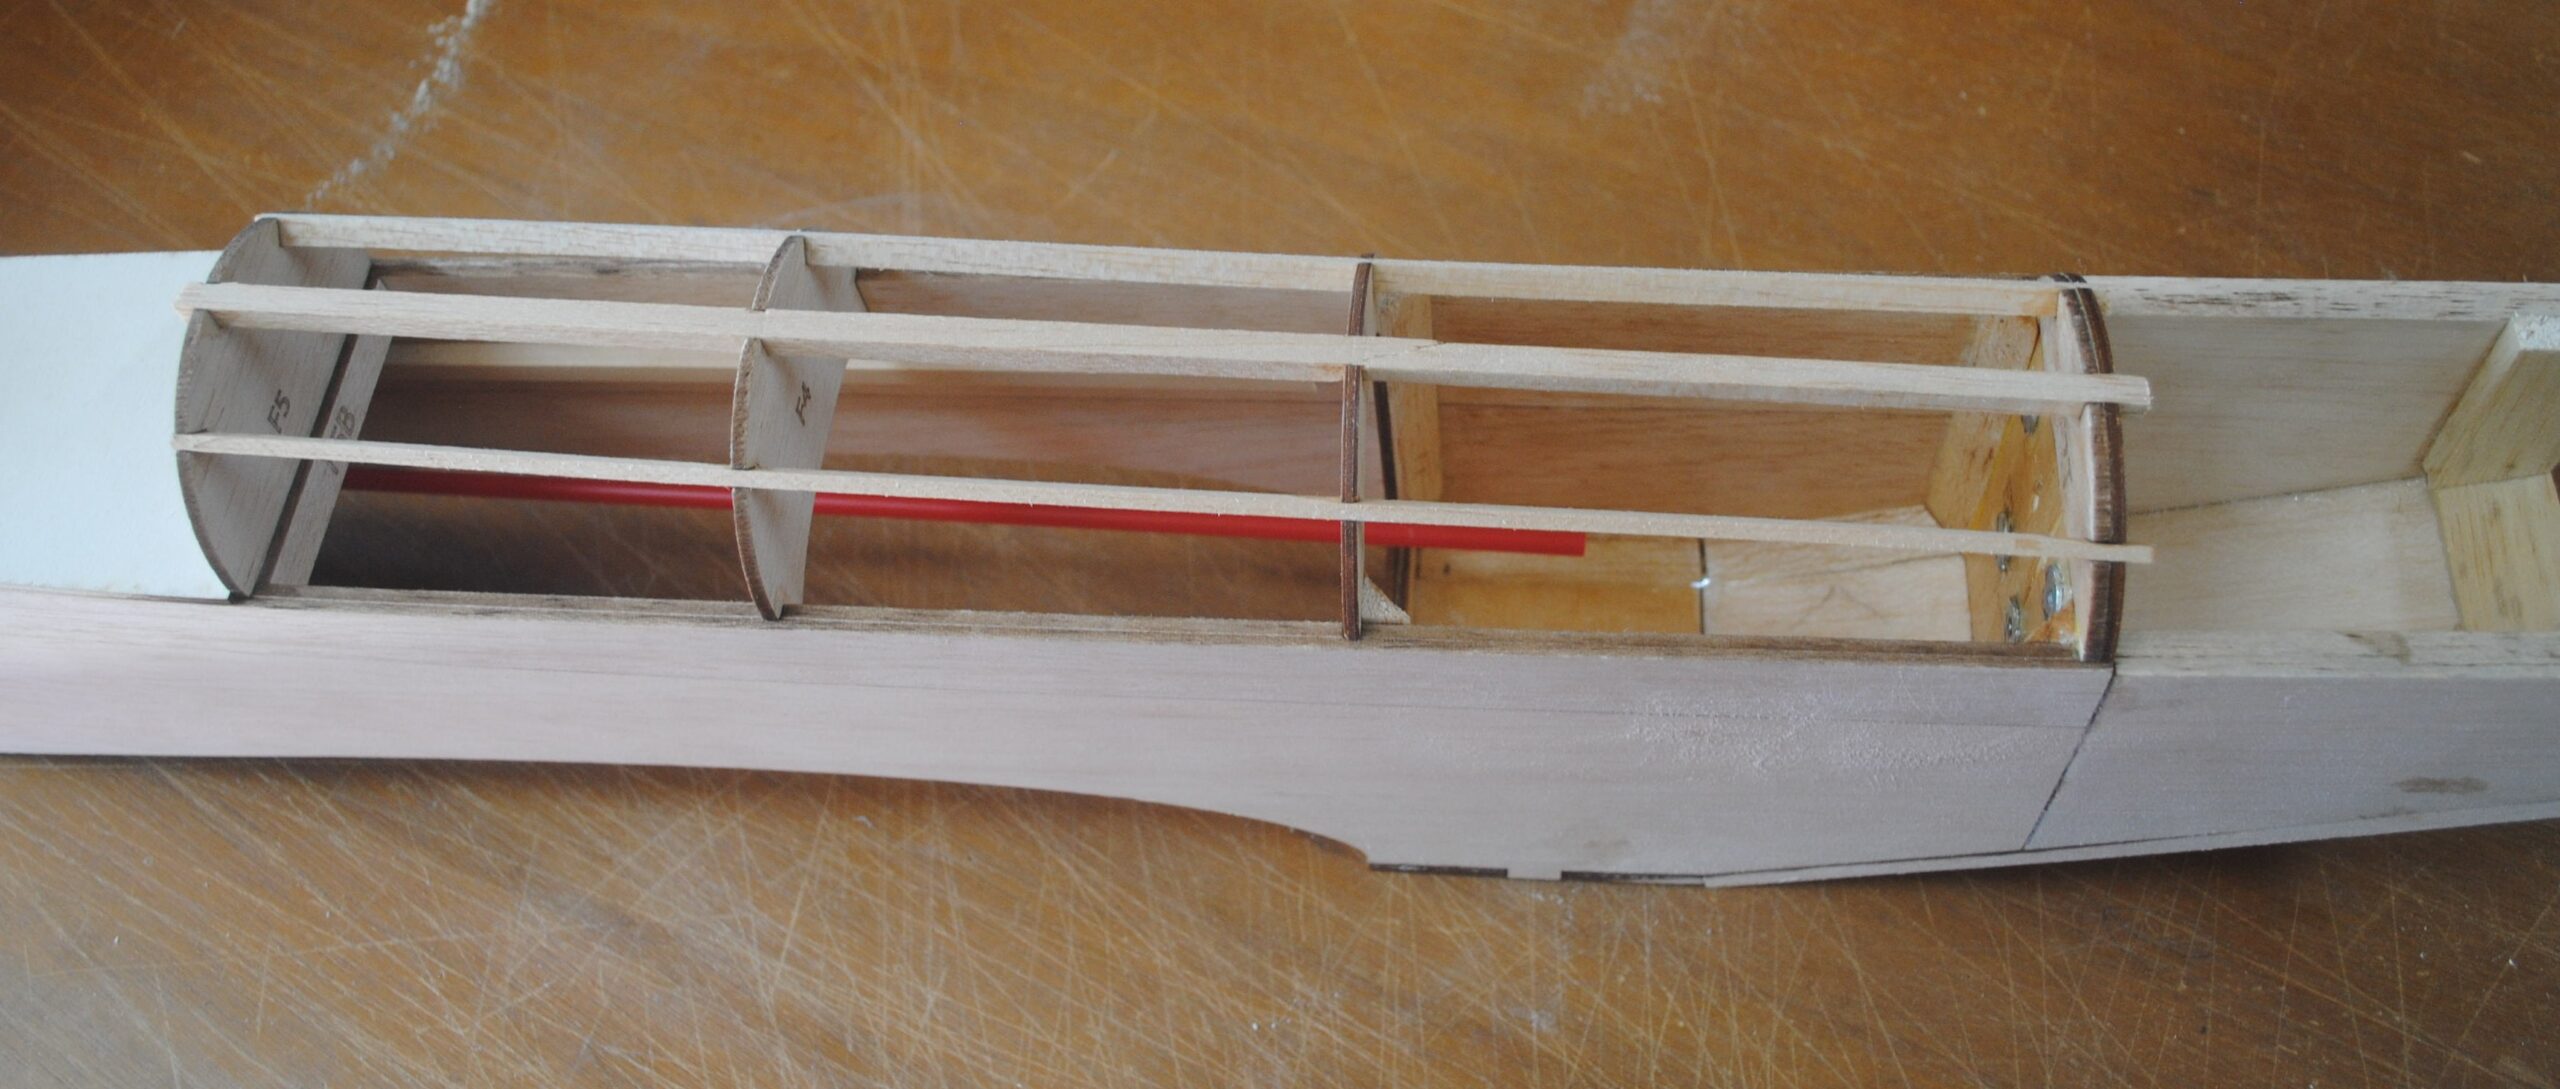
The next section describes the construction of the front deck from F2 to F5. If your airplane will have a battery hatch on top, your deck will extend from F3 to F5. Other than that detail the sequence is the same.
Glue the sticks into the top notches of F2 through F5. 1/4 x 1/4 balsa goes in the top, and 1/8 x /14 balsa goes in the other two notches.
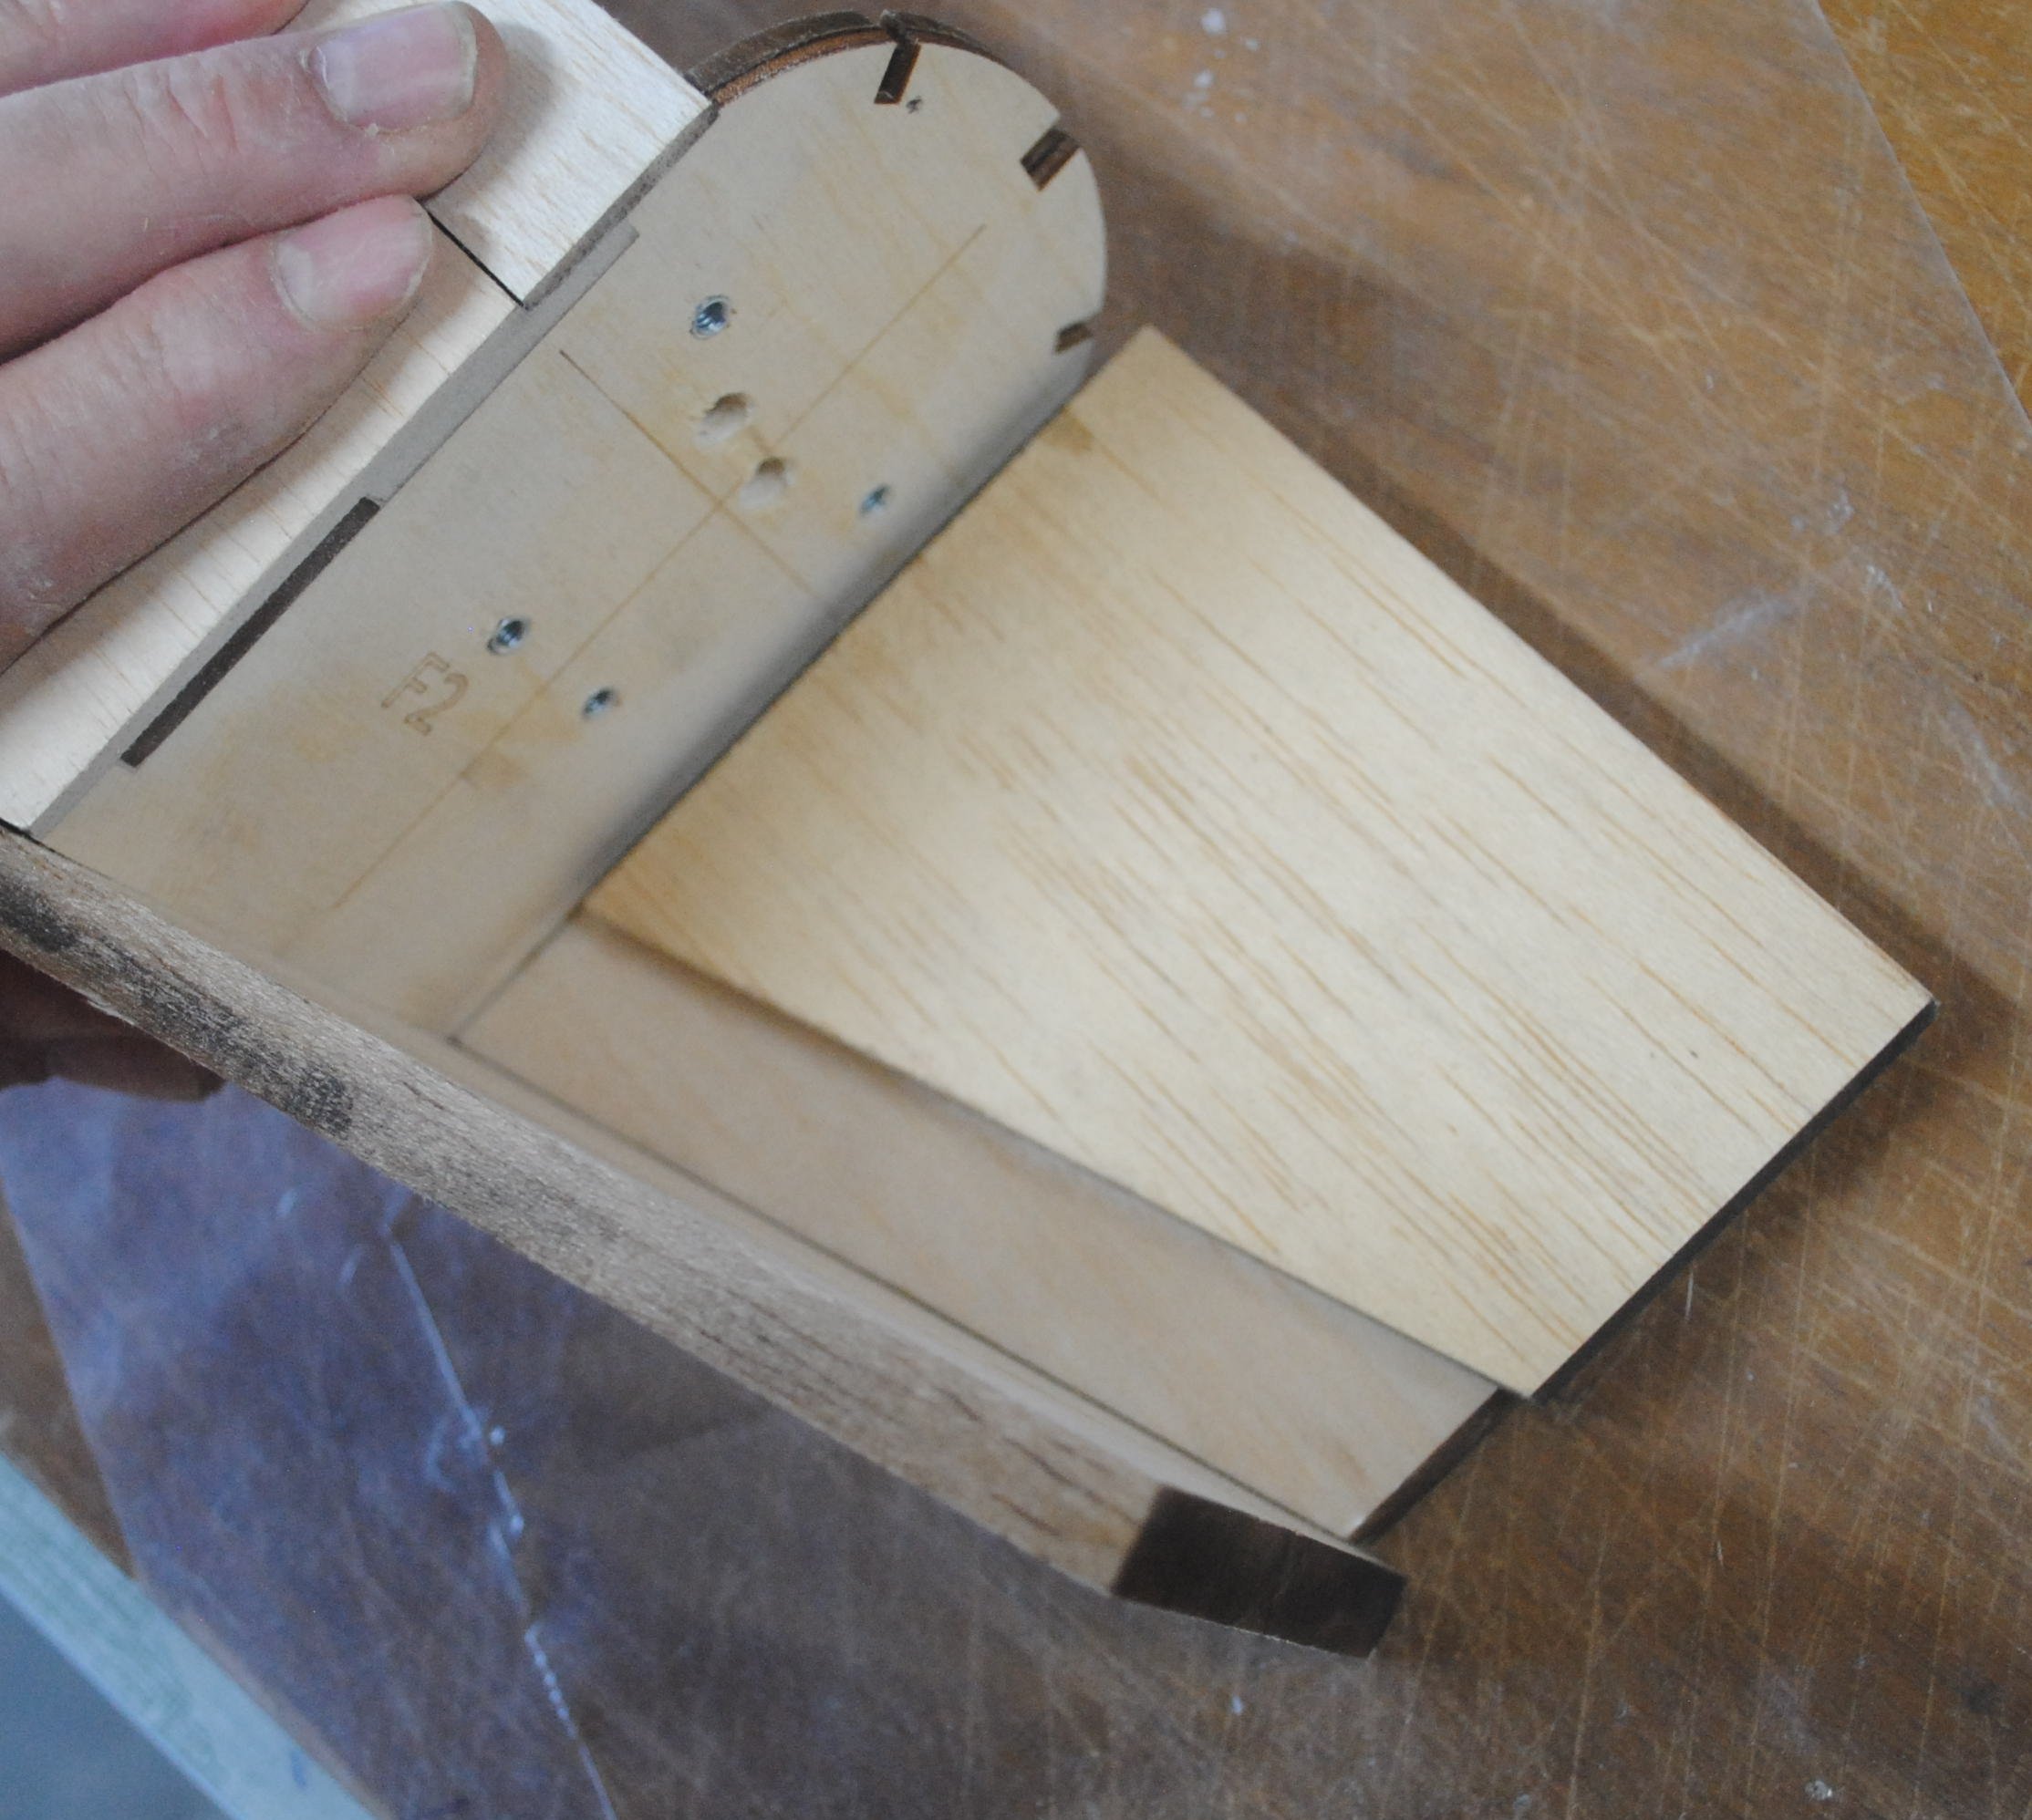
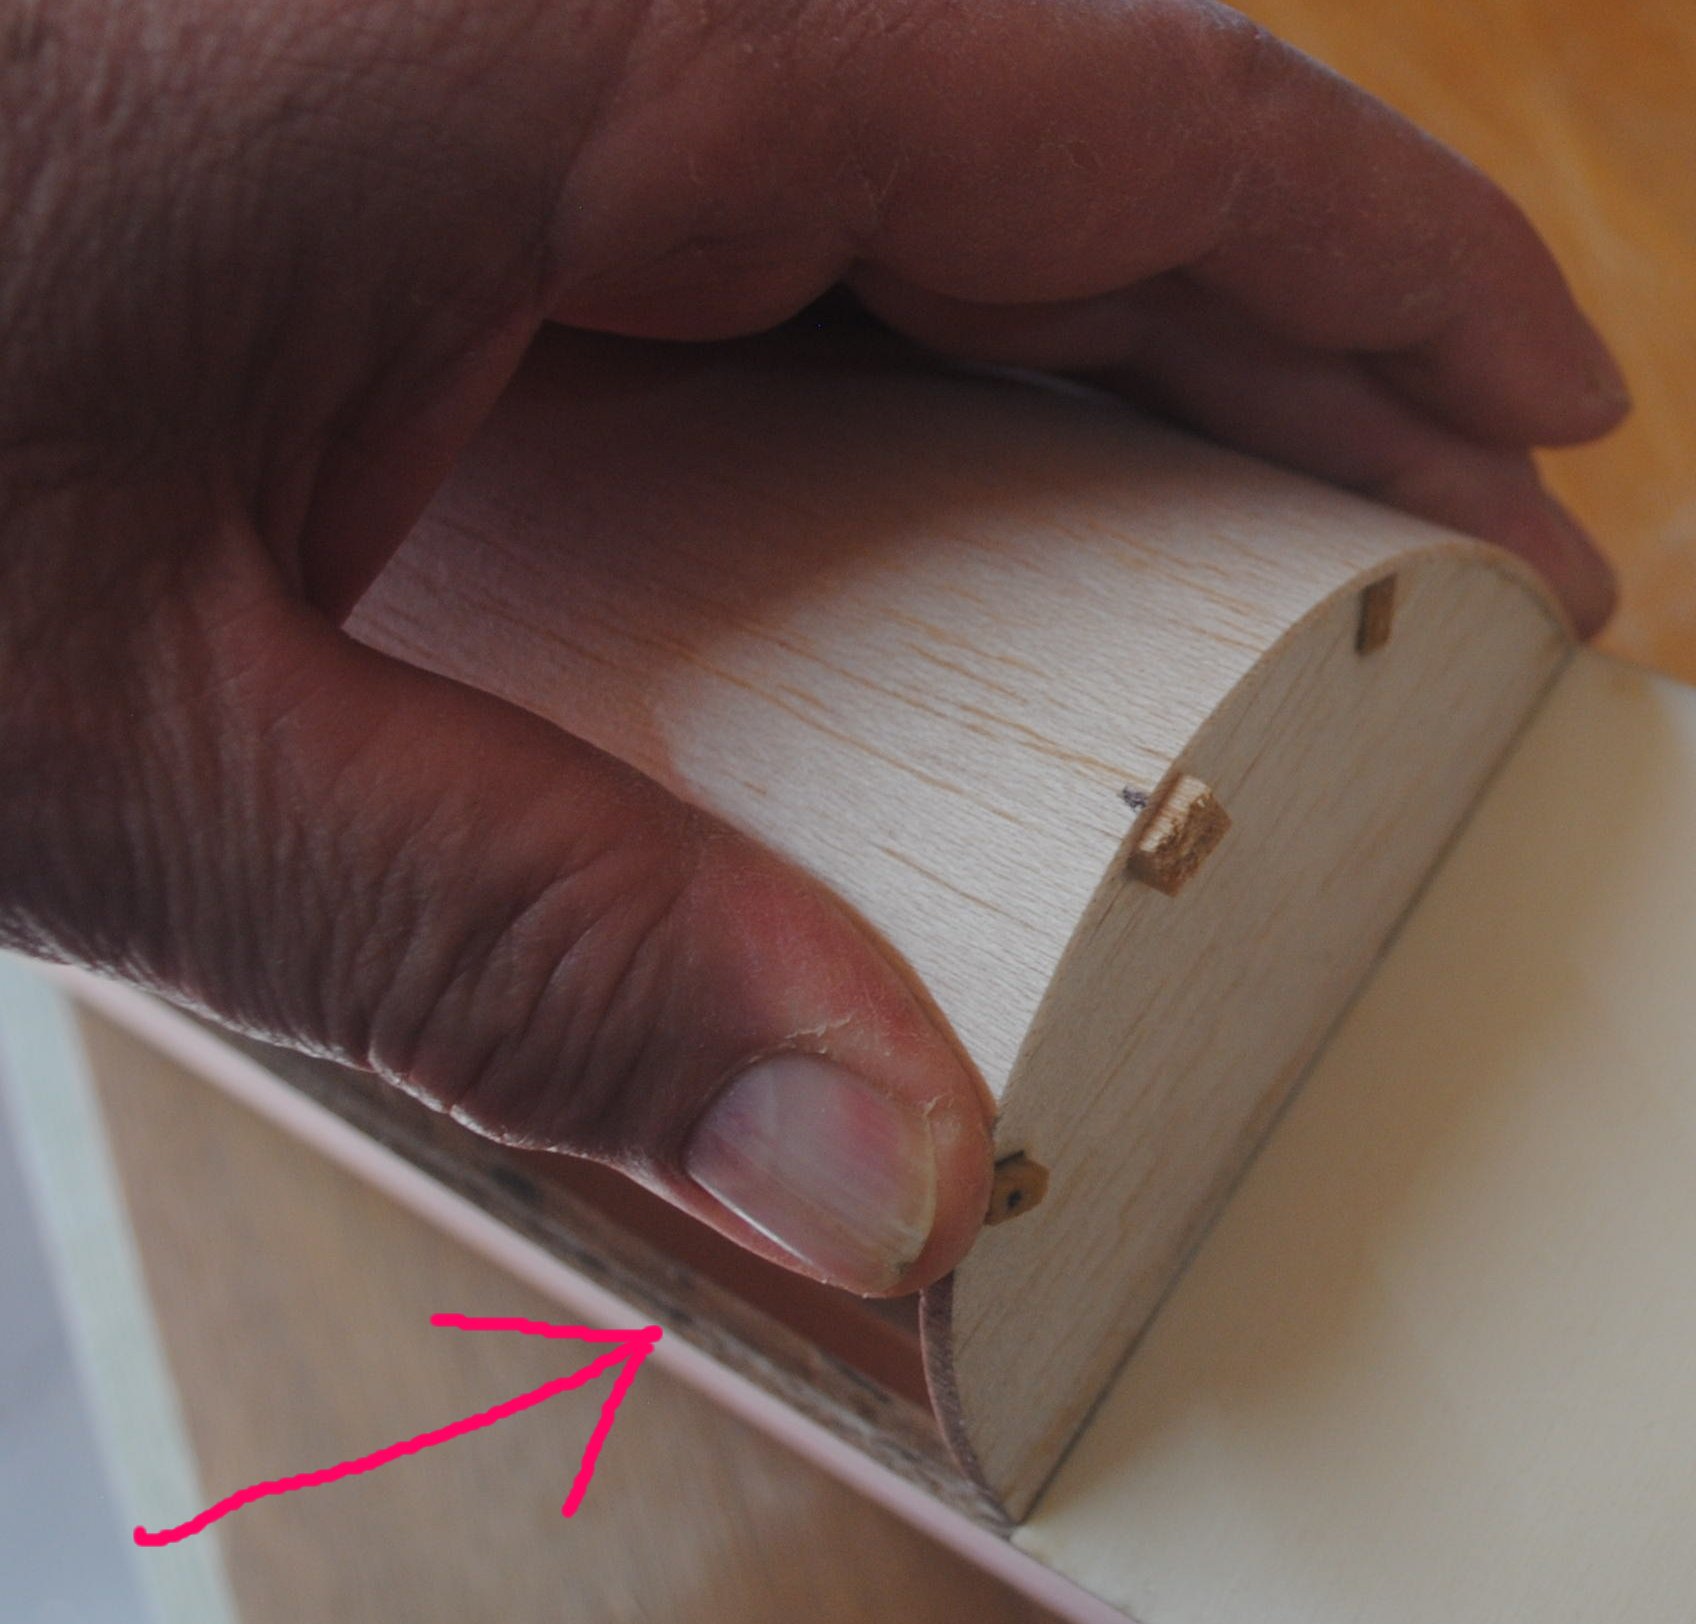
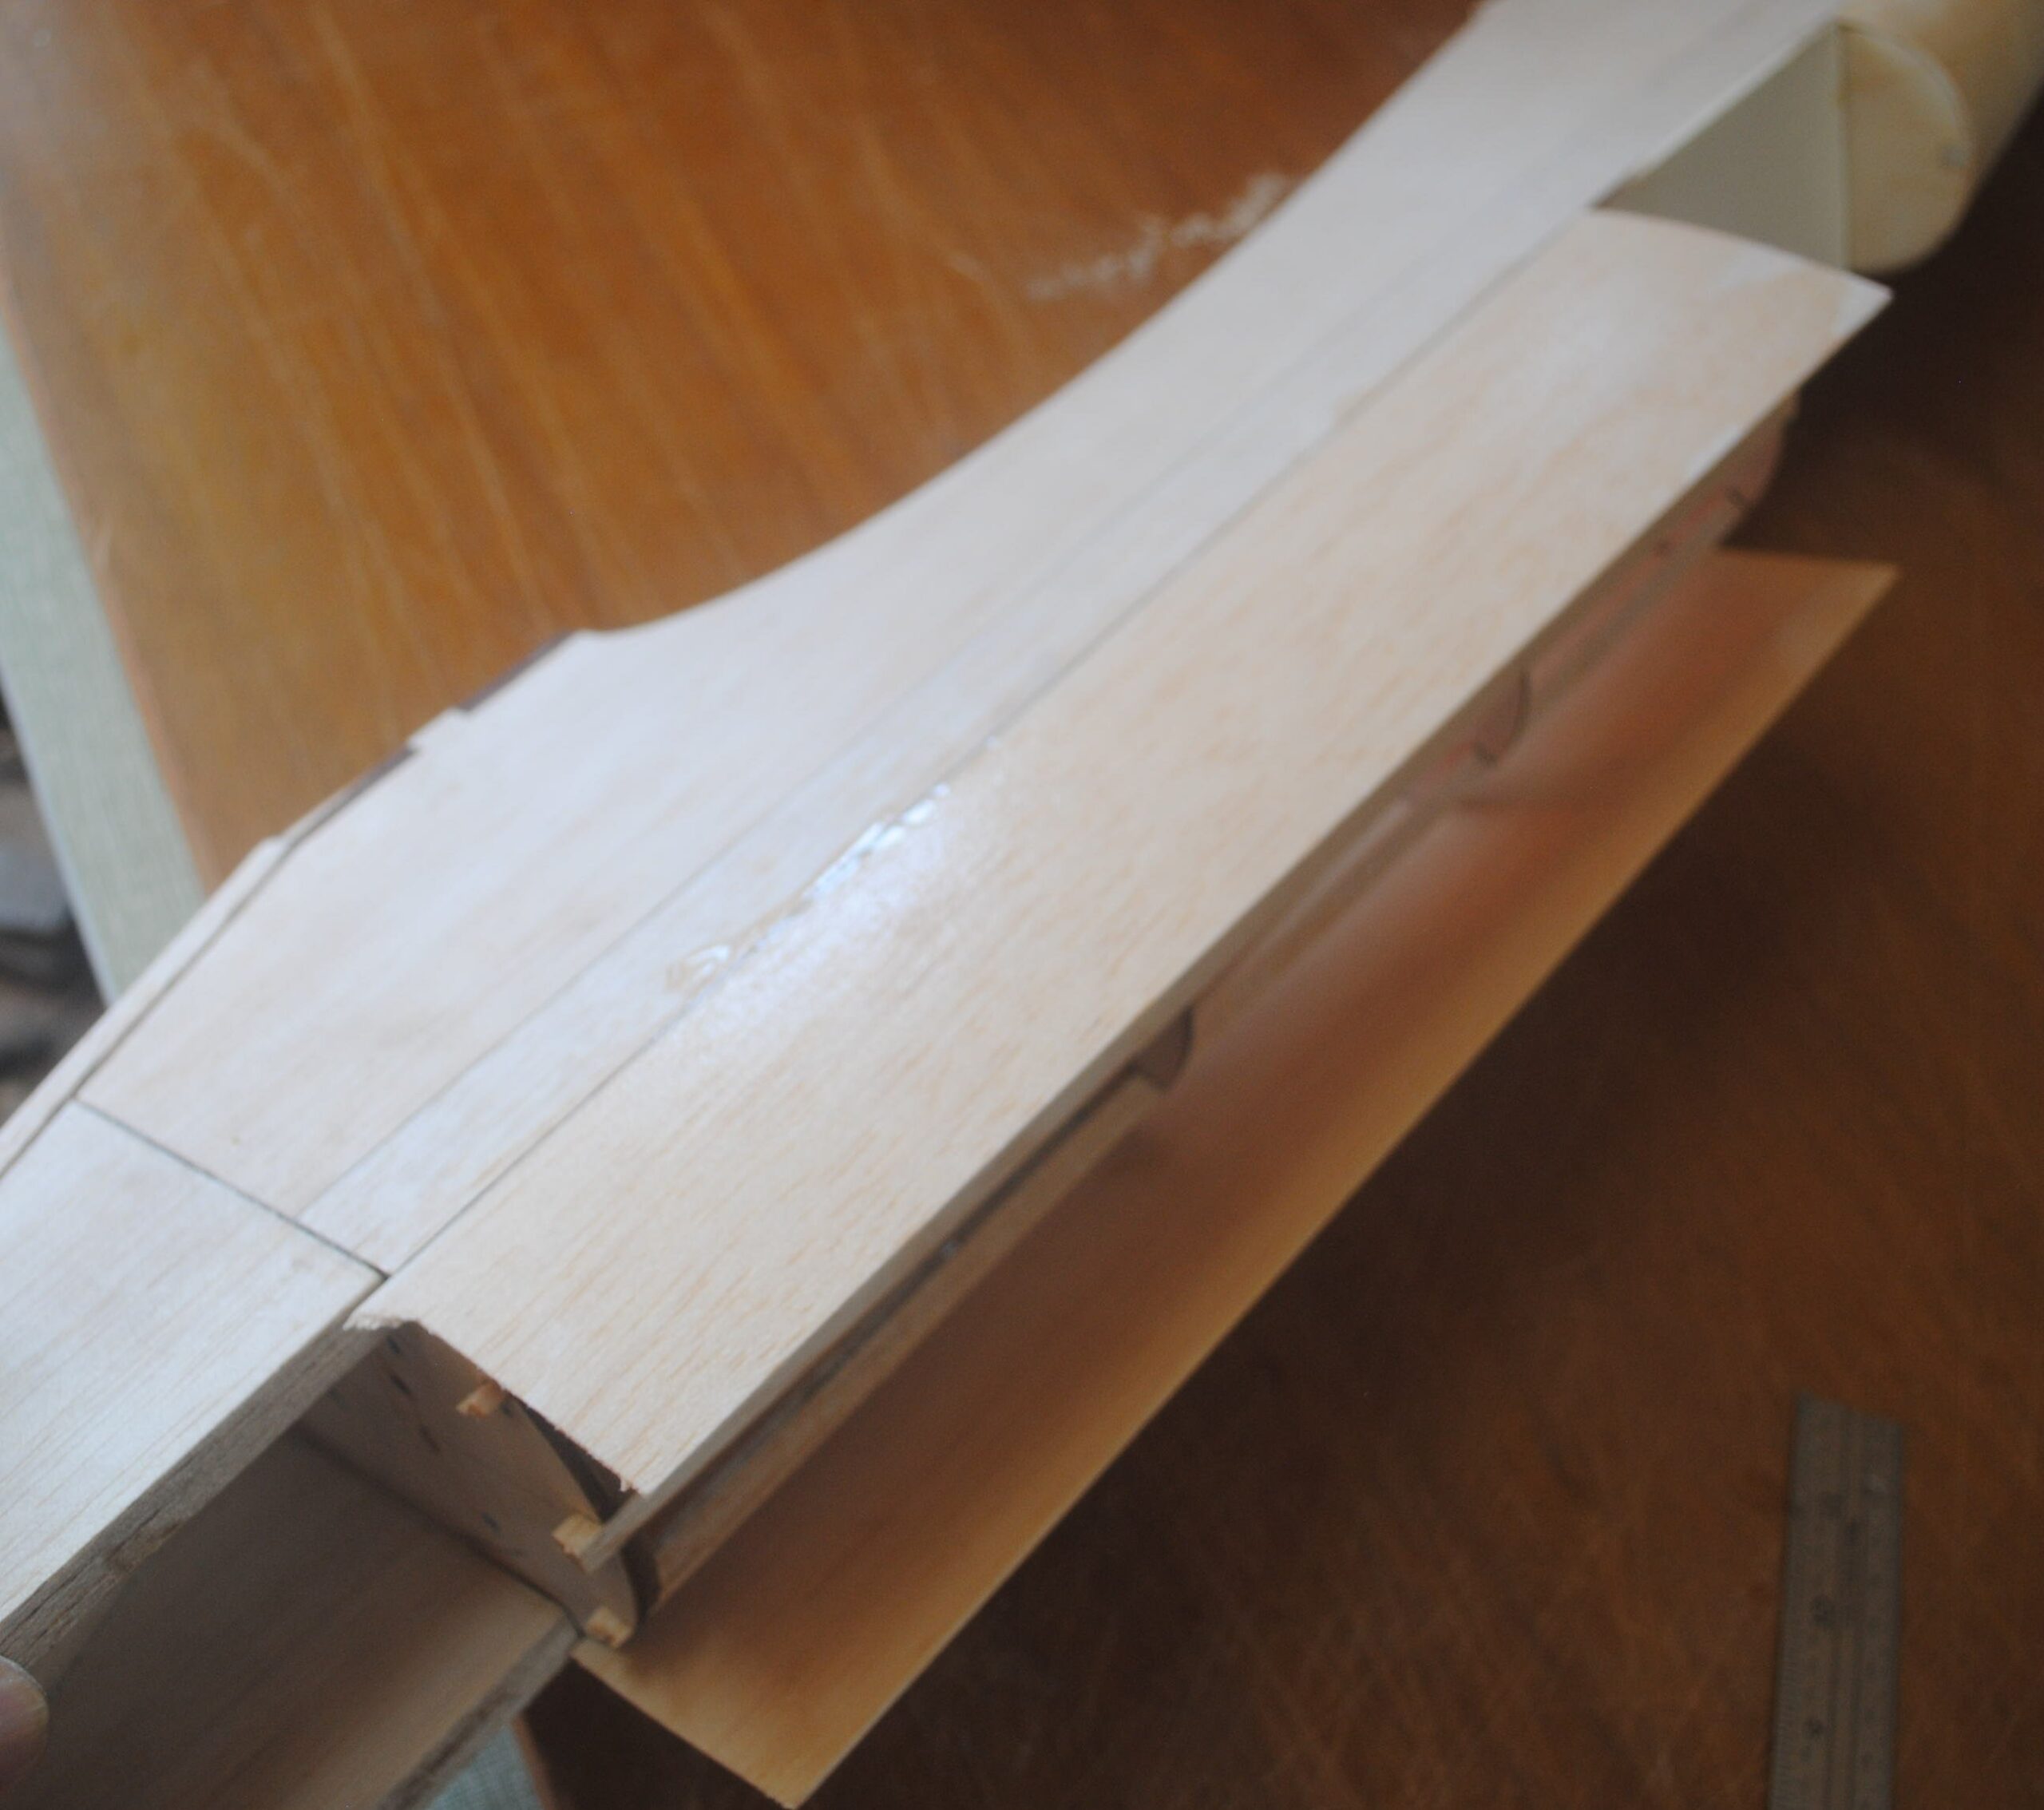
Place a piece of 1/16 x 3 x 16 balsa on top of the fuselage side just in front of the cockpit floor, and roll it around the curve. Mark it with a pen at the middle of the balsa stick at the top of F5. Make one for each side. Note that the following photo shows the first half being held in place and marked. The arrow indicates that there is no balsa attached to the other side.
Mark the other end the same way, at F2. Use a straight edge and knife to cut along the line. Now do the opposite side the same way. Theoretically these two pieces should meet at the top on the center line of the top stick, but it’s better to cut them just a hair too wide and trim later than it is to cut them too narrow and have a gap at the top.
Glue these pieces of sheeting to the top of the fuselage sides. Do not glue them to anything else yet. The joint is a straight line with no compound curves, so the sheeting should fit straight and snug, and you should make an effort to attach this joint firmly and wait for the glue to cure all the way before curling the piece around the top of the bulkhead. When you get both sides on, it will look like this.

You can see that I glued them with CA and spritzed a tiny bit of accelerator from the outside to make the joint secure. I don’t want it coming undone while I’m curling it around the bulkheads.
Lay the plane on its side and wet the outside of the sheeting, especially at the front where it has to follow a sharper curve.
When the balsa is ready to bend, apply medium CA to the top of the top stick, with the glue biased toward the side you’re working on. If you use a ton of glue it will squish out and leave chunks that interfere with the opposite side. Apply glue to the other stick and as much of the bulkheads as the glue bottle will reach, but these parts are not quite as important as the middle stick. Press the sheet to the bulkheads as you curl it over, so as not to leave any gaps between the sheeting and bulkheads. When it’s stuck to the top stick you’ll see if you measured right. Mine is a little long.

In this case the remedy is to use a straight edge to trim the sheet along the center line of the stick. Don’t worry about cutting into the stick. A longitudinal cut won’t hurt it.

That looks better. Wet the other sheet, and when it’s ready, roll it over tight against the bulkheads and see if it overlaps. If it does, use a straight edge to trim it off where needed. Place glue on the top stick and whatever other parts you can reach with your glue bottle, and roll the sheeting into place.
Now you can turn the fuselage over. In any spot where the sheeting isn’t attached, hold it tightly in place with one hand and apply thin CA with the other hand.

Alternatively, you could use your own preferred way to stick top sheeting on, but you die-hard users of Titebond and pins already knew that. There are a hundred ways to do it. Just remember not to sand anything until the balsa is dry. Those who sand wet balsa will have to live with the regret.

Once the balsa is dry, sand the sheeting and sticks flush with the instrument panel.
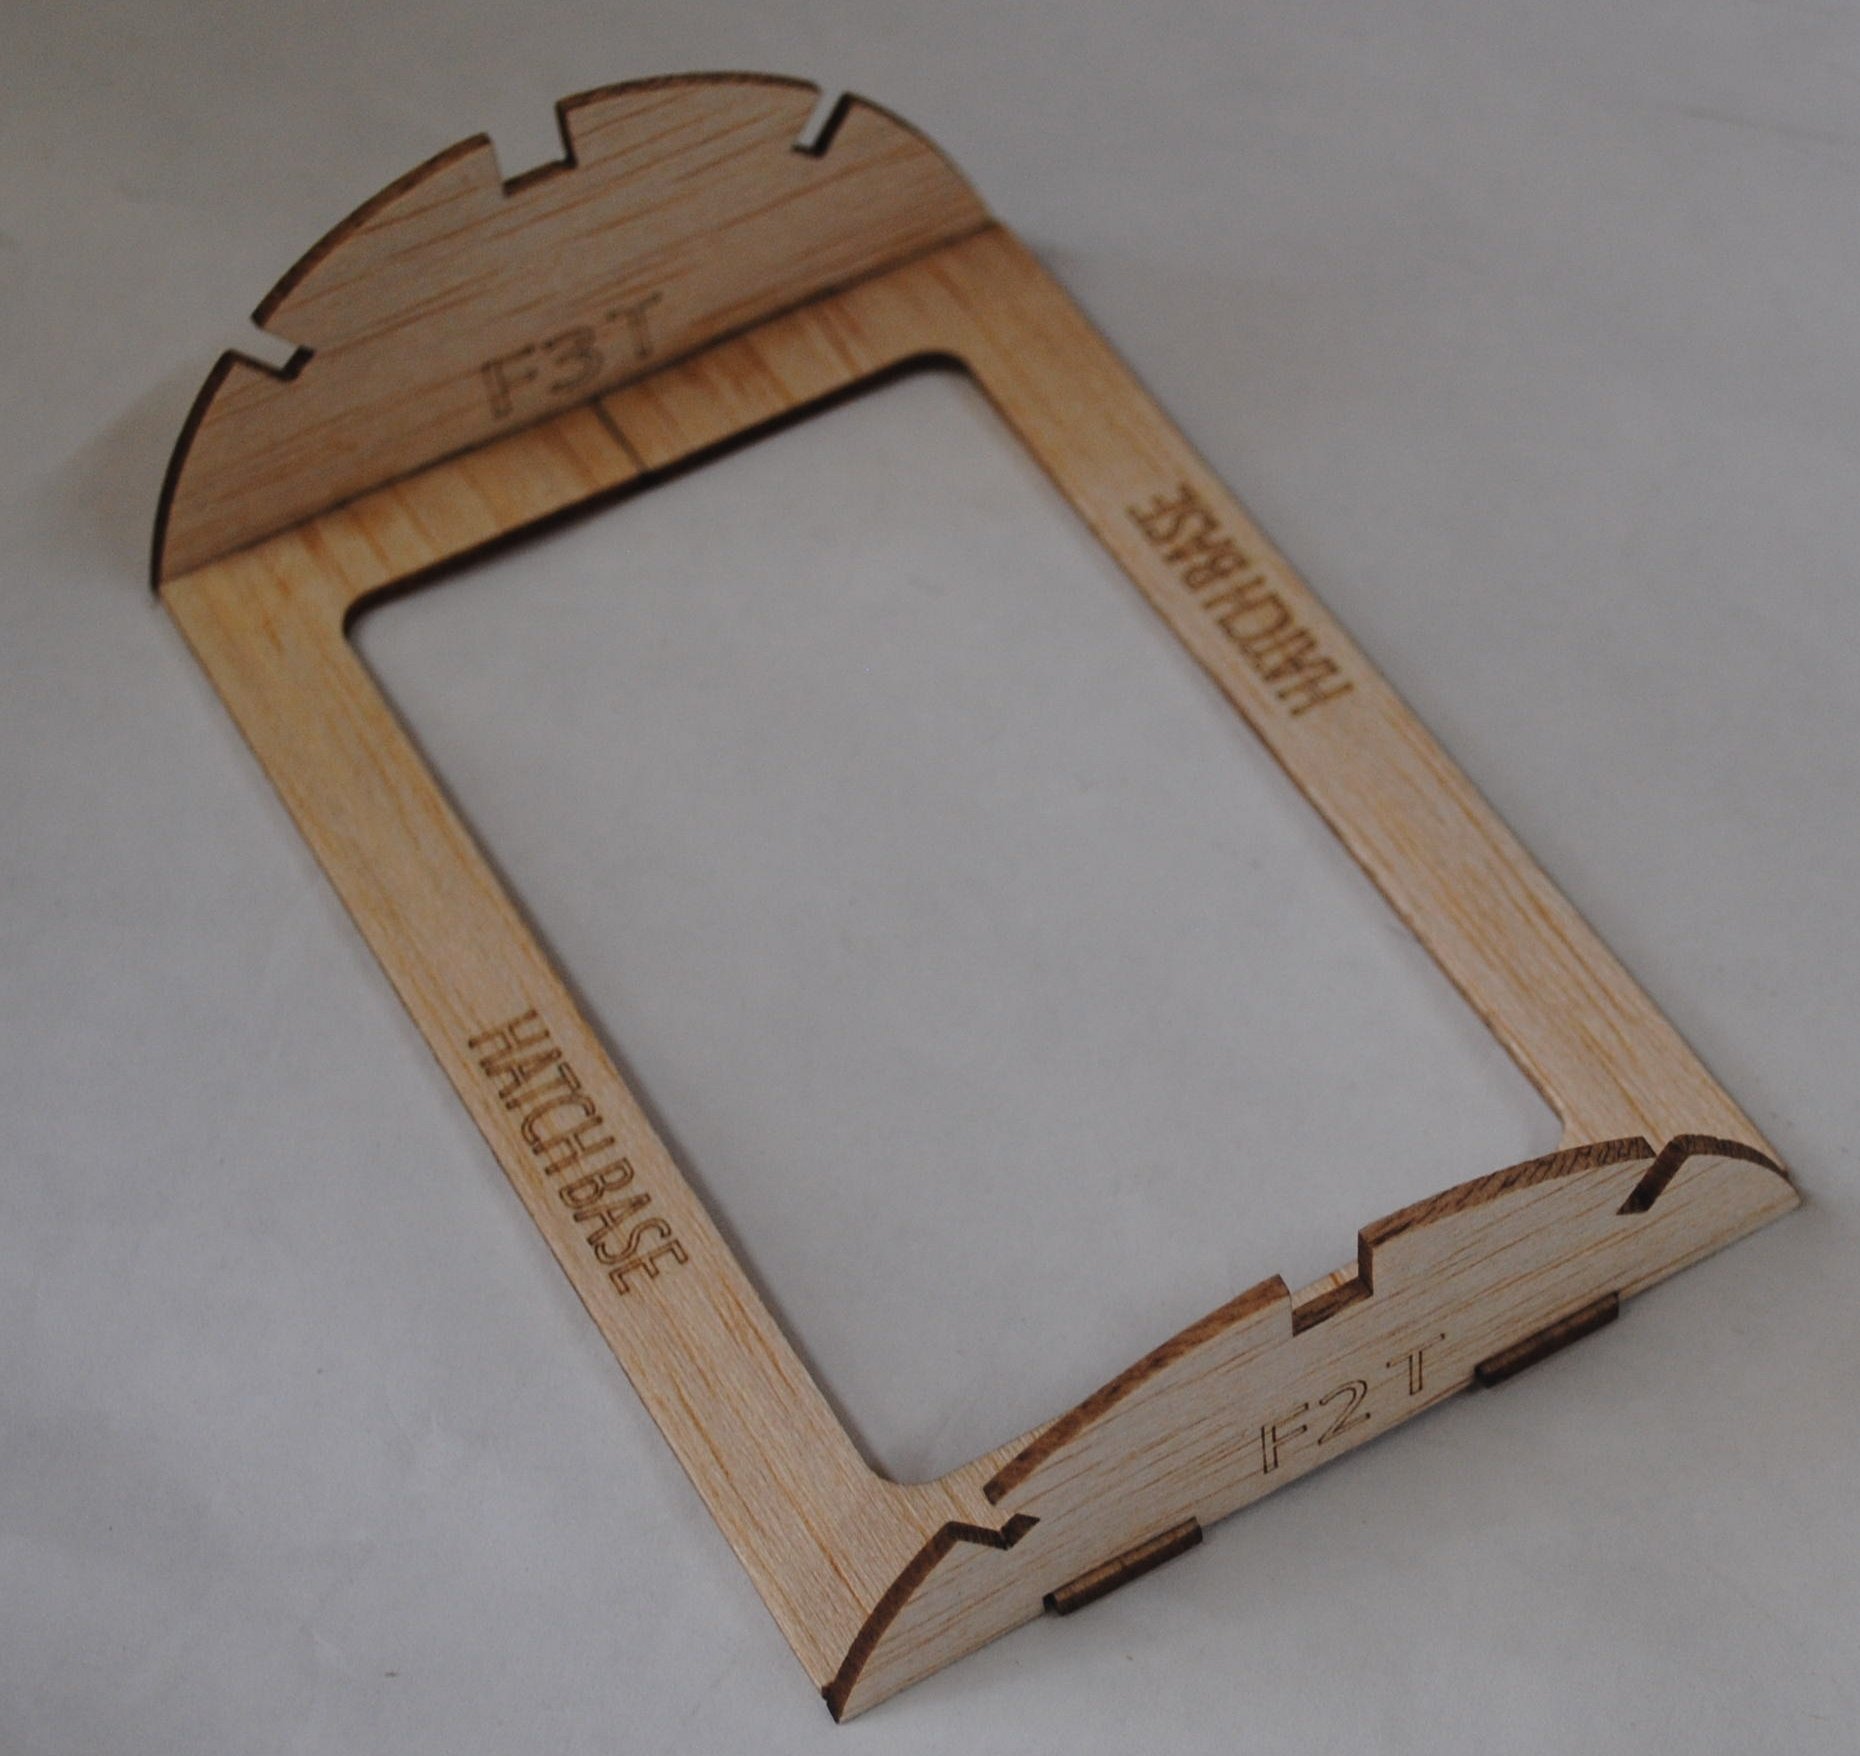
If you’re building your plane with the hatch, glue the two halves of the hatch base together.

Attach F2T and F3T. These pieces sit on top of the hatch base tabs.
Pin the assembly to the table to keep it flat, and add the 1/8 x 1/4 sticks and the 1/4 x 1/4 top stick.
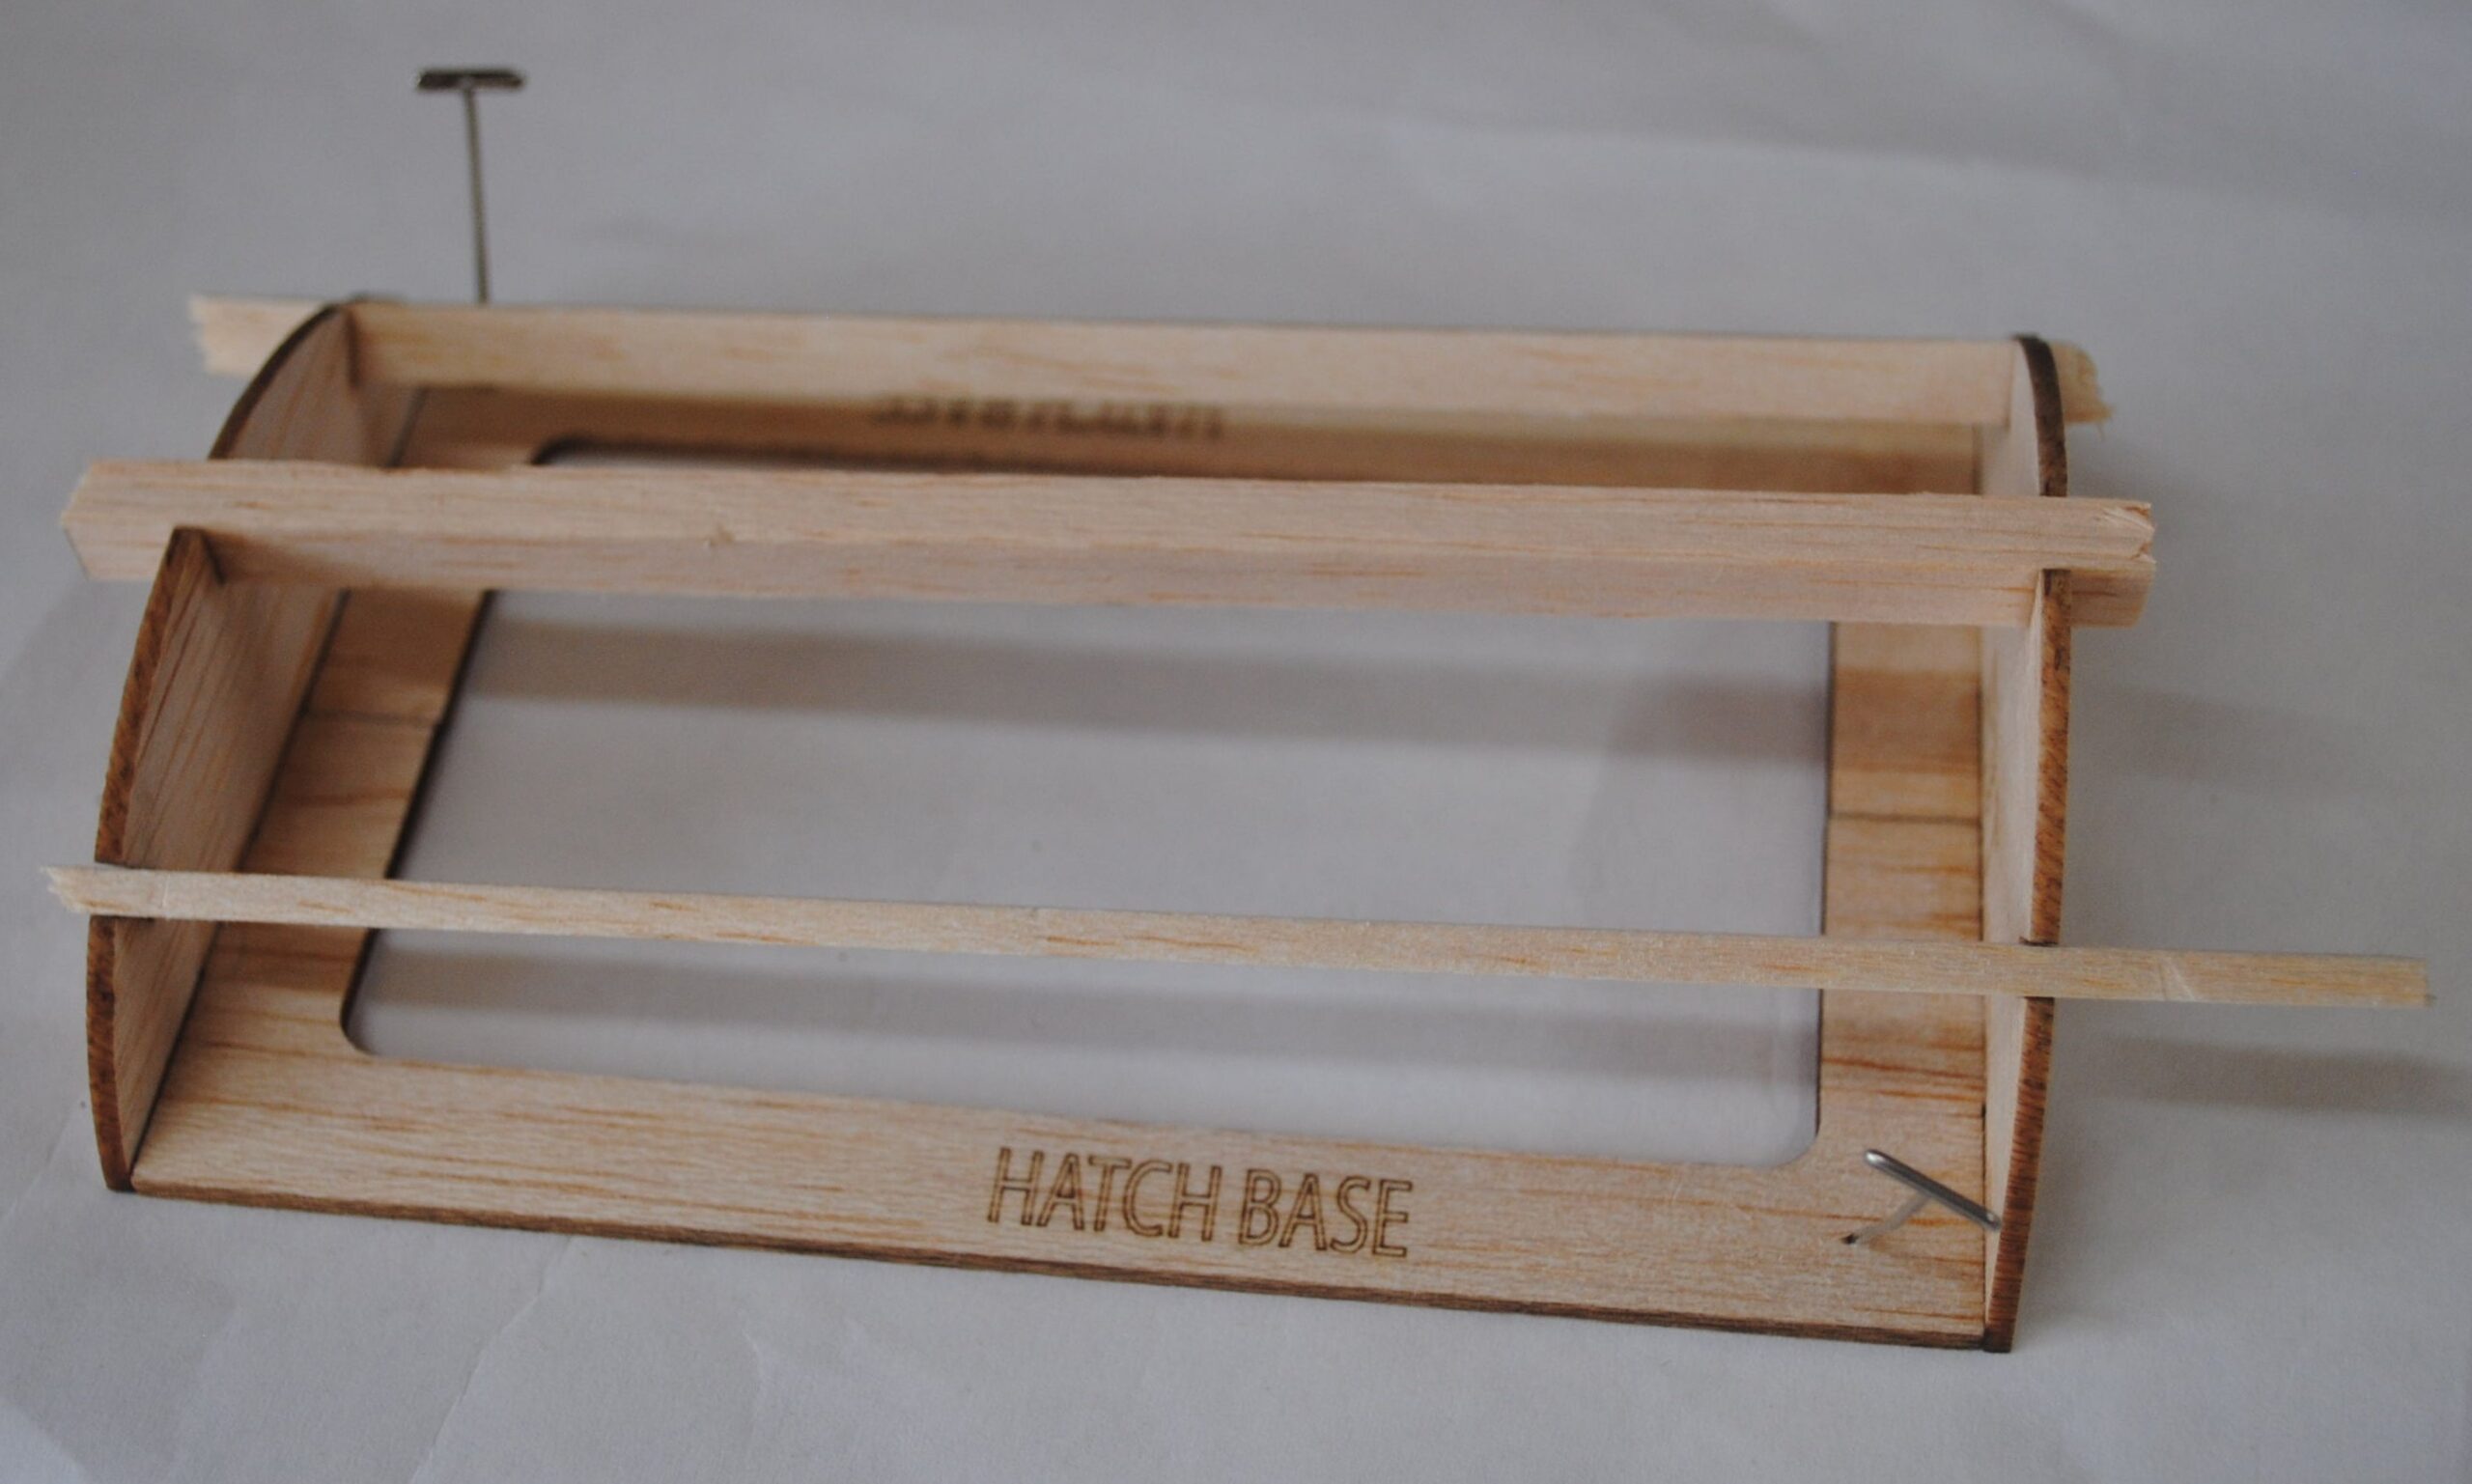
Sand the ends of the sticks flush with the bulkheads. Cover the top of the hatch with 1/16 balsa sheet. The procedure is similar to covering the fuselage top deck, but in this case you should start at the top and roll the sheeting on towards the bottom. Place the hatch at the edge of the table with the edge of the hatch base protruding out into space around half an inch. Pin the hatch to the table to keep it flat. Pin it from the ends so the top sheeting doesn’t trap pins inside. Your sheeting doesn’t need to be trimmed to the exact width. Glue your sheeting along the center line of the top stick, then roll it down to stick to the bulkheads and the edge of the hatch base. Turn the hatch around and do the other side the same way.
Trim and sand the sheeting flush with F3T. Place the hatch in its proper location on top of the fuselage. Trim and sand the sheeting flush with the front of F2. In other words, the sheeting extends beyond F2T and hangs over the main F2 bulkhead, hiding the notches in the top of F2.
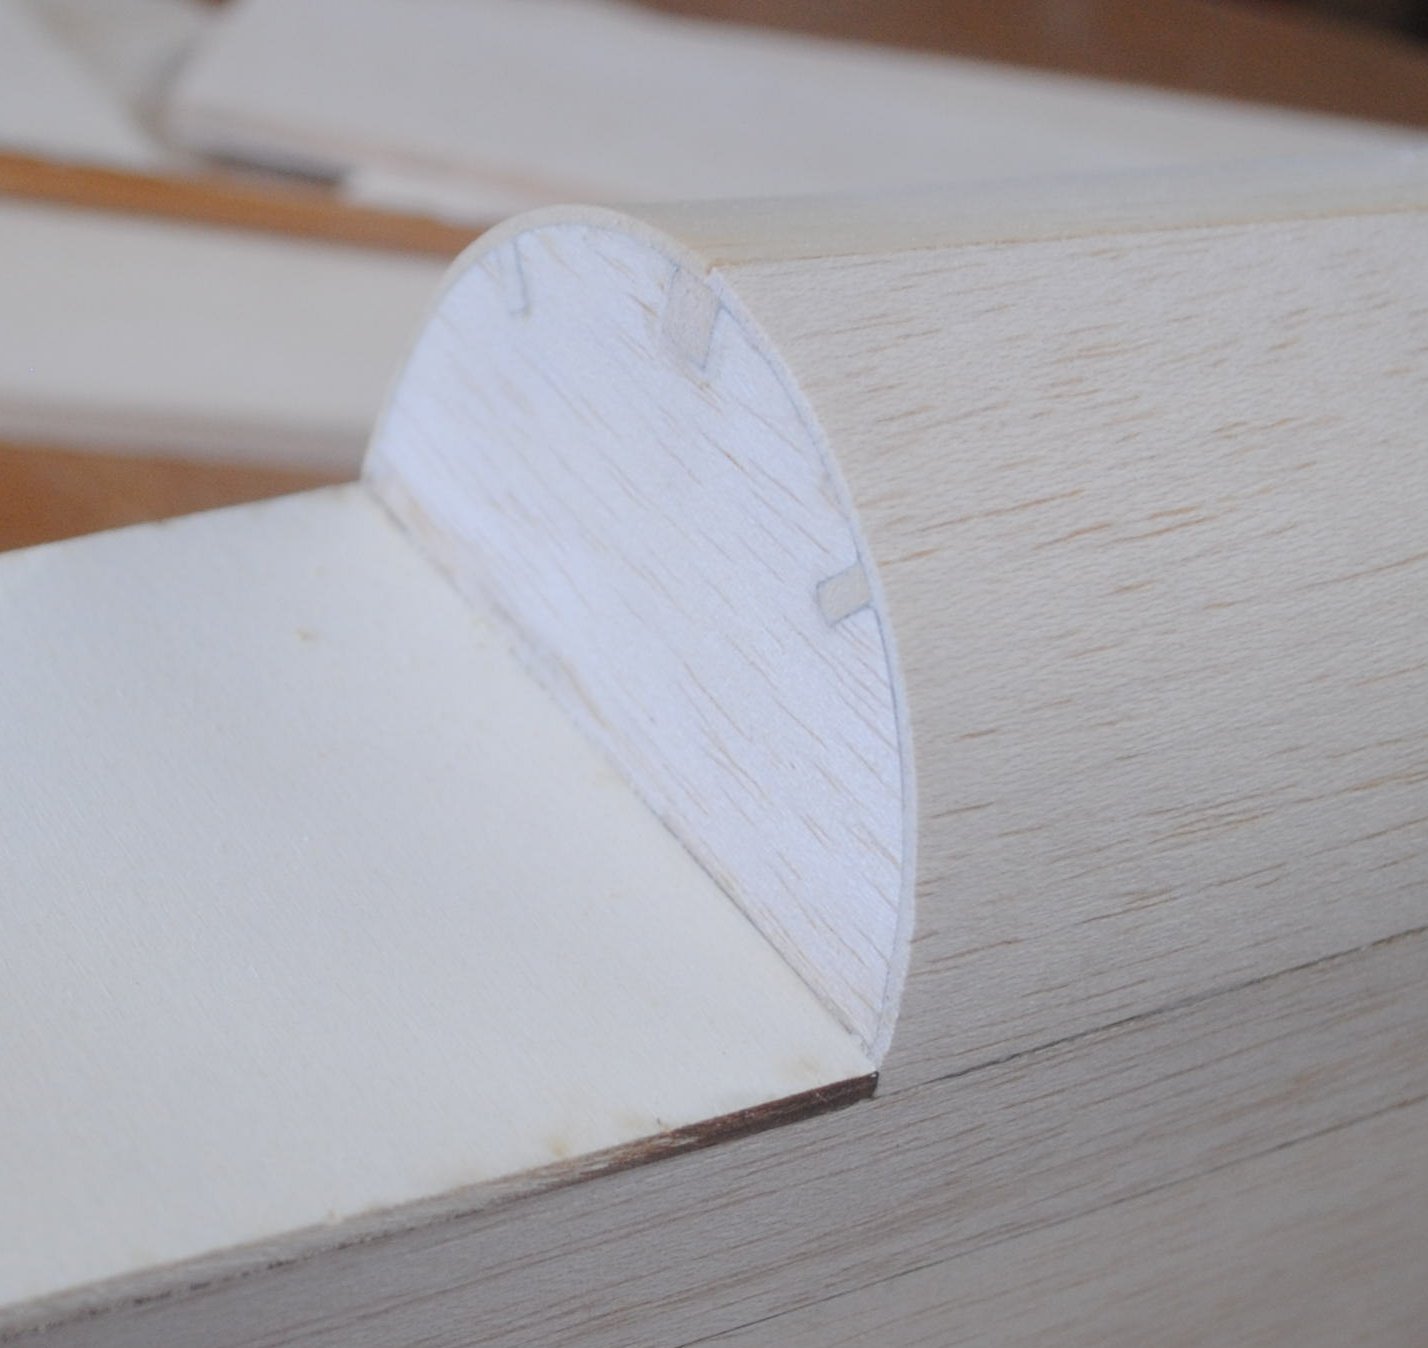
With the hatch held in place, holes can be drilled through F3 and F3T for magnets to be inserted and glued into place, and a hole can be drilled through F2 and F2T for a dowel.
Sand the sides of the cockpit floor flush with the fuselage sides.

The cockpit sides are made from 1/4″ x 3/4″ balsa sticks about 6 inches long. Cut the stick to fit between the head rest and the instrument panel.
Sand the bottom edge so the stick leans inwards a few degrees. The bottom and ends of the stick should protrude slightly so they can be sanded off and rounded.

Now the fuselage is pretty much done, and it just needs final sanding before covering. Start by sanding the cockpit side stick flush with the fuselage side.
Then sand the rear of the stick to blend with the rear turtle deck. The line of the turtle deck should extend without changing.
Do the same for the front end of the stick.

Now sand the middle section. For this step there is no pattern to follow. Just sand it so all the curves blend together in the middle. Viewed from either end, it should look smooth with no ungraceful lumps.
Sand the chin block so it curves smoothly toward the landing gear.
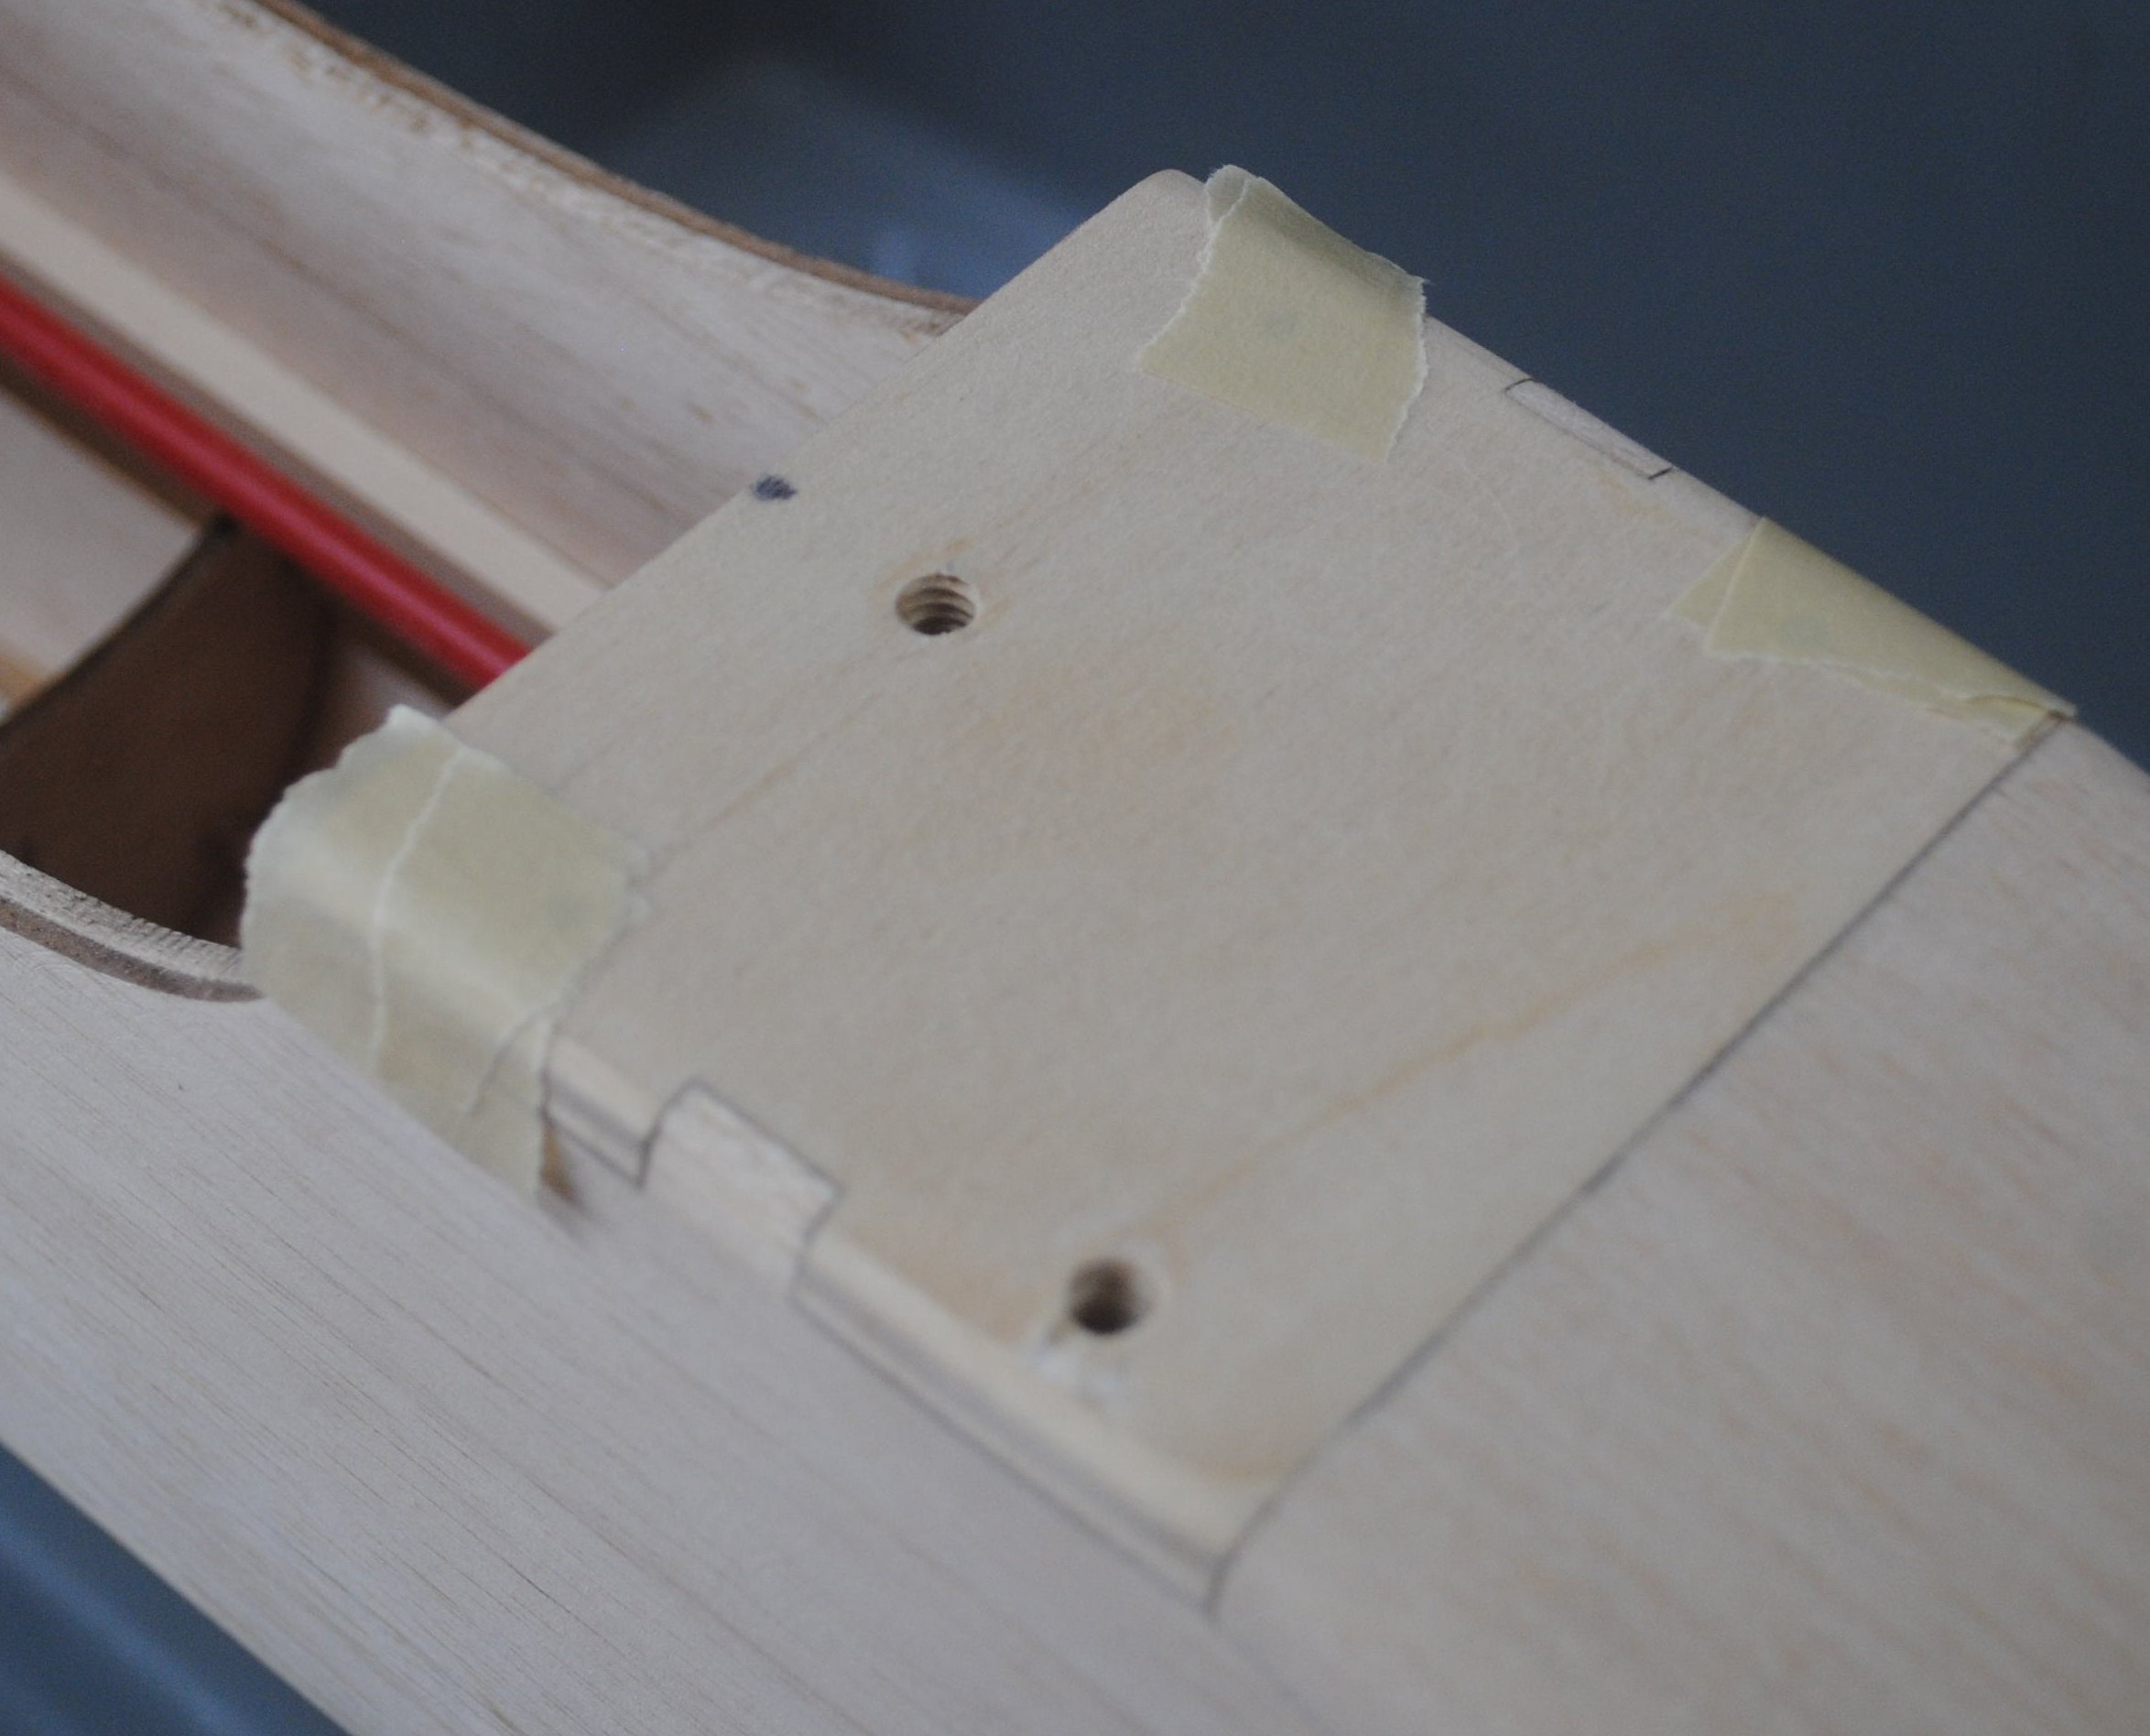
This is a good time to drill the plate for landing gear. The landing gear is attached with three 1/4-20 bolts. You can use four if you like, but you should make sure the rear bolts don’t interfere with the wing dowels. Line up your landing gear on the center line, with the angle of the landing gear legs sweeping backwards. If you have a long enough memory, you’ll recall that you used the landing gear bolt template to drill 1/8″ holes in the landing gear. Drill through one of the holes into the fuselage with a 1/8″ bit. Then enlarge that hole in the landing gear to 1/4″, and enlarge the hole in the fuselage to 3/16″. Harden the hole in the wood with thin CA and spray accelerator on it so your tap won’t get fouled with active glue. Tap the hole in the wood to 1/4-20.
Attach the landing gear firmly with this screw. Drill through the second hole through the landing gear with a 1/8″ bit. Take off the landing gear, enlarge the second hole to 1/4″ in the landing gear and 3/16″ in the fuselage, harden the hole, tap to 1/4-20.
Now use the first two bolts to attach the landing gear so you can drill the third one through the wood at 1/8″

Take the gear off, enlarge the holes, harden and tap the wood, and it’s done.

There are two notorious mistakes that will cause your bolt holes not to line up with the landing gear holes. The first is enlarging the landing gear holes to final size before drilling through them into the fuselage. The second is trying to hold the piece in place with your hand while drilling all of the holes at the same time. The landing gear is guaranteed to move. Completing each hole one at a time is the only way to line them all up accurately.
Carve and sand the cowl to whatever shape you prefer. I would love to see some photos of what you guys do with your cowls. I took the simple approach this time.


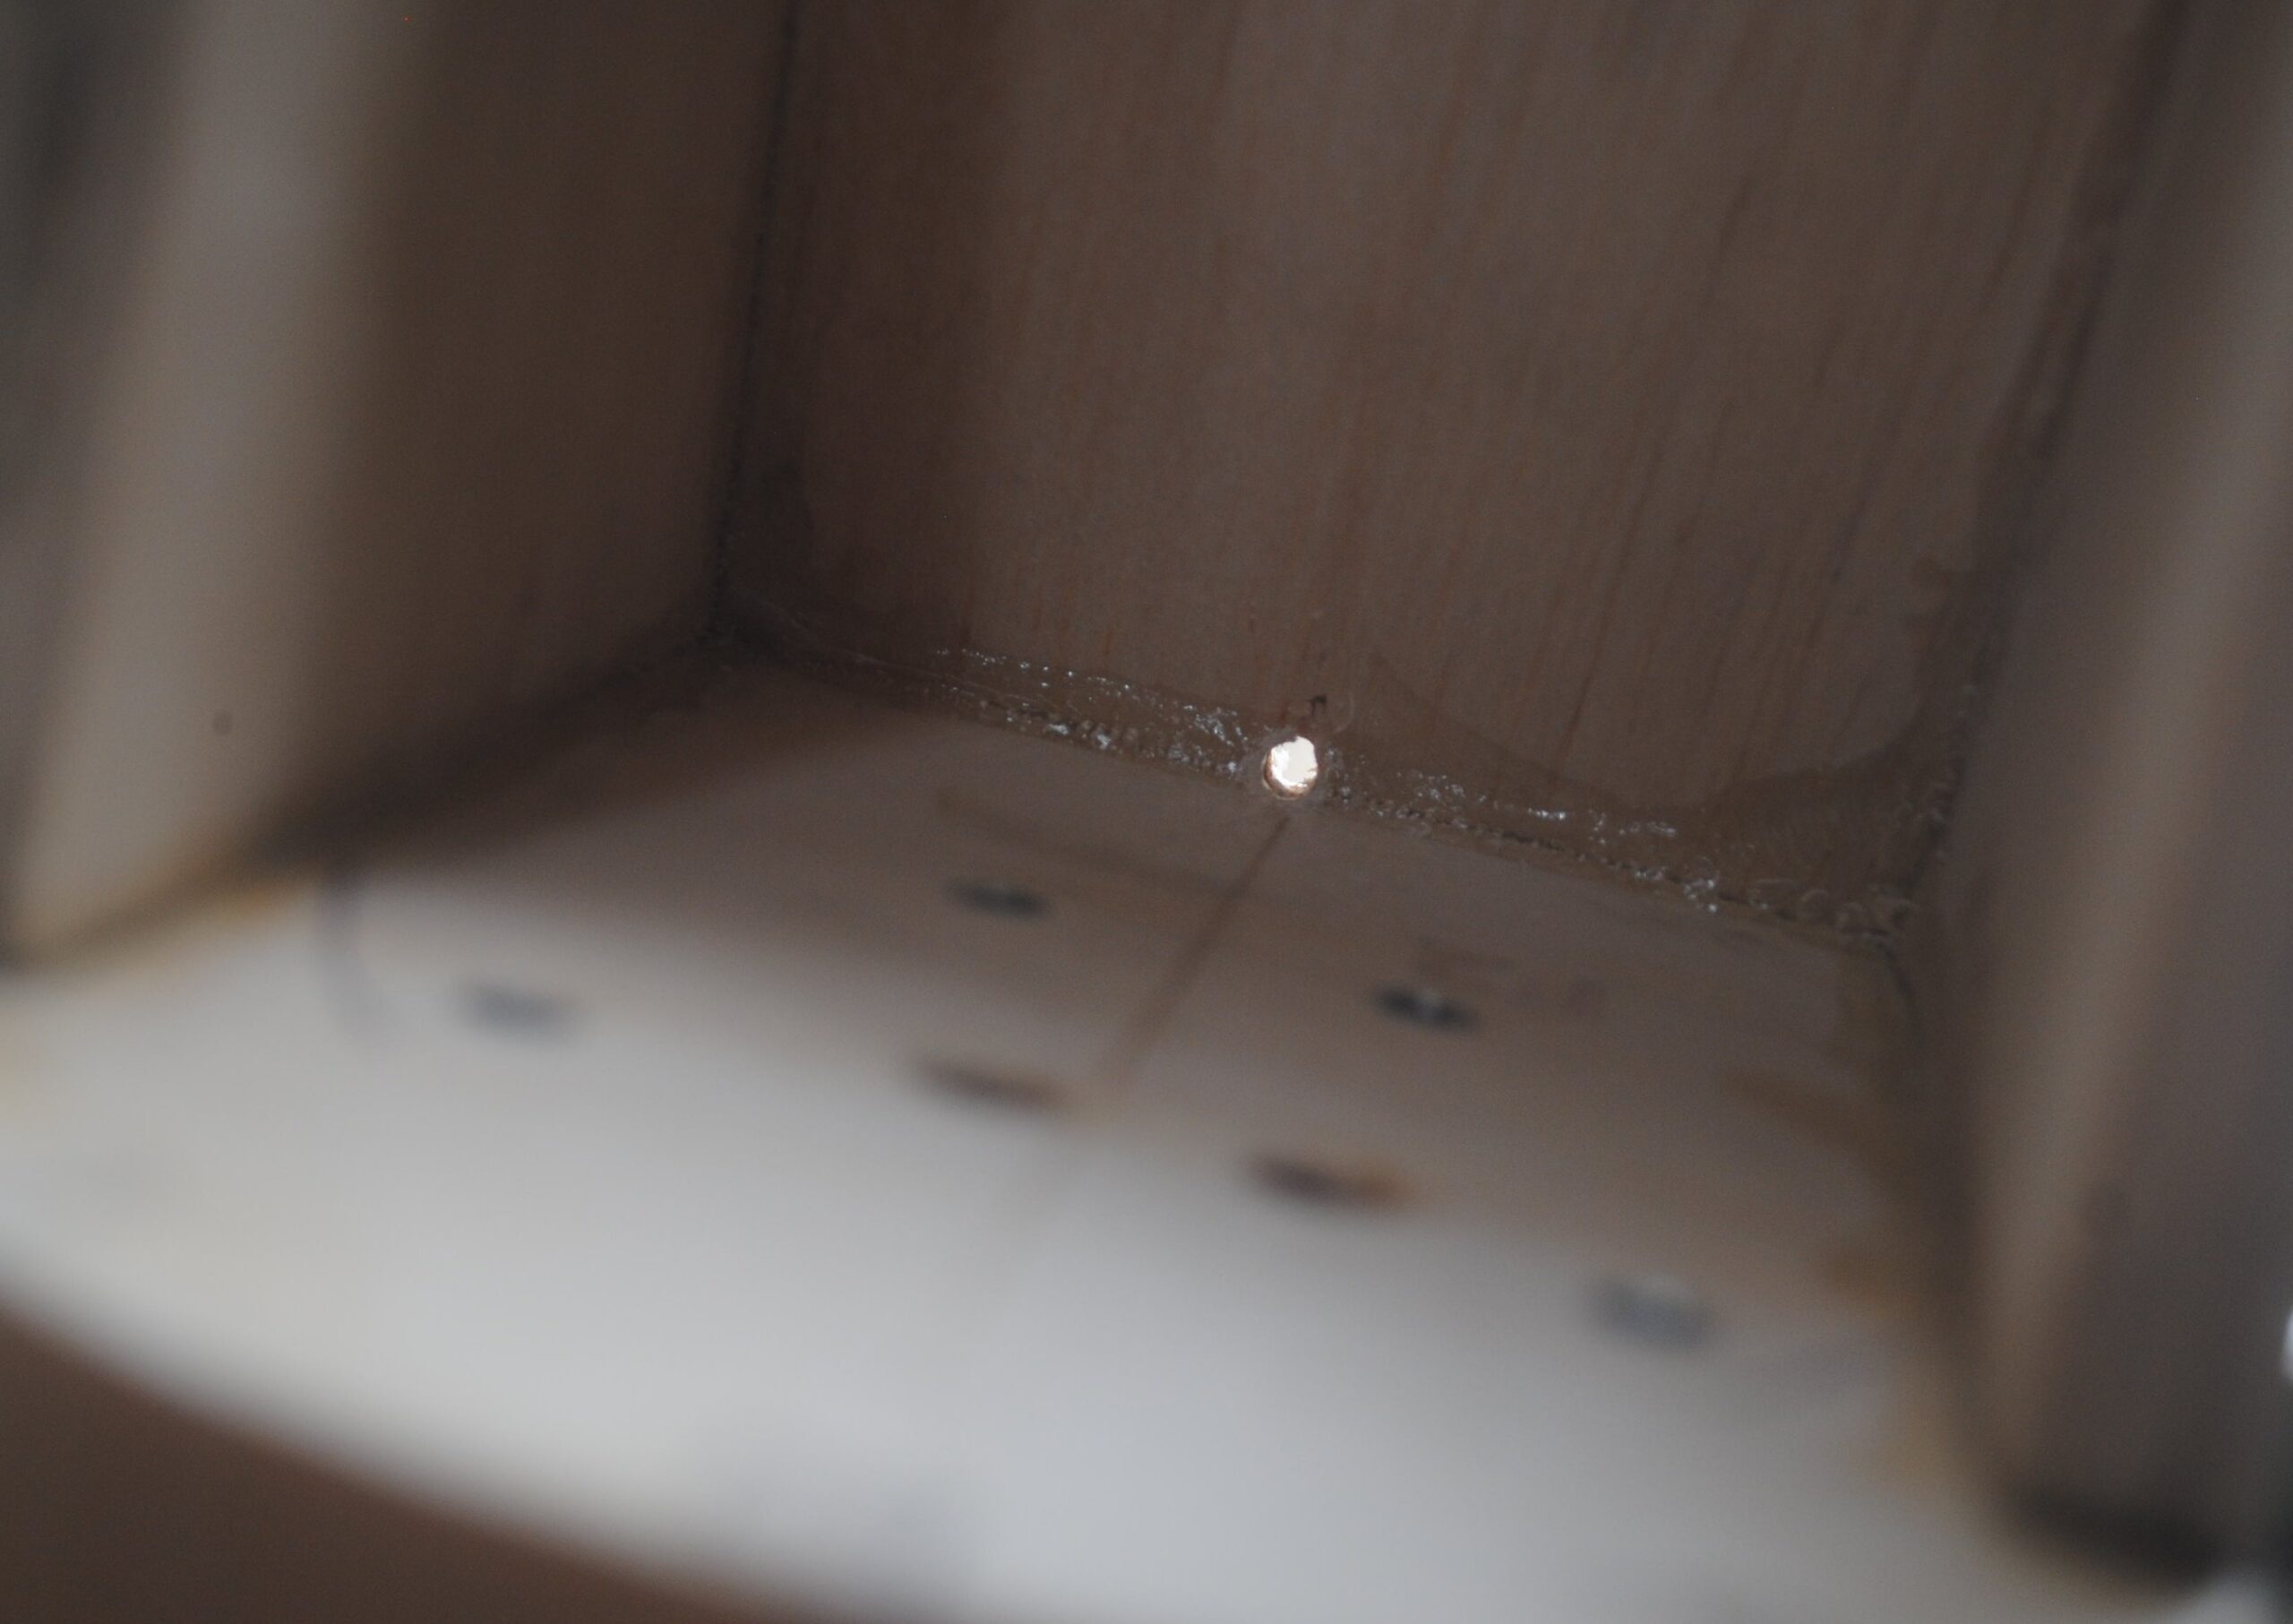
If you’re not using a glow engine, or if you opted for a flat firewall instead of a cowling, you won’t have to worry about oil collecting under the engine. If you do have a glow engine and a cowl with a floor, you’ll need an oil drain. Drill a 1/8″ hole vertically at the bottom edge of the firewall for oil drainage. I like to put a plastic tube inside it to keep oil from soaking into the wood inside the hole, and naturally I prefer to do that after the covering is already in place. But I think it’s a good idea to drill the hole before covering.