When building a wing with a curved-bottom airfoil the easiest way to build it straight is on a wing jig, so if you have one maybe you want to use it. If you don’t have one maybe you should think about getting one if you think you’ll be building more airplanes in the future. The wing ribs have 1/4″ holes for wing jig rods. The only tricky thing is that wing jigs are typically 36 inches long, and the Simpleton wings are close to four feet. You would have to build them in two halves and add a plywood joiner in the middle. There’s nothing wrong with doing it that way.
Because these wings have no dihedral it’s easy to build them in one piece, so in this case the table is the simpler option. Here are the instructions for building on the table.
Separate the top wing ribs (large) from the bottom wing ribs (small). Pick a wing to start with and set the ribs for the other wing aside for now. In the following instructions the bottom wing is shown in the photos. It has servo mounting plates, and the top wing does not.
Lay the plan out on a flat table that will accept pins, such as a hollow core door, drywall sheet, stiff ceiling tile, or a balsa building board. Make sure it’s really flat. If it’s twisted or sags in the middle, your wing will also be twisted or saggy. Cover the plan with some kind of plastic. I always use sheets of Monokote backing plastic that I have saved over the years, but that’s something you probably don’t have if you’re a new builder. Use whatever you can find, but I will warn you that wax paper usually sticks to CA glue, so watch out for that. Position the plan so the wing you’re working on is near you at the edge of the table.
Your wing sheeting is cut from 1/16 x 48 inch sheeting as follows:
2 3/8″ wide leading edge sheeting for top wing;
2″ wide leading edge sheeting for bottom wing;
1″ wide trailing edge sheeting for both wings.
Cap strips are cut from leftover sheeting. They can be 1/4 to 3/8 inch wide. The width is not critical, but it looks better if they’re all the same.
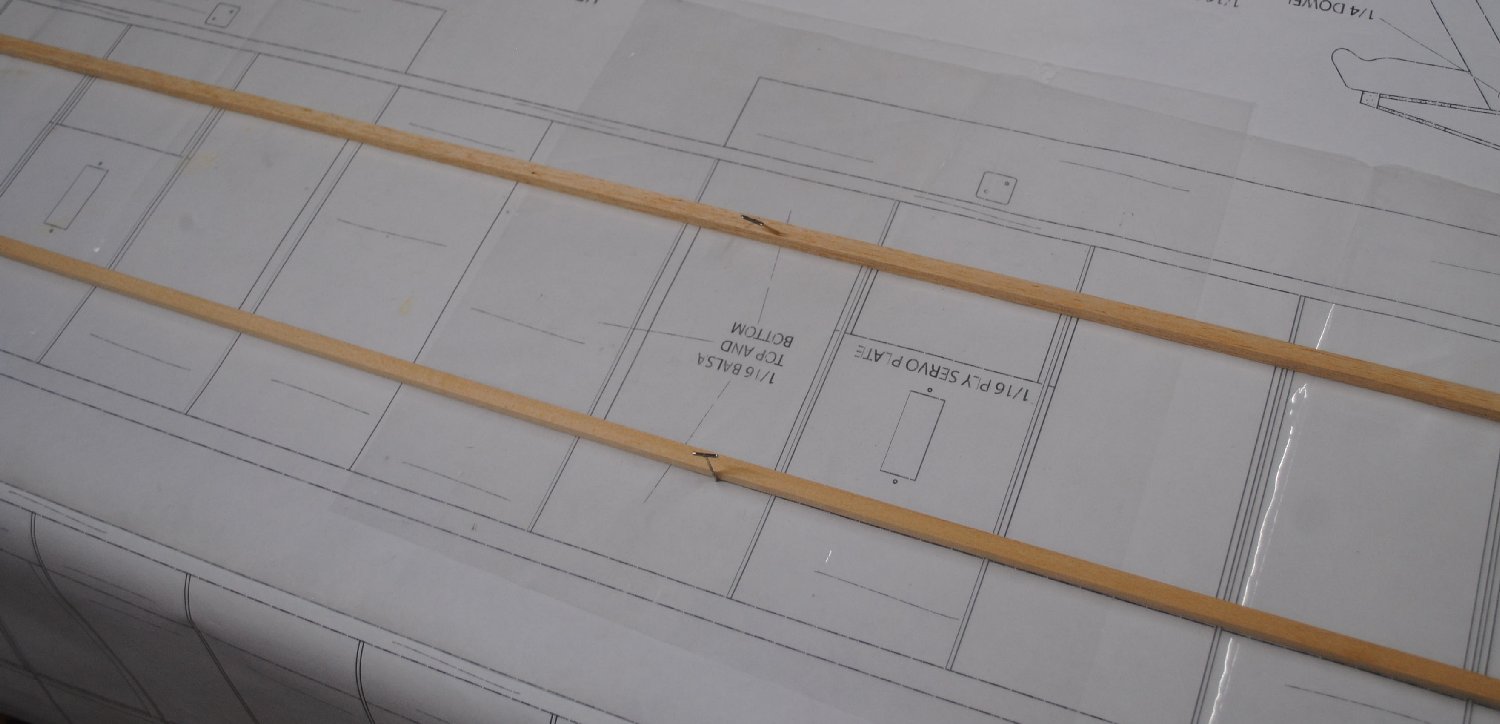
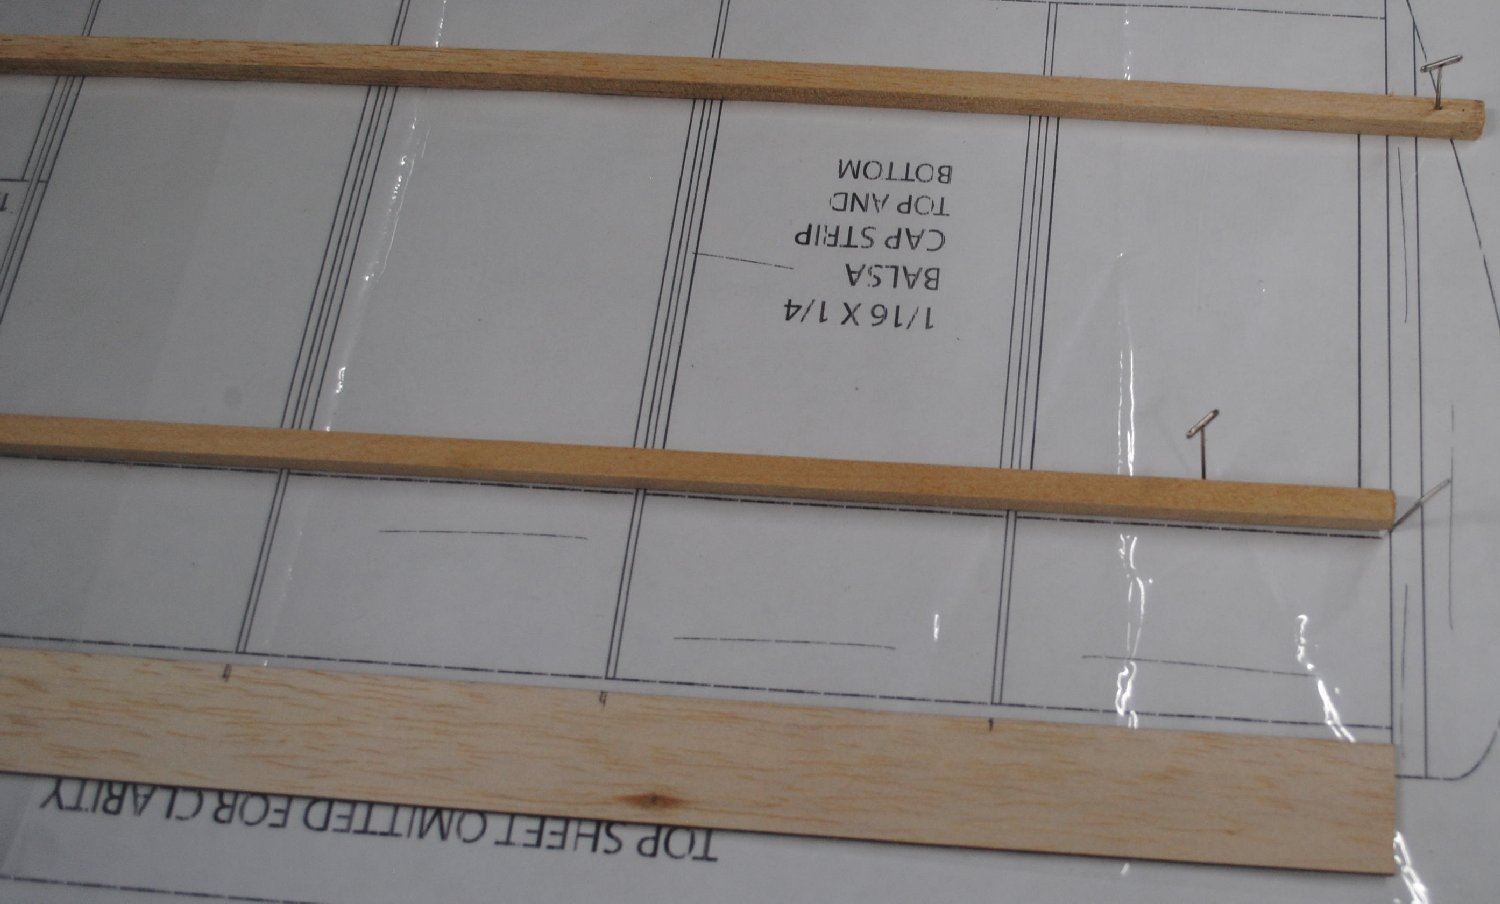
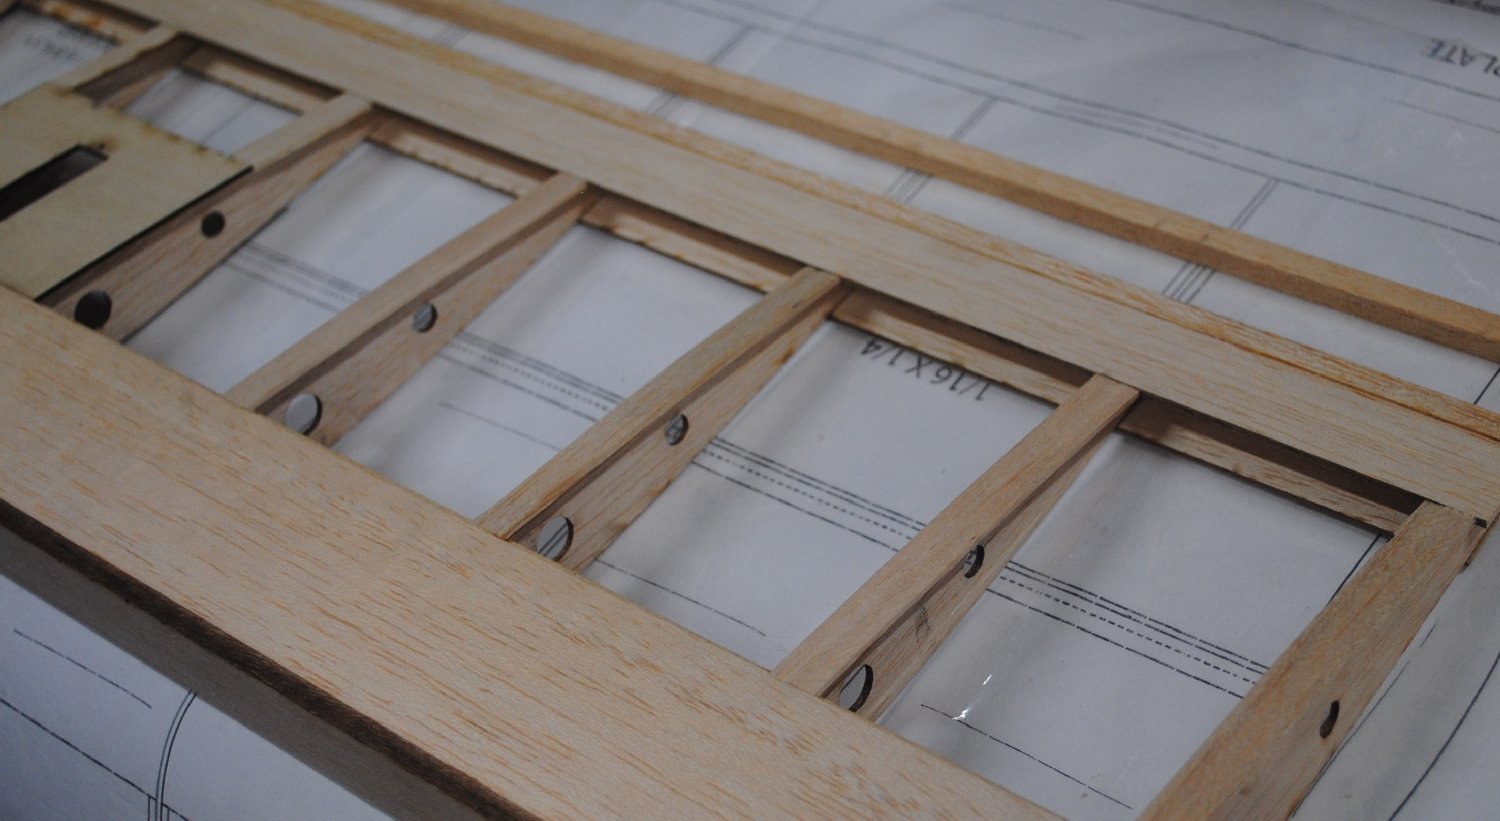
Use pins to place the bottom 1/4 x 1/4 hard wood spar. Because it’s hard you can’t pin through it, but you can fence it in pretty easily with about 3 or 4 pins. If it wants to warp a little bit, place the pins strategically to straighten it. Lean the pins away from the spar a little bit so they will not interfere with the top spar when it is added later.
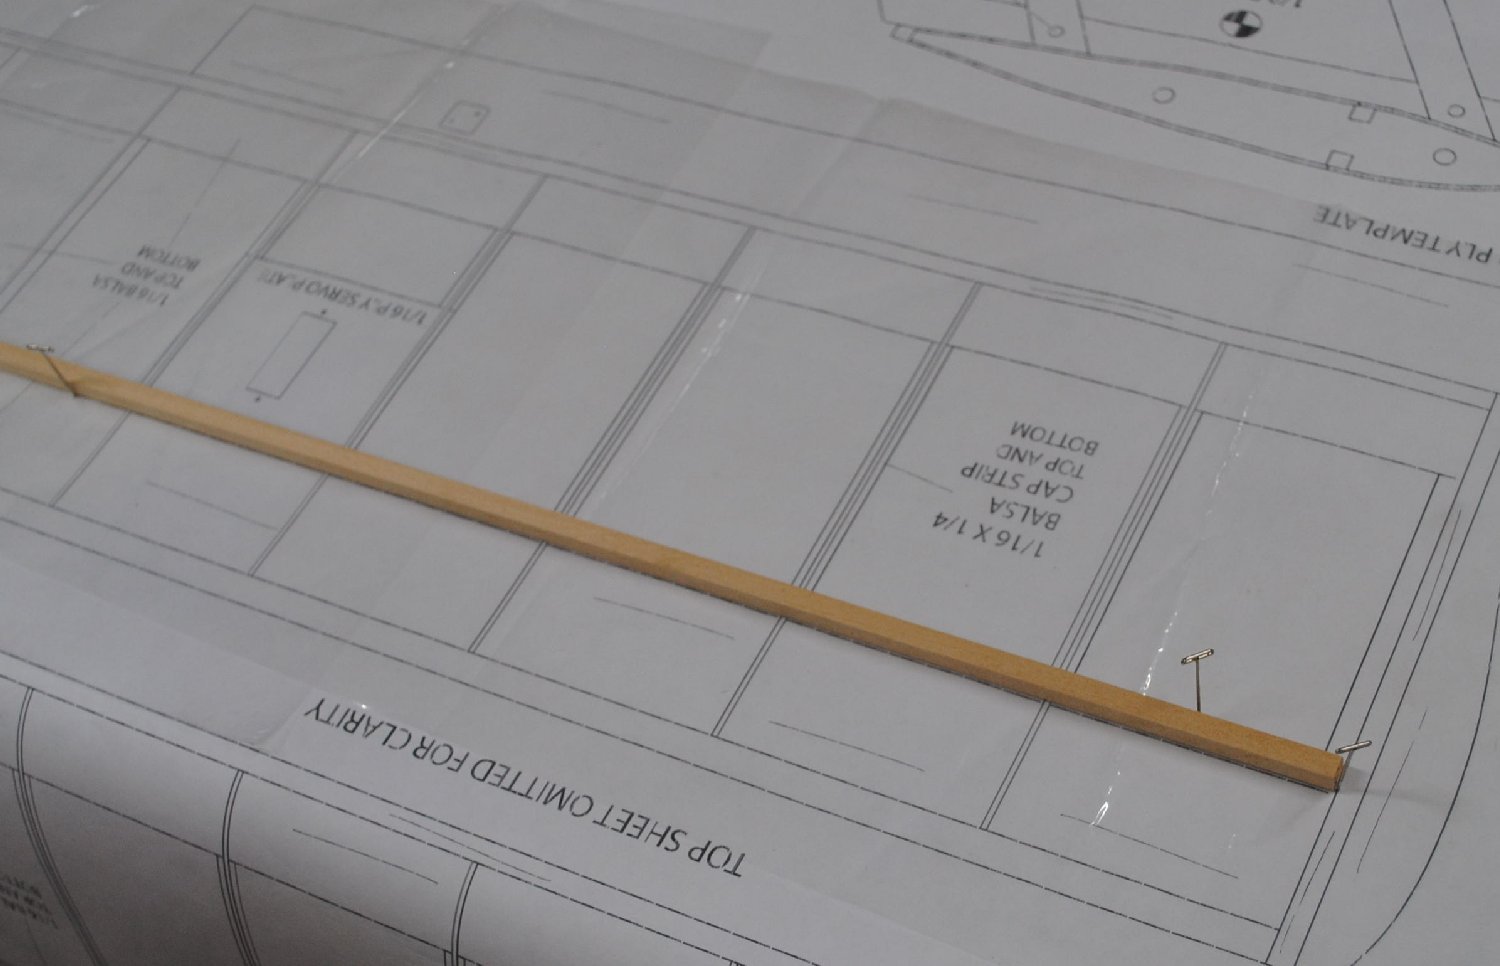
Pin a 1/4 inch balsa stick to the table at the front edge of the trailing edge sheeting on the plan. It’s easy to stick pins through this stick. Just don’t stick any where they will interfere with the 1/16 inch sheeting. Notice how the pin in the photo is leaning away from the trailing edge sheeting.
Mark the rib locations on a piece of 1/16 x 1 inch x 48 inch balsa sheeting and set it aside for now. A ballpoint pen works really well on balsa.
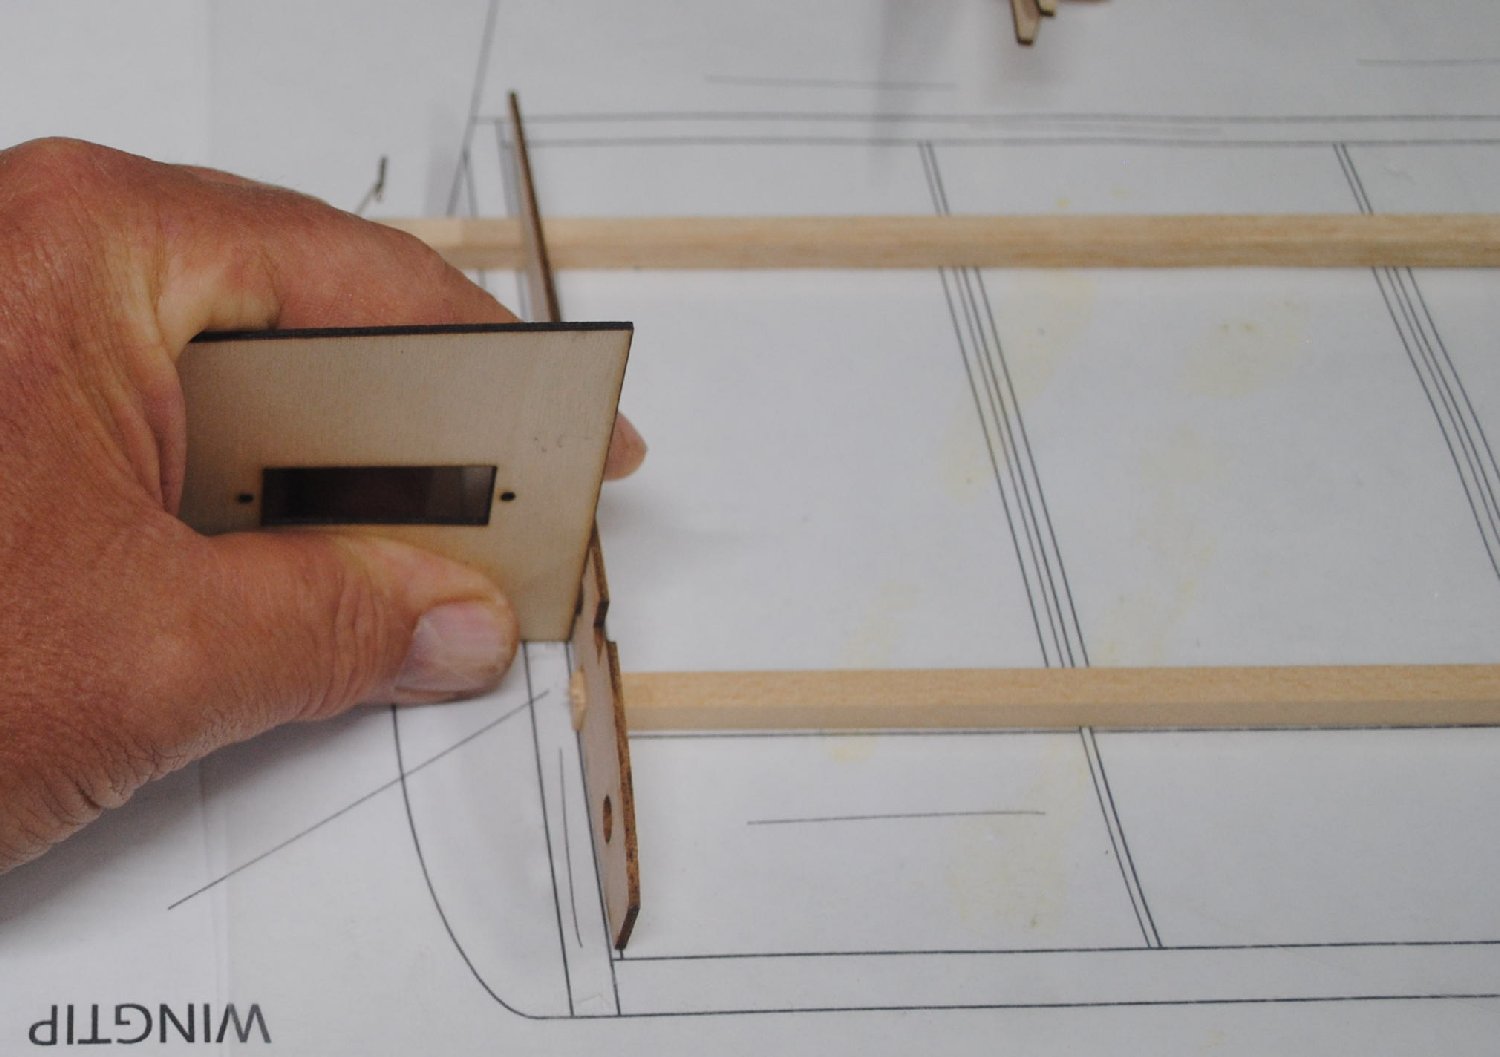
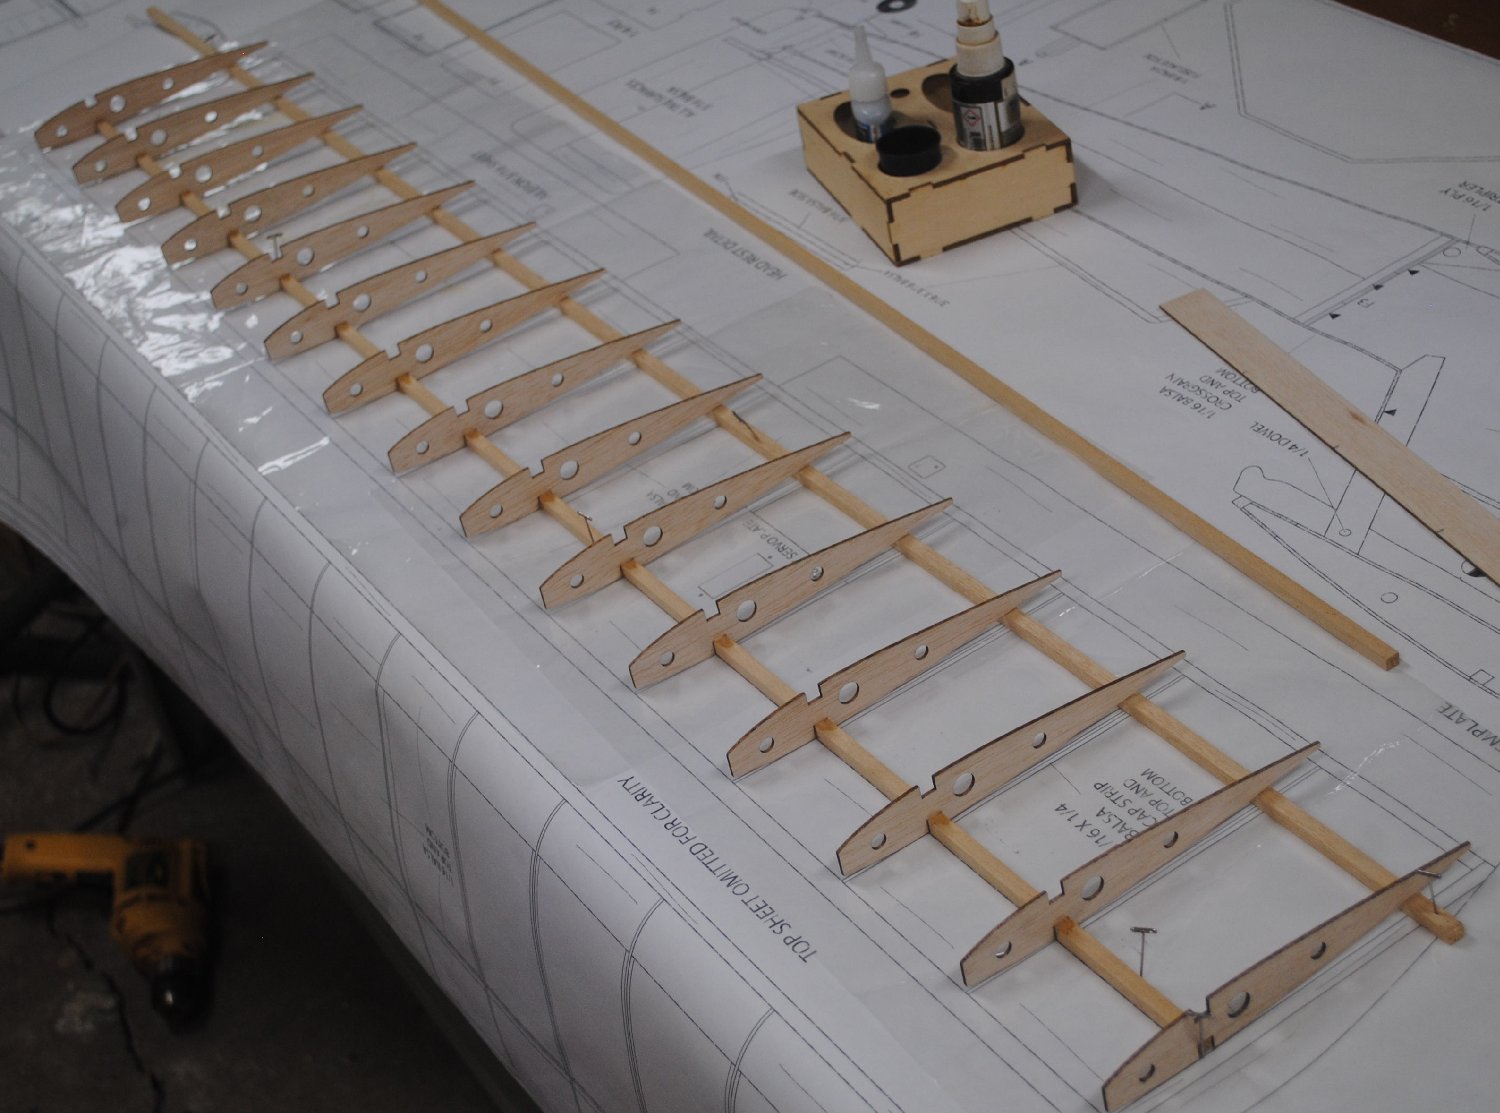
Place a rib in its correct location, aligned properly with the plan, and resting on the balsa stick. Use a square to make it stand up straight, and glue it to the spar with a touch of thin CA glue. (Do not glue the rib to the balsa stick.) You can use other types of glue, such as Titebond or Fab Tac. I really like Fab Tac. But with thin CA you can build a wing so fast it will make your eyes burn.
Continue gluing all of the ribs in place on the bottom spar, gluing only at the spar. Remember not to glue the ribs to the 1/4 inch balsa support beam.
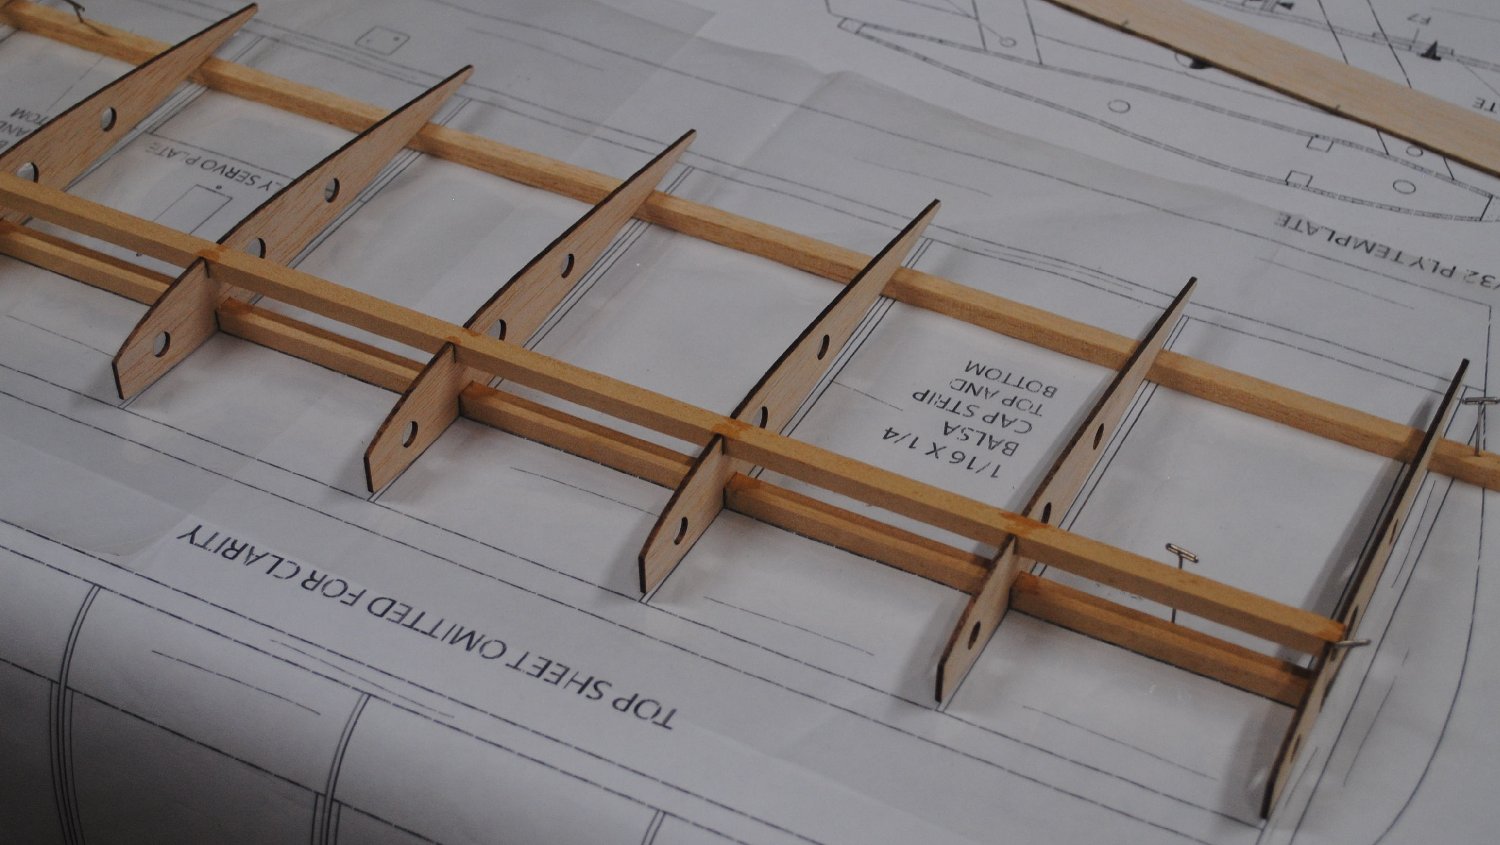
Put the top spar in place in the spar notches. It’s OK to trim it to length, but it always feels stupid to trim it too short, so I like to trim it 1/8 inch oversize, or not trim it at all. When it looks right, glue the top spar. Just put a little touch of thin CA on each rib where it meets the back of the spar, then do the same along the front side of the spar. Don’t be tempted to use tons of glue because it takes only a tiny amount of thin CA to bond the wood together, and any additional just runs down and makes a mess.
Test fit the top trailing edge sheeting. You want it to reach all the way to the tails of the ribs, and it’s preferable if it hangs over just a hair just to make sure it doesn’t come up short. Sometimes the sheeting will be warped. If so, orient the warp so it protrudes beyond the trailing edge in the middle. This way you can easily put it in the right place at each end without worrying about the middle.

Although that diagram makes it look like we’re applying the sheeting below the ribs, we’re really putting it on top.
Don’t be tempted to straighten warped sheeting, because the warp will return after the glue dries. The marks you made on the sheeting are supposed to help you line up the wing ribs. If you have any ribs that don’t want to stay in the right place, you can stick pins into the table next to them to hold them where they belong. Slight deviance is tolerable, so pick your battles. It’s prettier when everything is straight, but the plane will fly even if your ribs aren’t 100% in line.
When you have a plan of action, place medium CA on top of the last 3/4 inch or so at the trailing edge of each rib. Glue the 1 inch wide trailing edge sheet to the tops of the ribs, pressing it gently into place with your fingers while your hands press on the spar to hold the wing down on the table.
The way to make a warp-free wing is to hold the structure straight every time you add a piece of sheeting.
Next you’re going to add leading edge sheeting. Pull out any pins that are in the way of the sheeting.
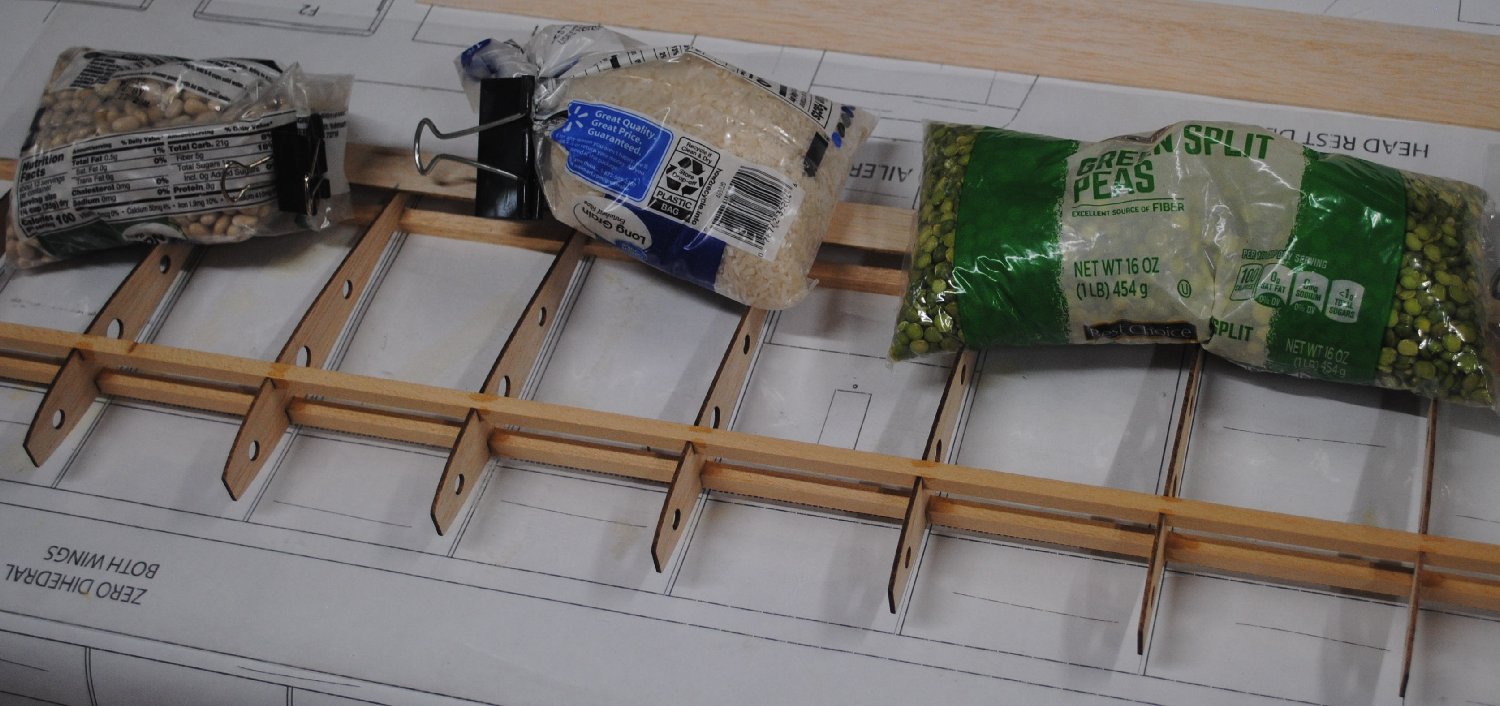
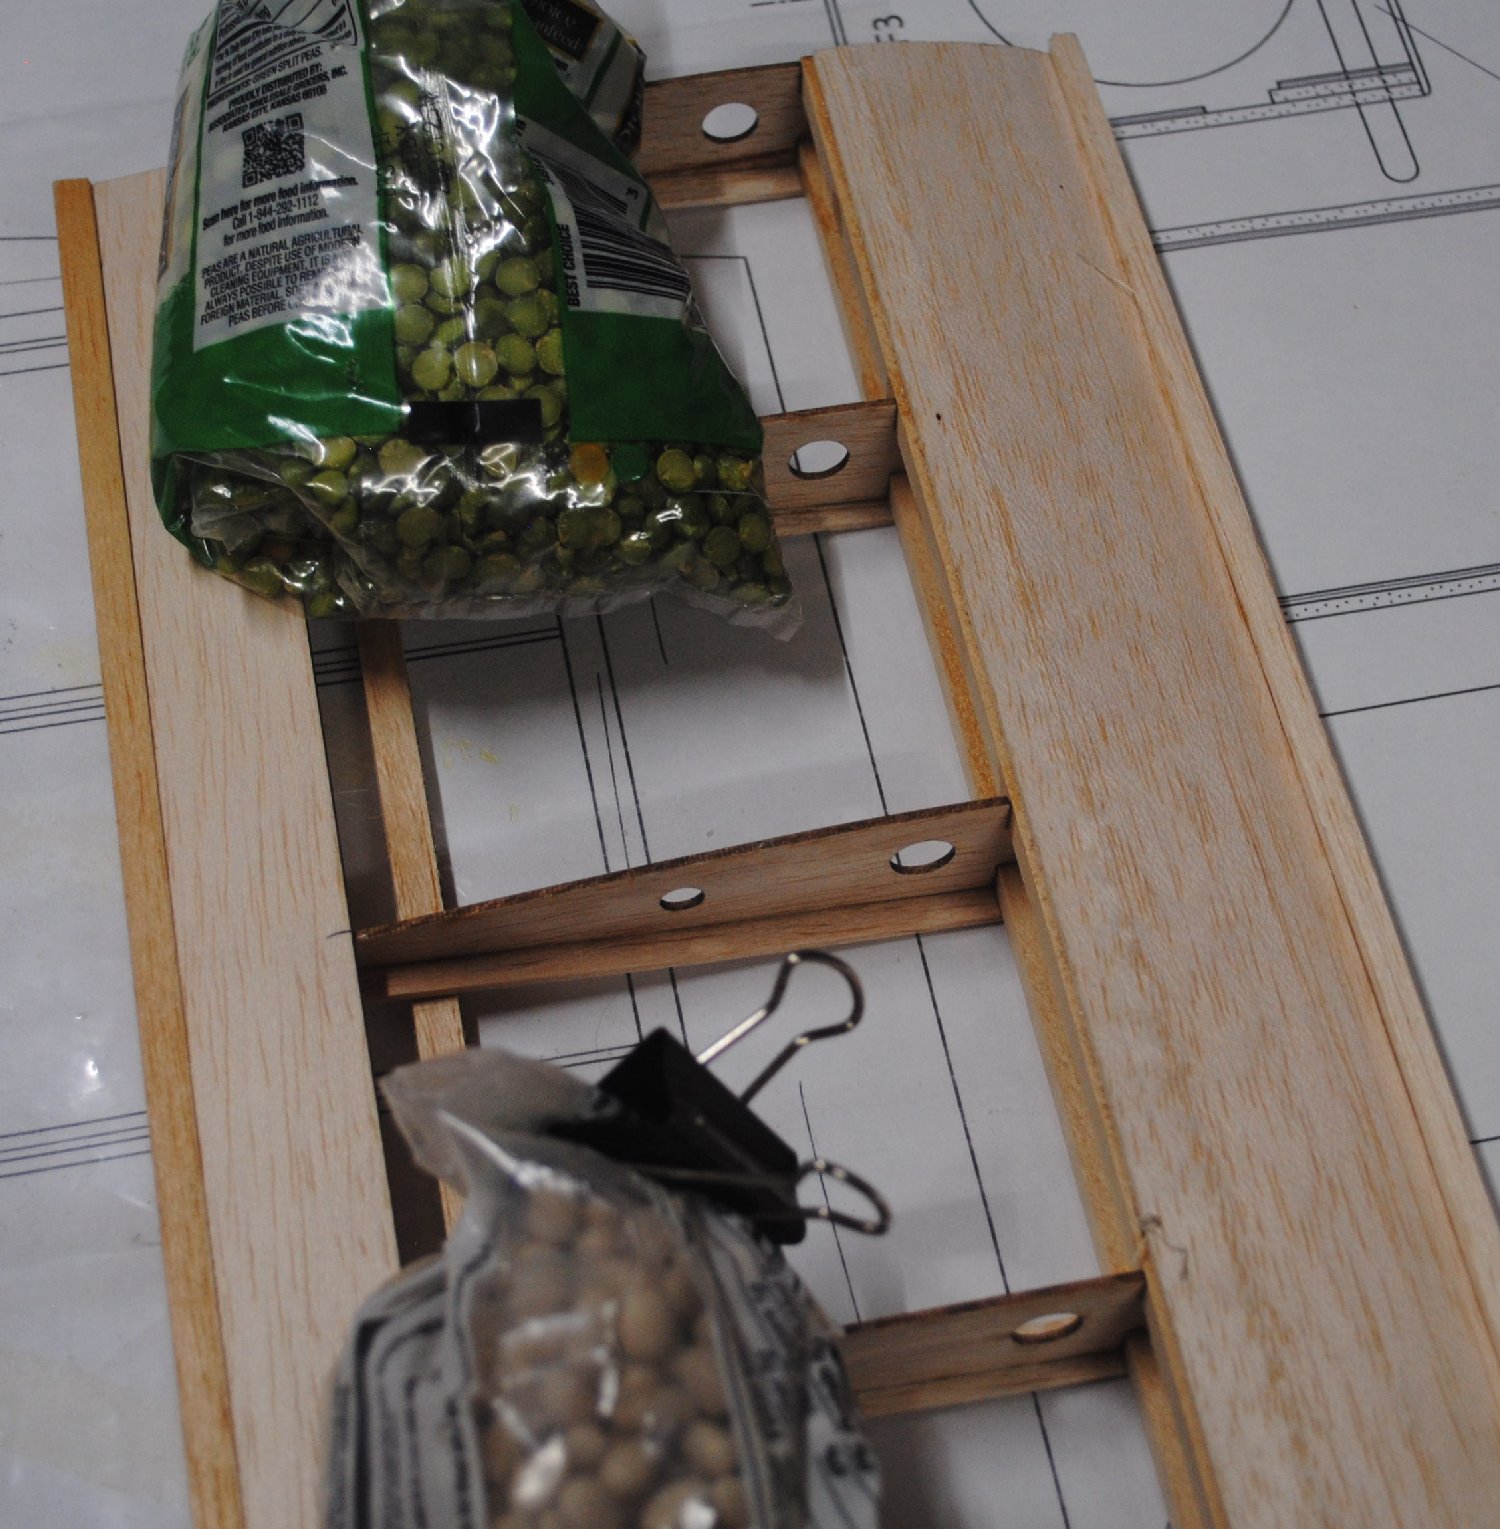
Add weights to the trailing edge to hold it flat on the table. Use sand bags, bean bags, canned food, or a 2×4 if you have one handy. You just want to make sure the rib tips don’t rise up when you press sheeting on the leading edge. What you REALLY don’t want is the trailing edge lifting in one spot while it’s touching the table in other spots, while you’re attaching a new piece.
If your leading edge sheeting is excessively curved, use a long straight edge to trim one edge straight.
Put medium CA on the top of the spar and the tops of the ribs. Press the sheeting firmly to the spar, holding it for several seconds until the glue cures. Then bend it down to the ribs with your fingers while holding the wing in place with your thumb. Remember the rule: Every time you add sheeting, make sure the wing is flat while you’re doing it. Hold the sheeting for several seconds to set the glue off, then move along and hold it on the next several ribs, etc.

(Helpful Hint: Sometimes when you put medium CA on the rib and press the sheeting, it will refuse to stick all the way to the front of the rib where the curve is more pronounced. The best remedy is to pick up the wing and hold it up vertically, and press the sheeting around the curve to the leading edge while sticking the last 1/4 inch with thin CA. Do this with each rib, one at a time. But that leads to the other problem, which is that the presence of medium CA will retard the curing of thin CA, forcing the use of accelerator. You can avoid trouble in the long run by leaving the front 1/4″ of each rib unglued when applying glue to the tops of the ribs and spar. Glue the sheeting in place, then hold the wing in your hand and glue the front bit on each rib with thin CA while pressing the sheeting in place with your finger.)
Now flip the wing over on the table. Make sure that the wing is sitting flat on the 1/4 inch balsa beam that is still pinned to your table. In other words, you don’t want the trailing edge sheeting sitting on the beam at one end, and the naked ribs sitting on it at the other end. The wing needs to sit flat.
Follow the same procedure as before to stick the top trailing edge sheeting on. Note that this sheeting does not need to have the rib locations marked, as the ribs are already glued in place and can’t move.
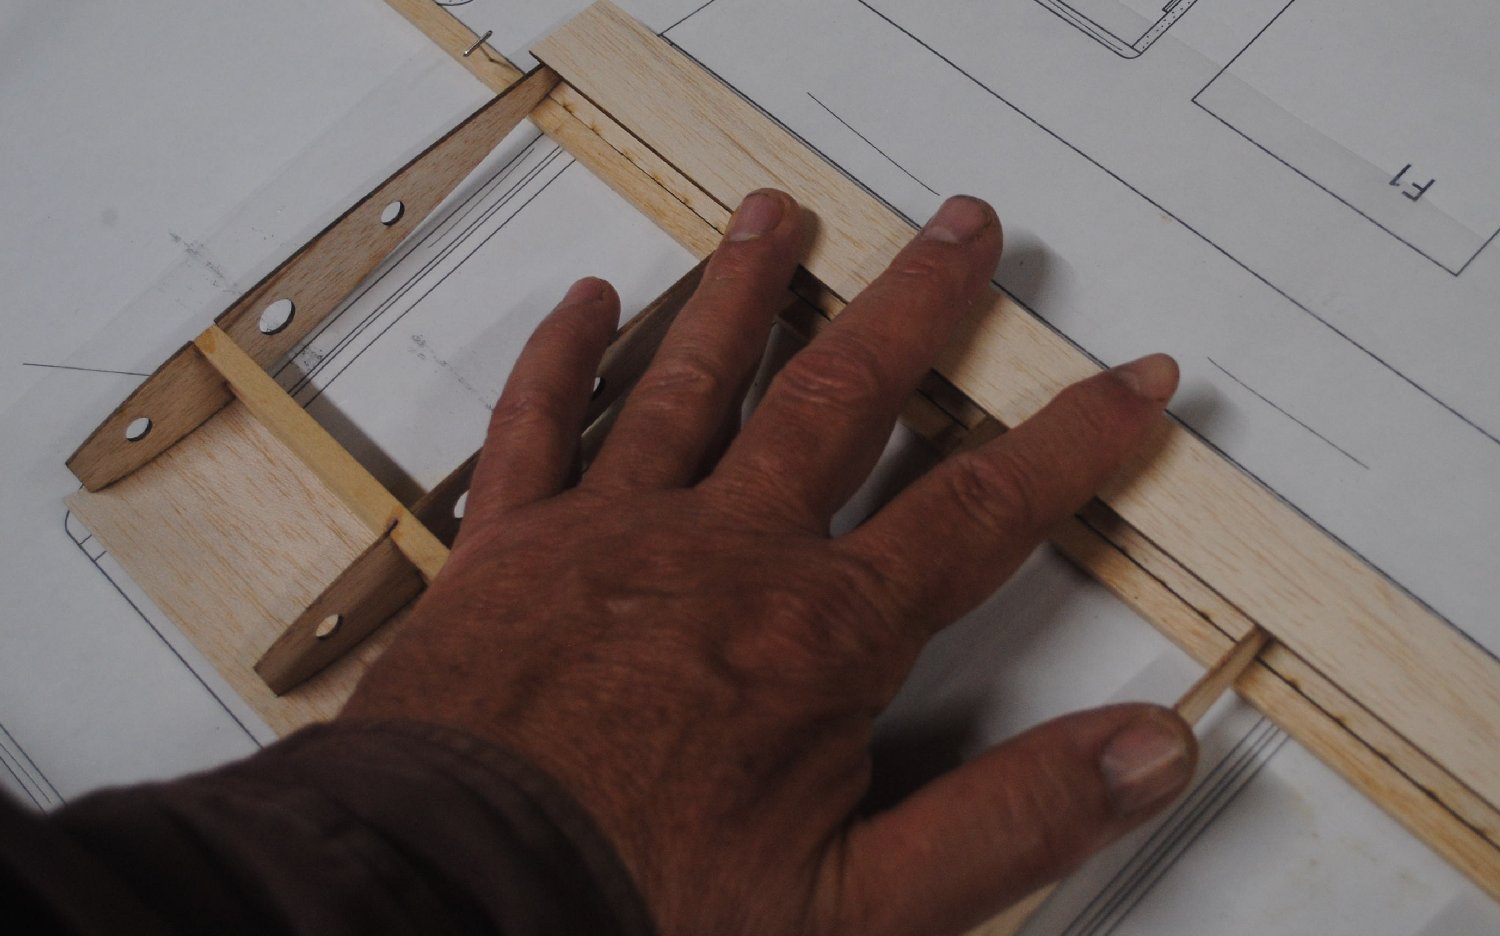
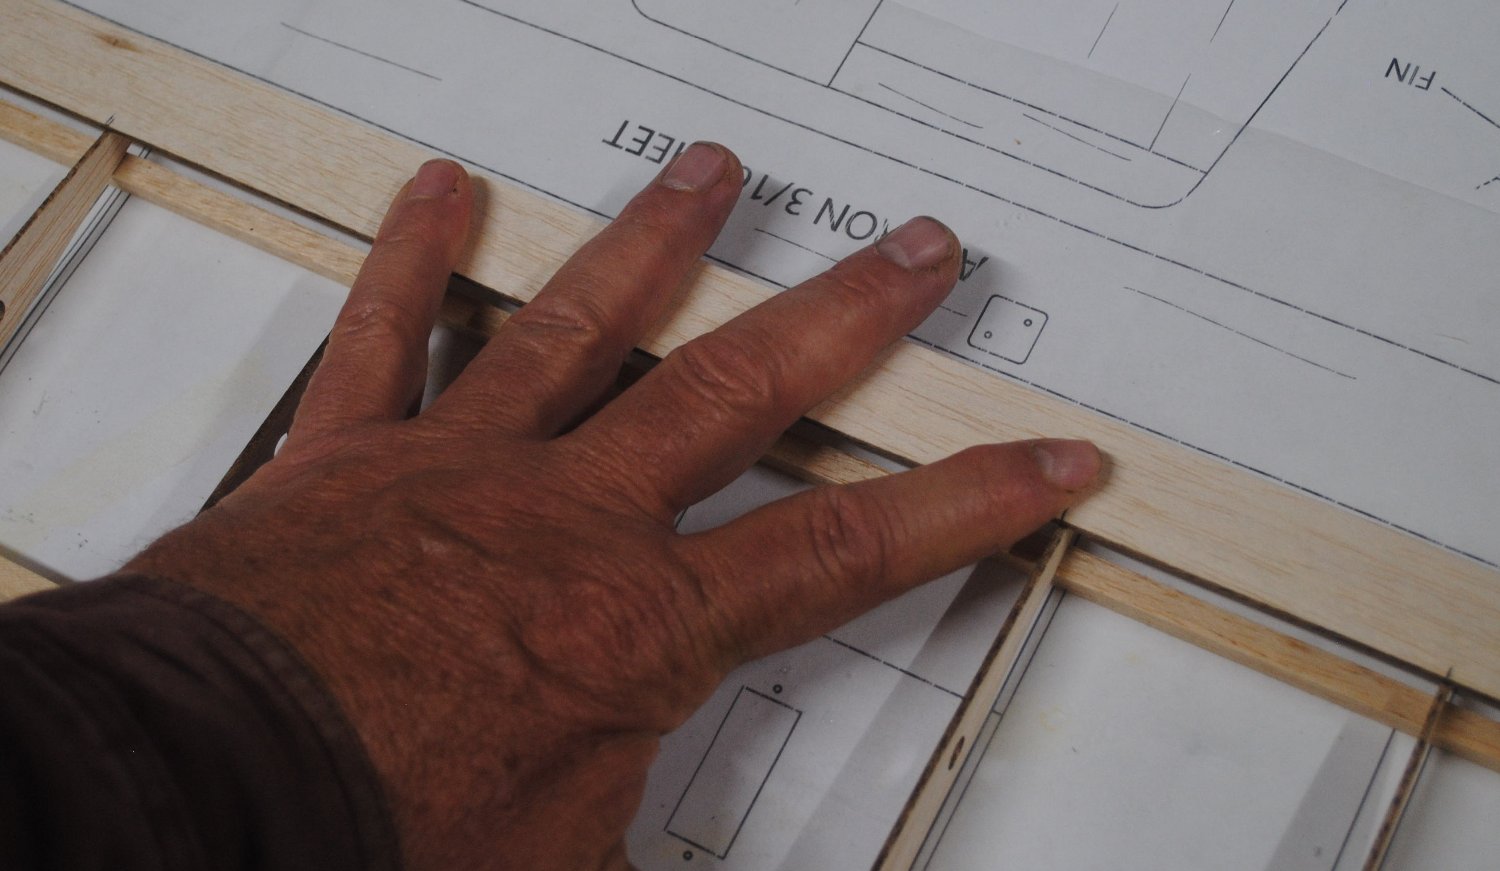
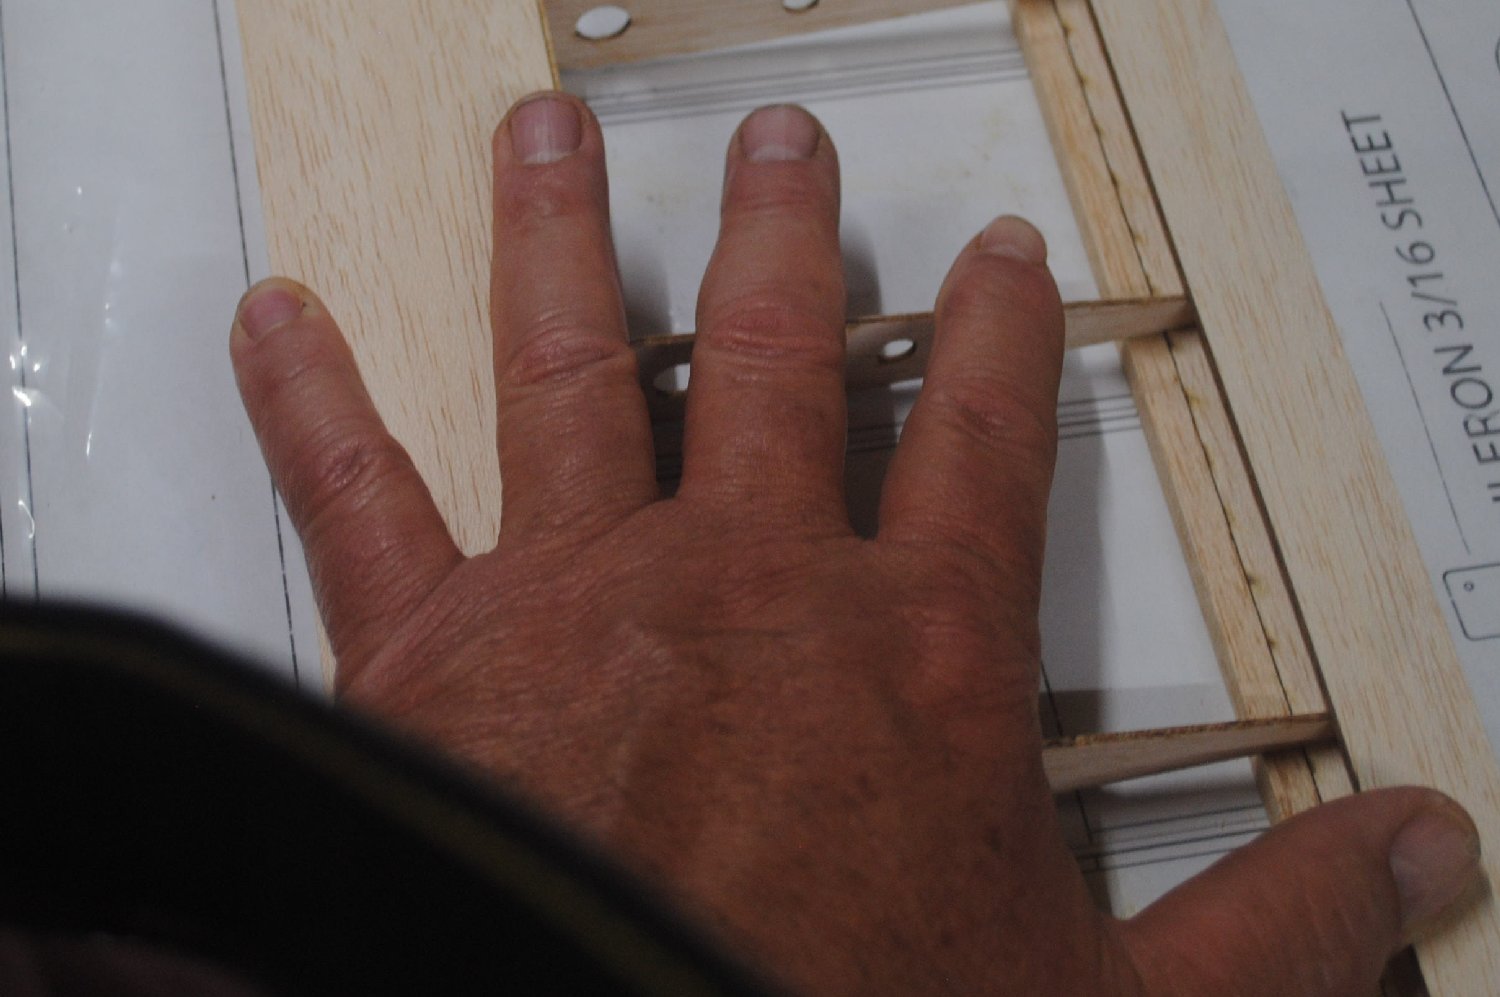
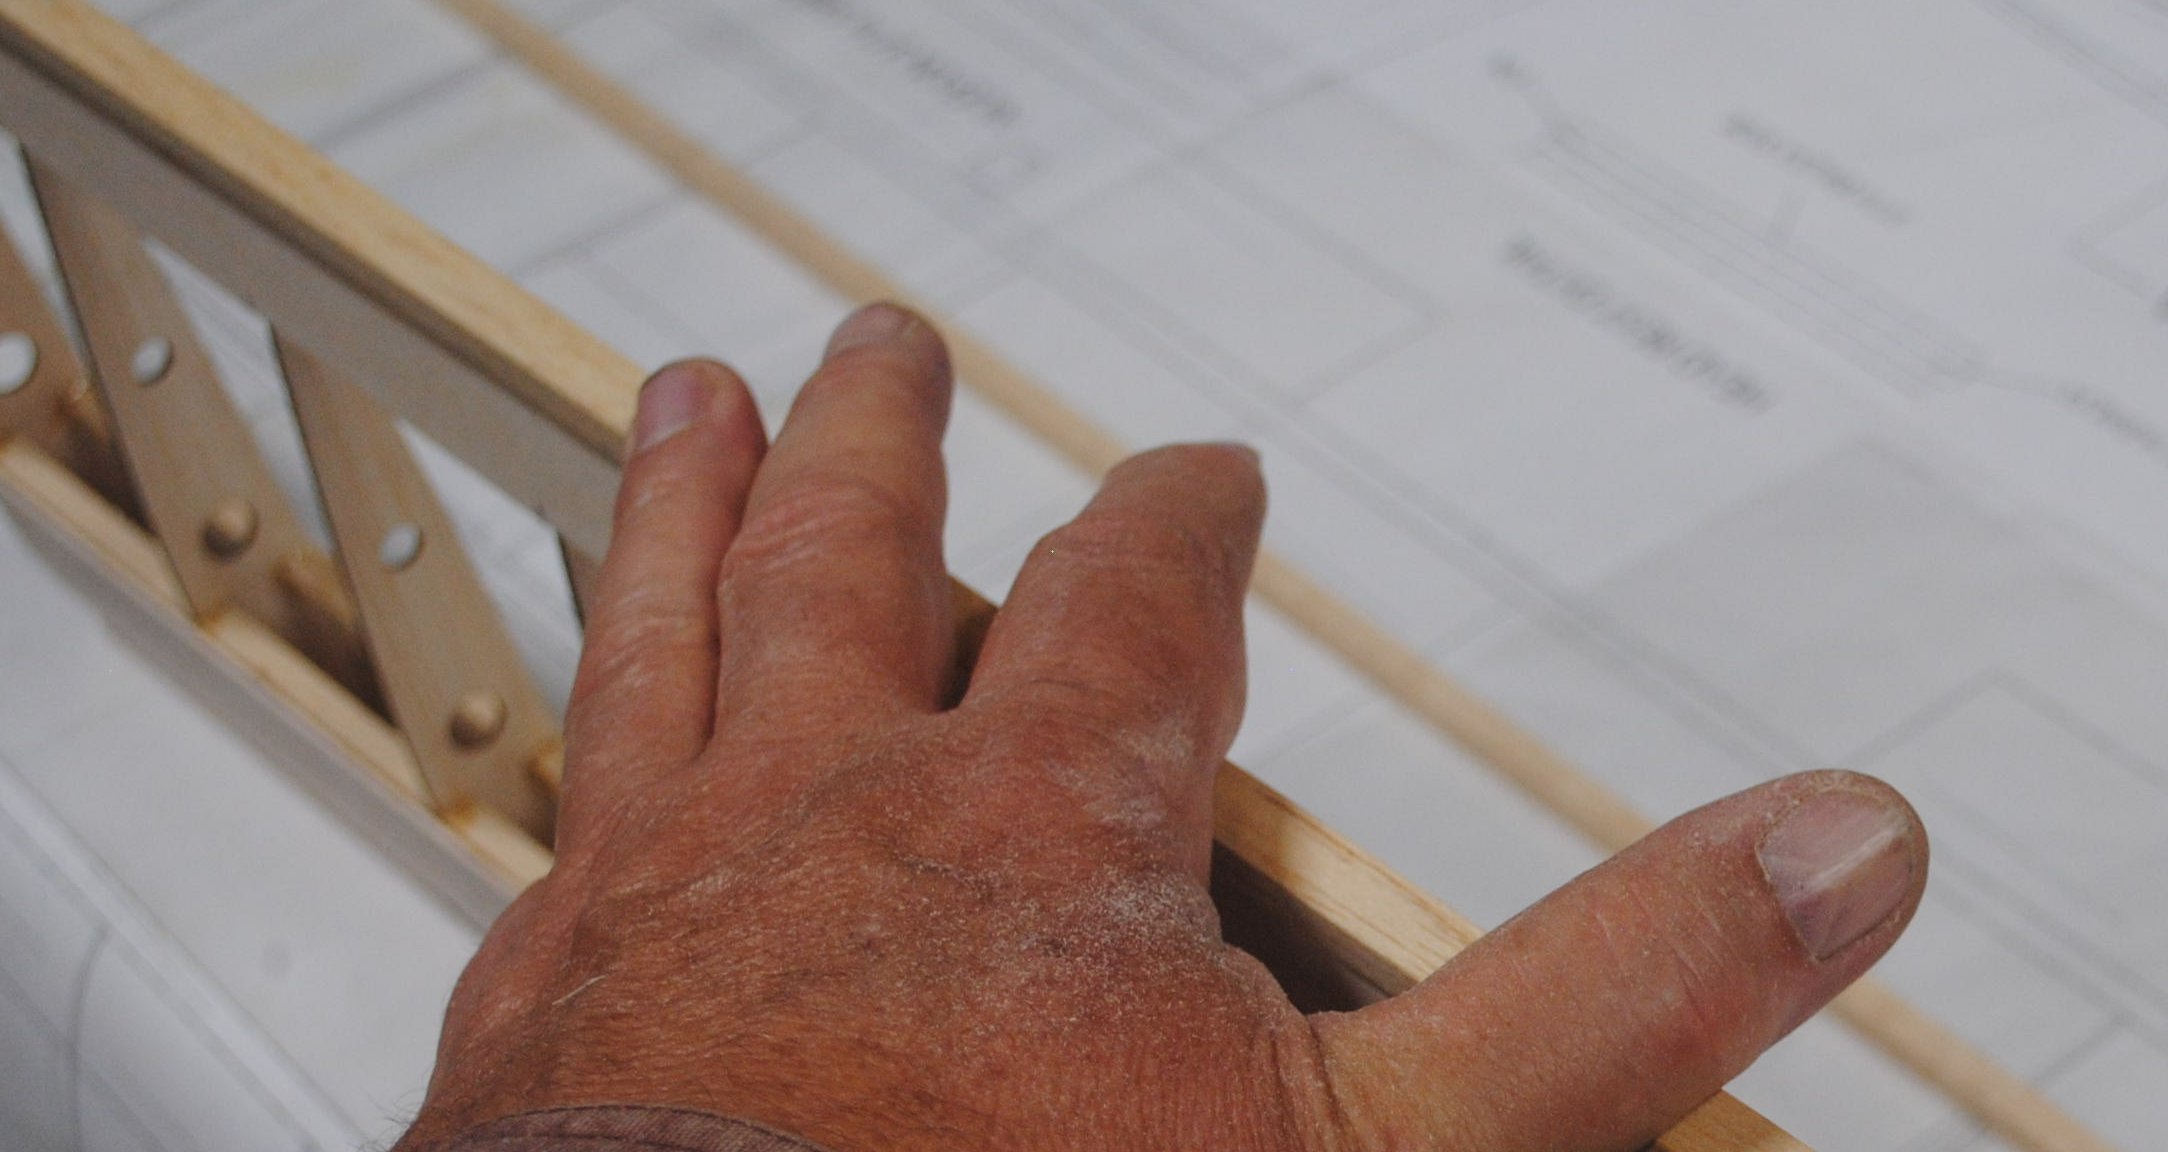
Repeat the process of adding leading edge sheeting. Hold the wing nice and flat. You can put the weights back on, or just use your other hand. You see only one hand in the photos because the other is holding the camera, but you are encouraged to use both hands to hold the wing flat. If you have a friend, use your friend’s hands, too. The flatter you hold the wing while applying sheeting, the better your wing will be in the end.
In this photo my whole hand is holding the wing flat, and my last finger is pressing the sheeting onto the rib. This works, but the job is better accomplished with more hands.
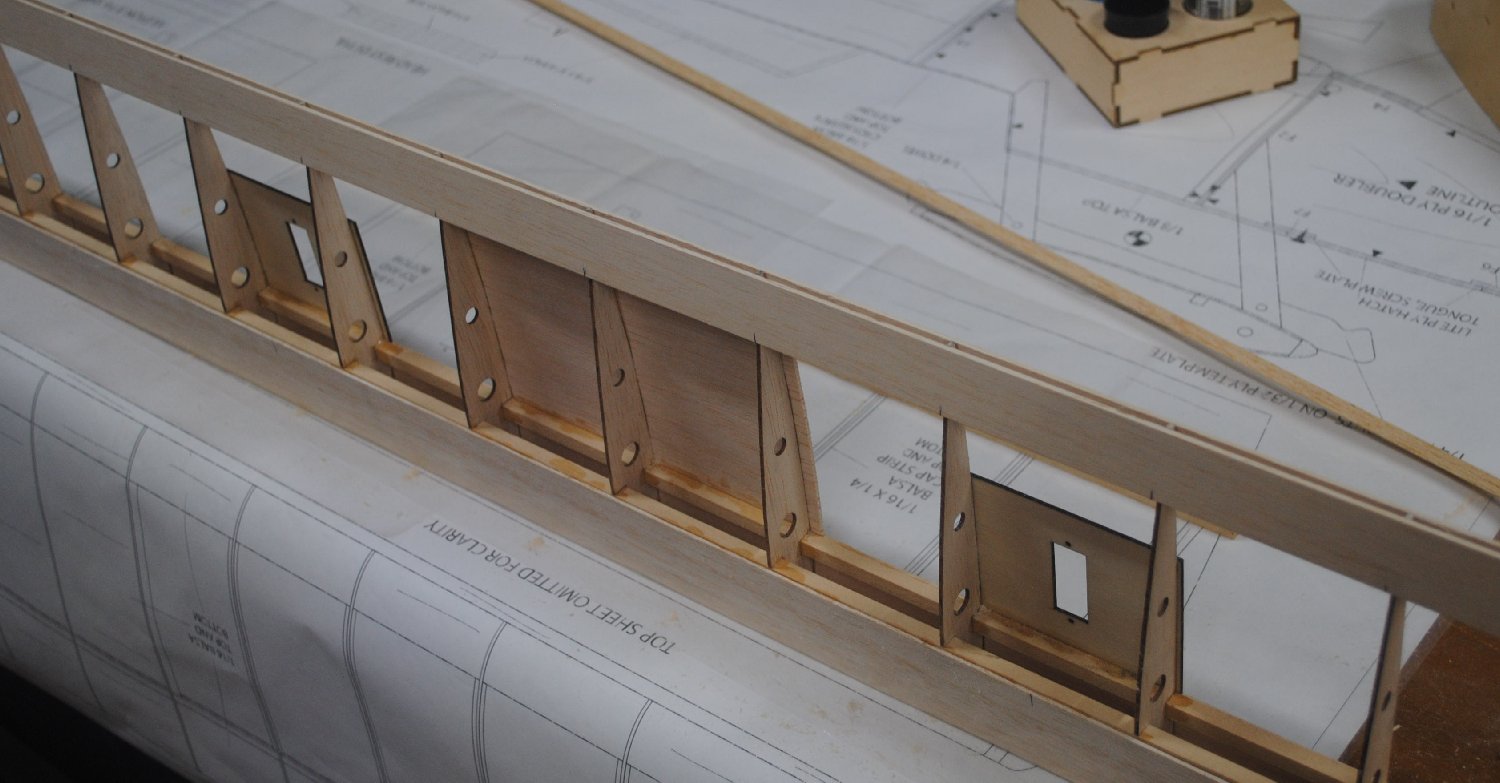
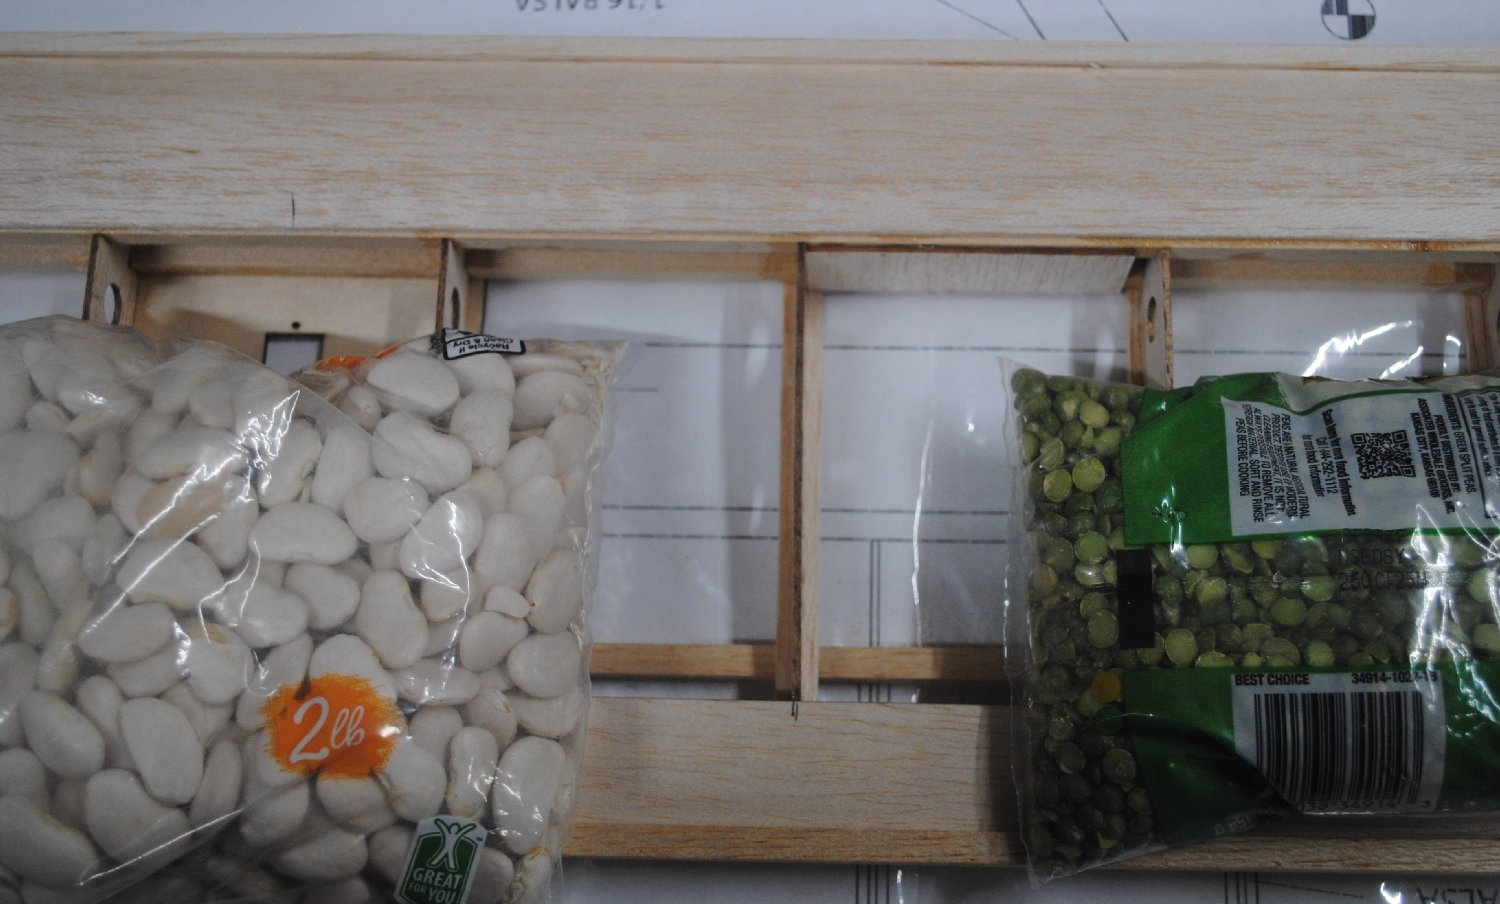
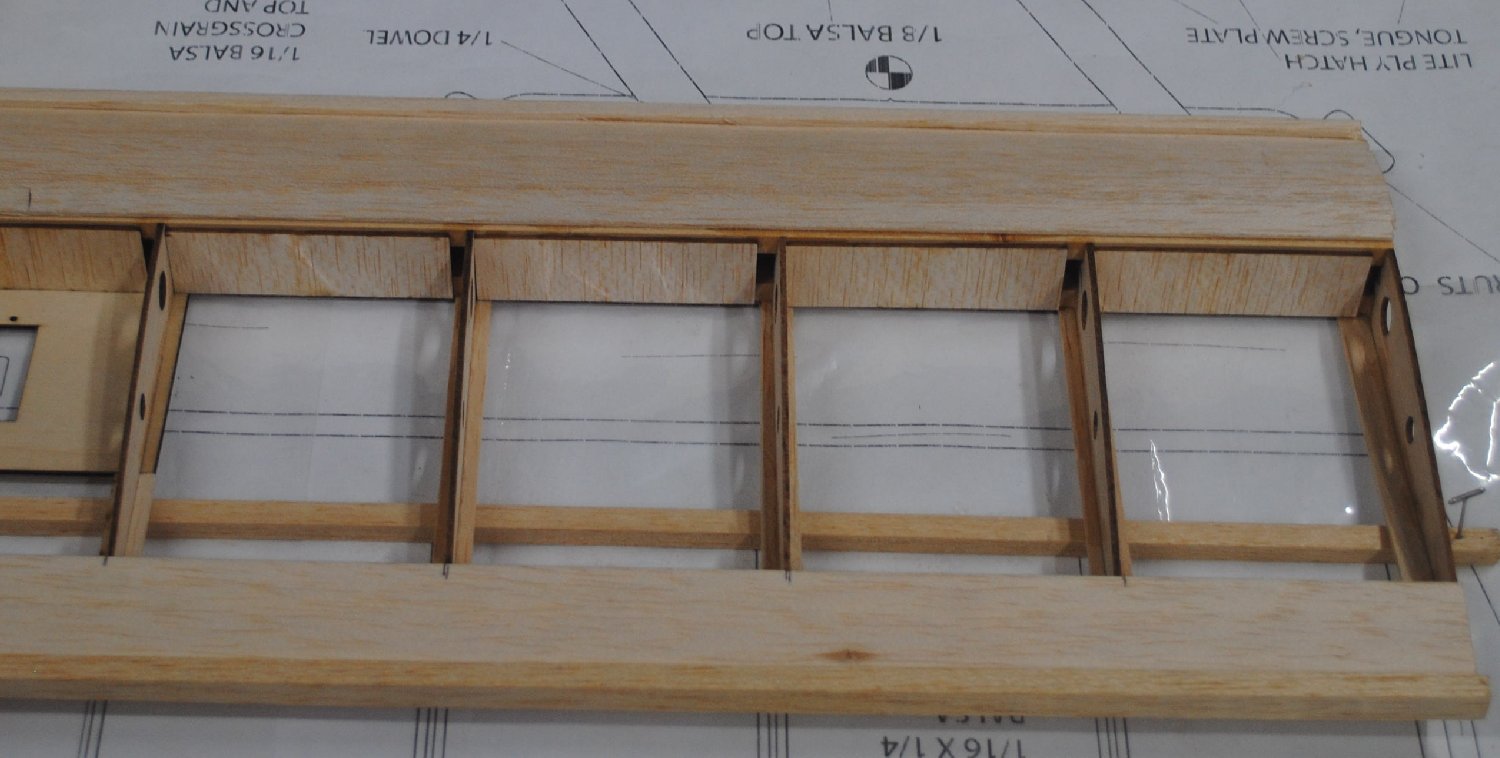
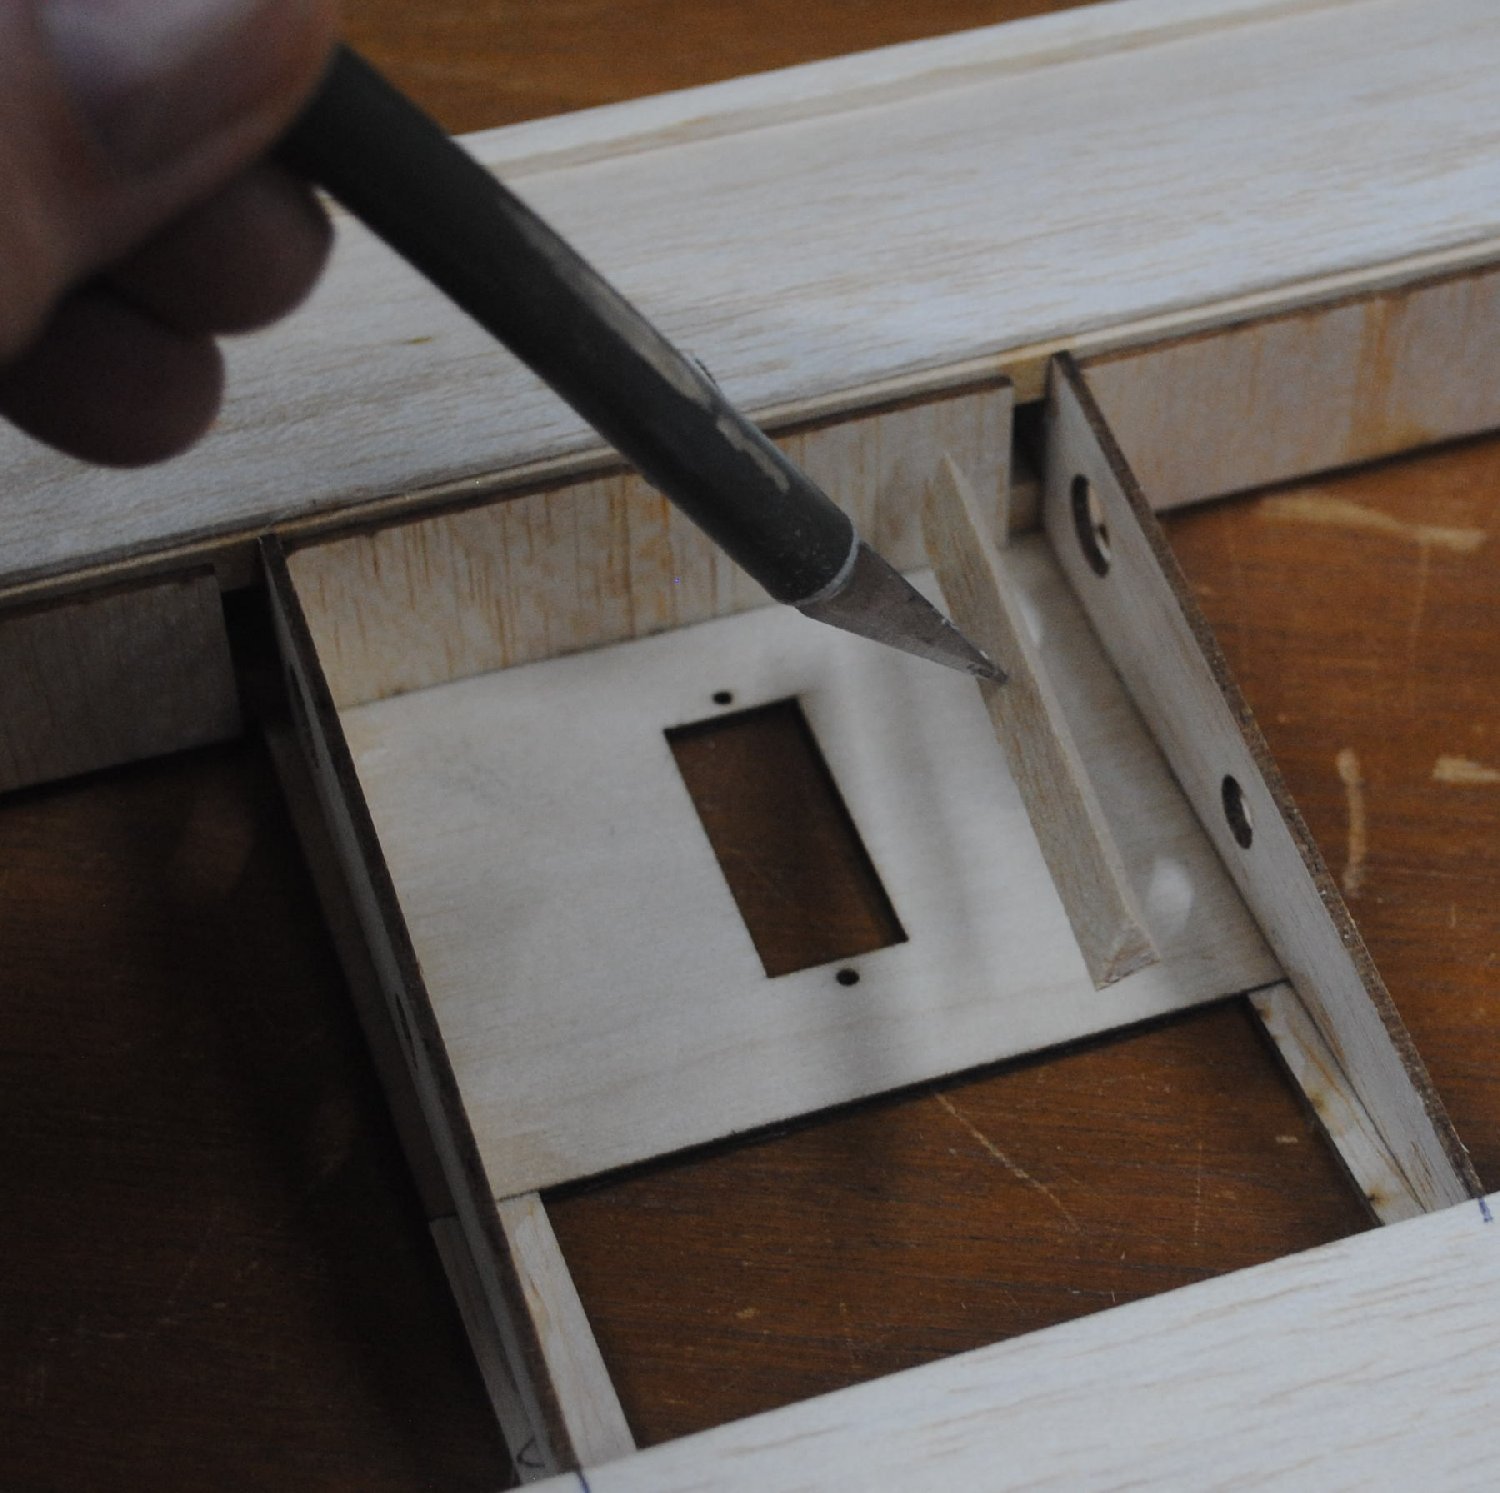
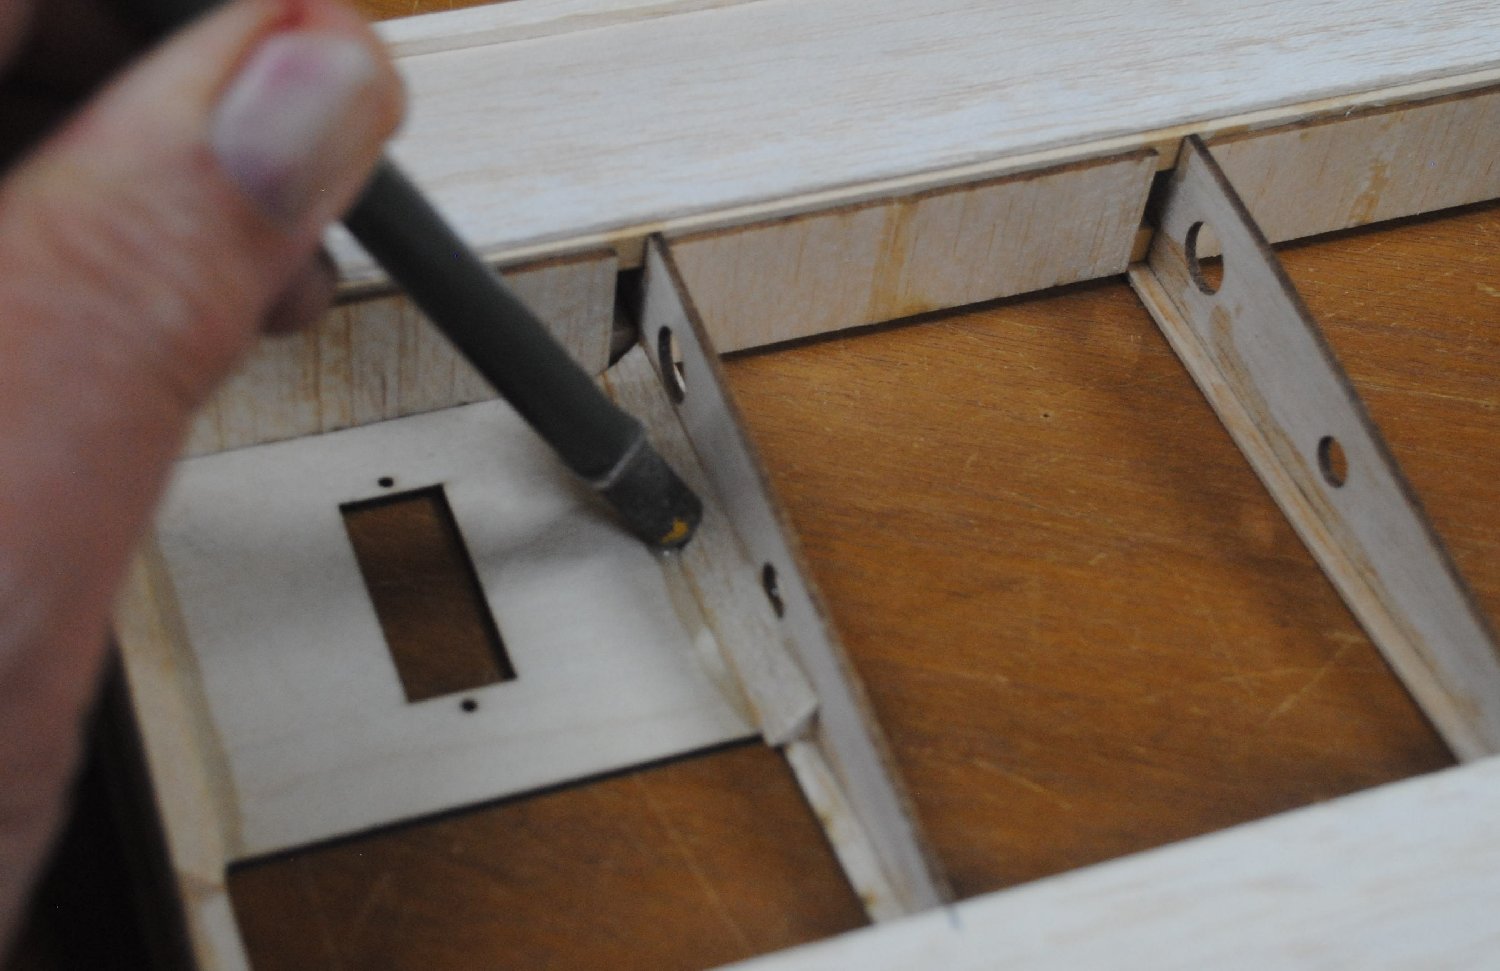
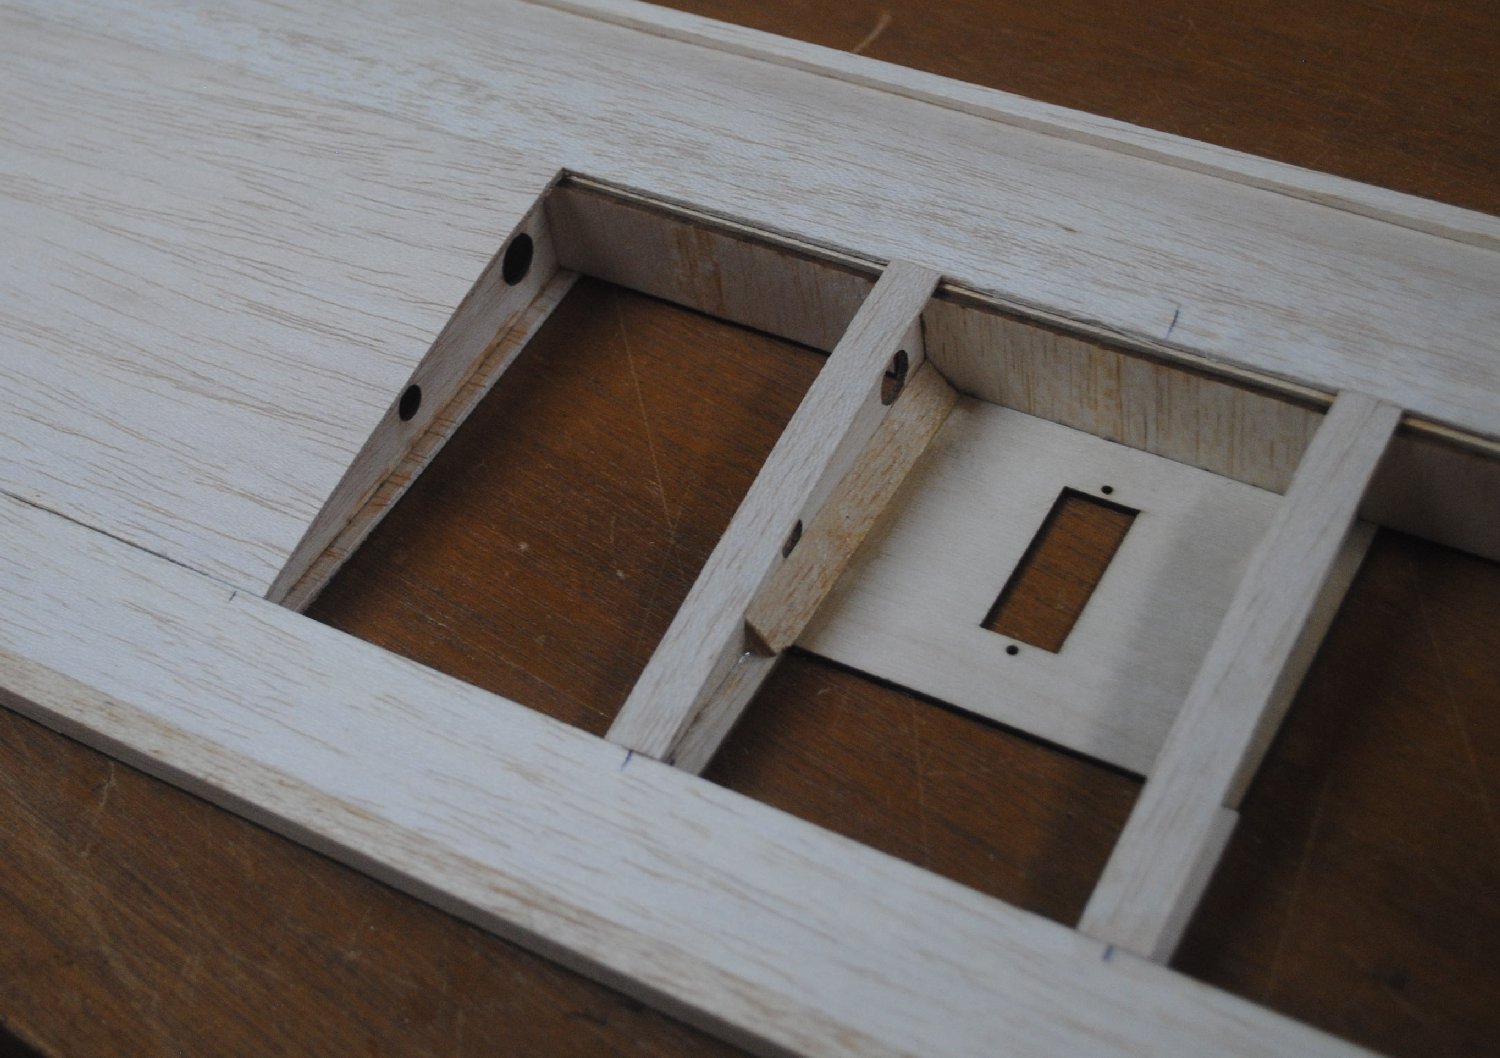
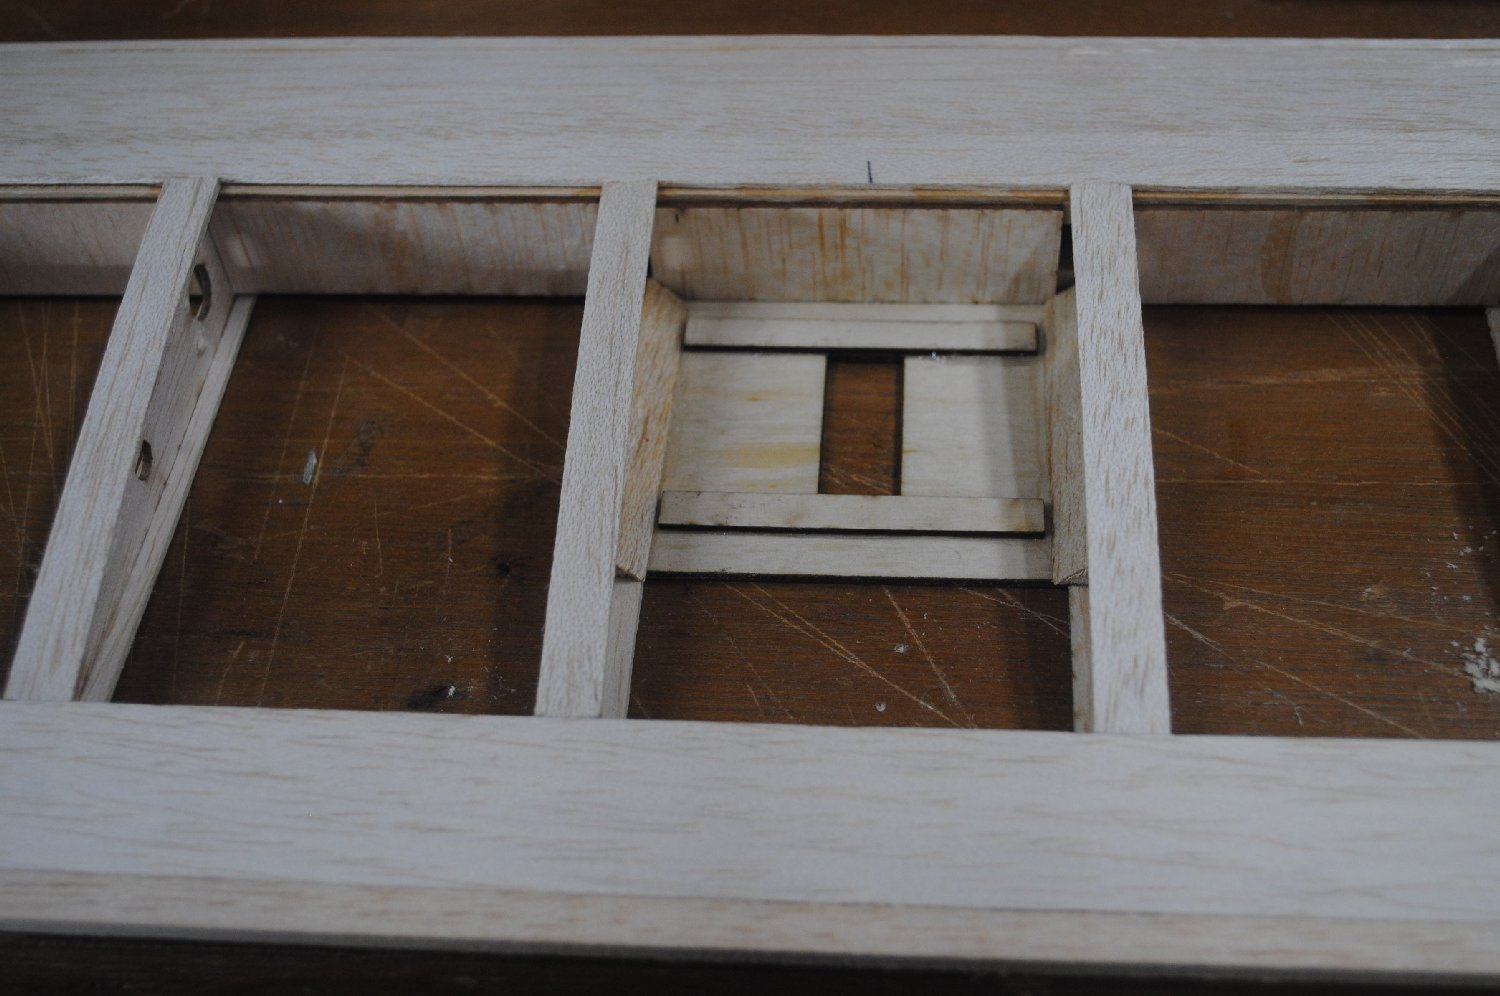
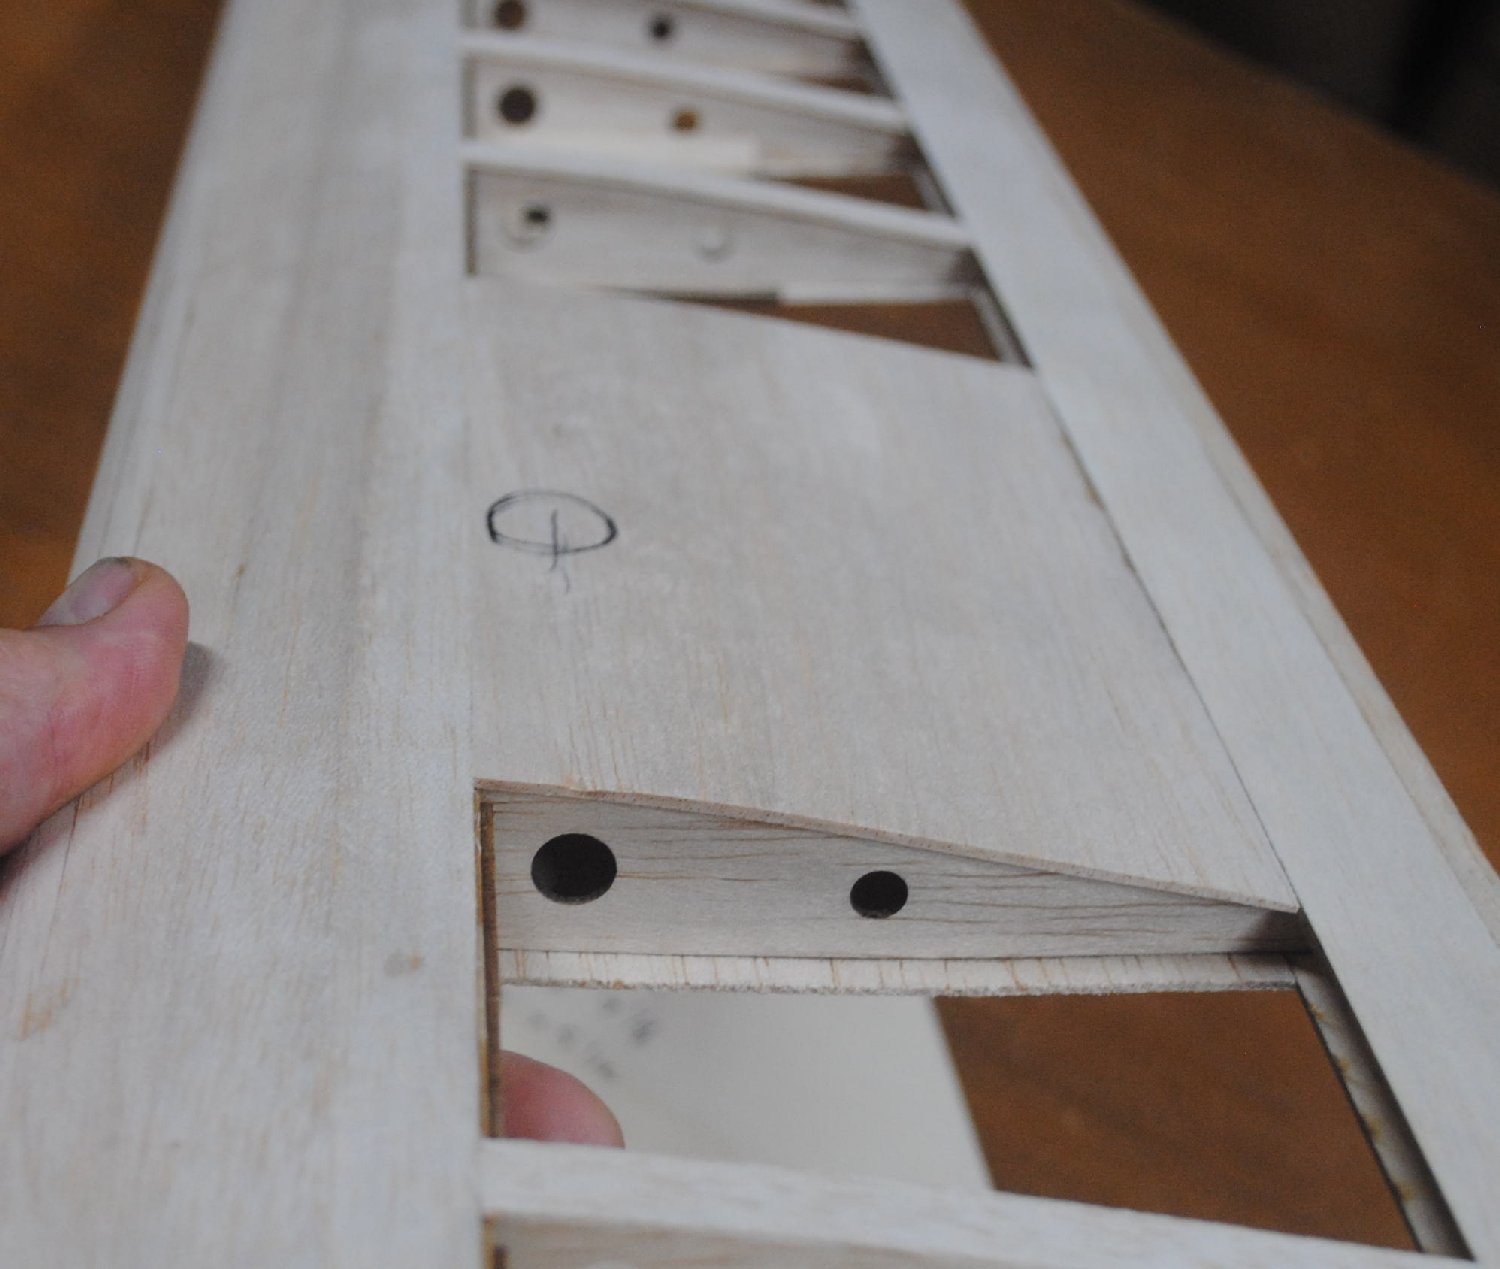
Add bottom sheeting to the center section of the wing. Don’t do the top sheeting yet. If you’re working on the bottom wing, add the servo plates. Check placement of the sheeting and servo plates on the plan, then double check so they don’t end up in the wrong place. Note that the location of the servo plate in the photo was marked with a pen.
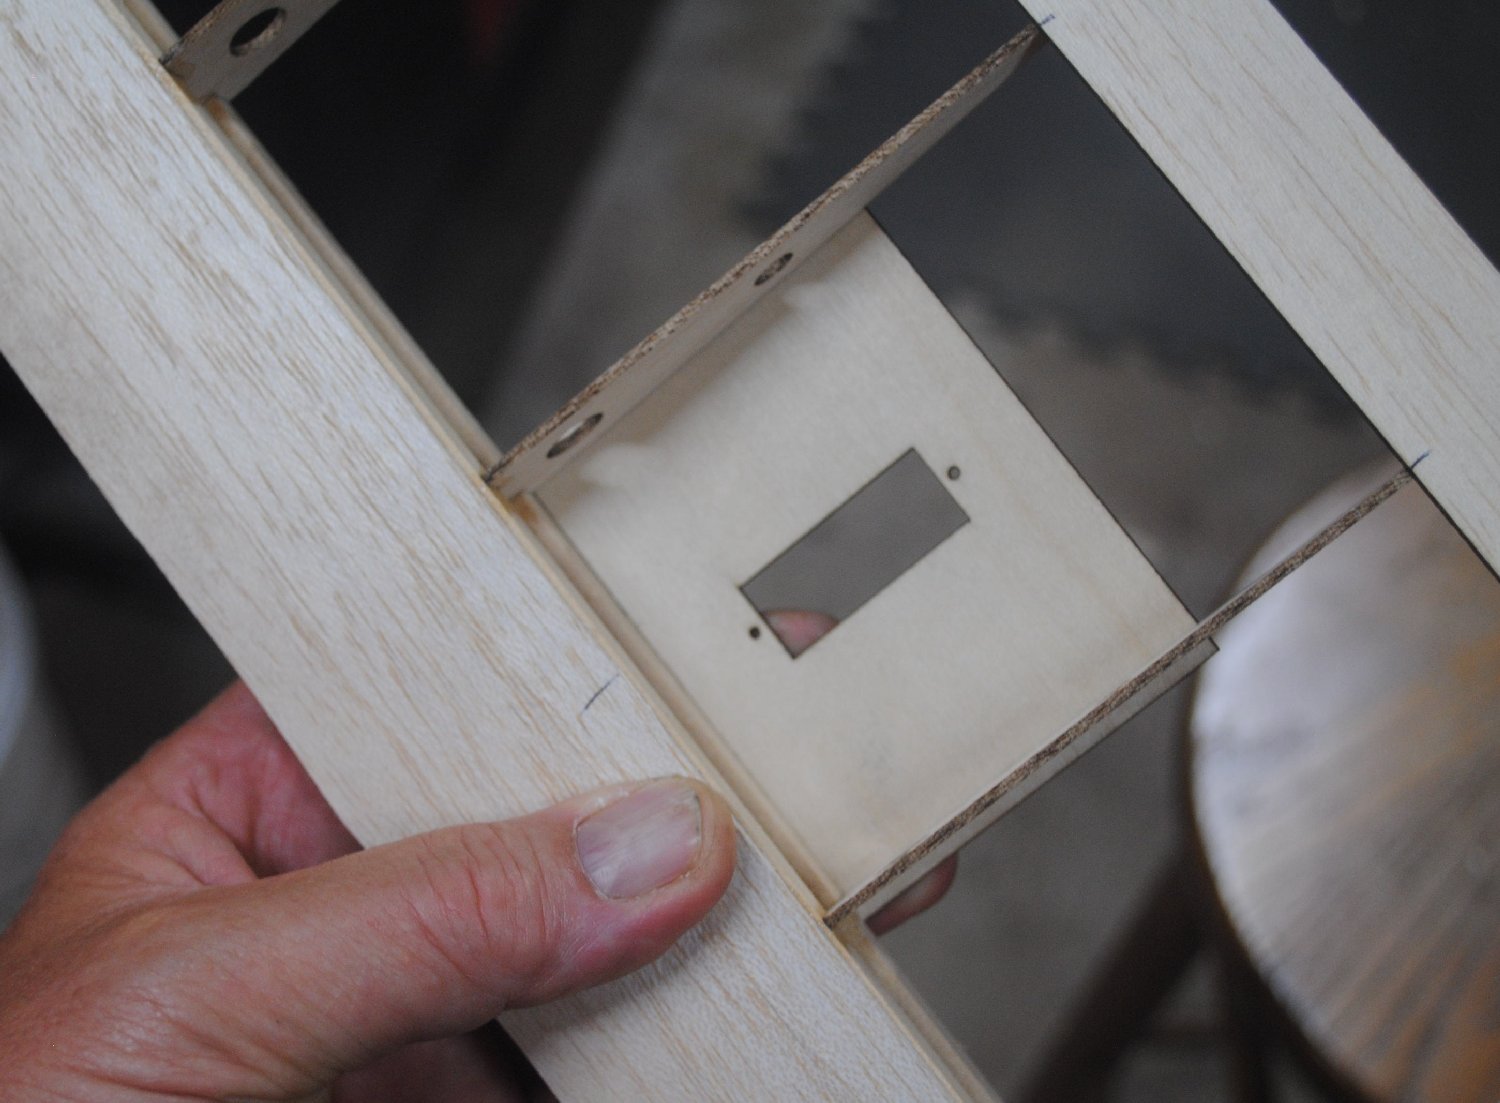
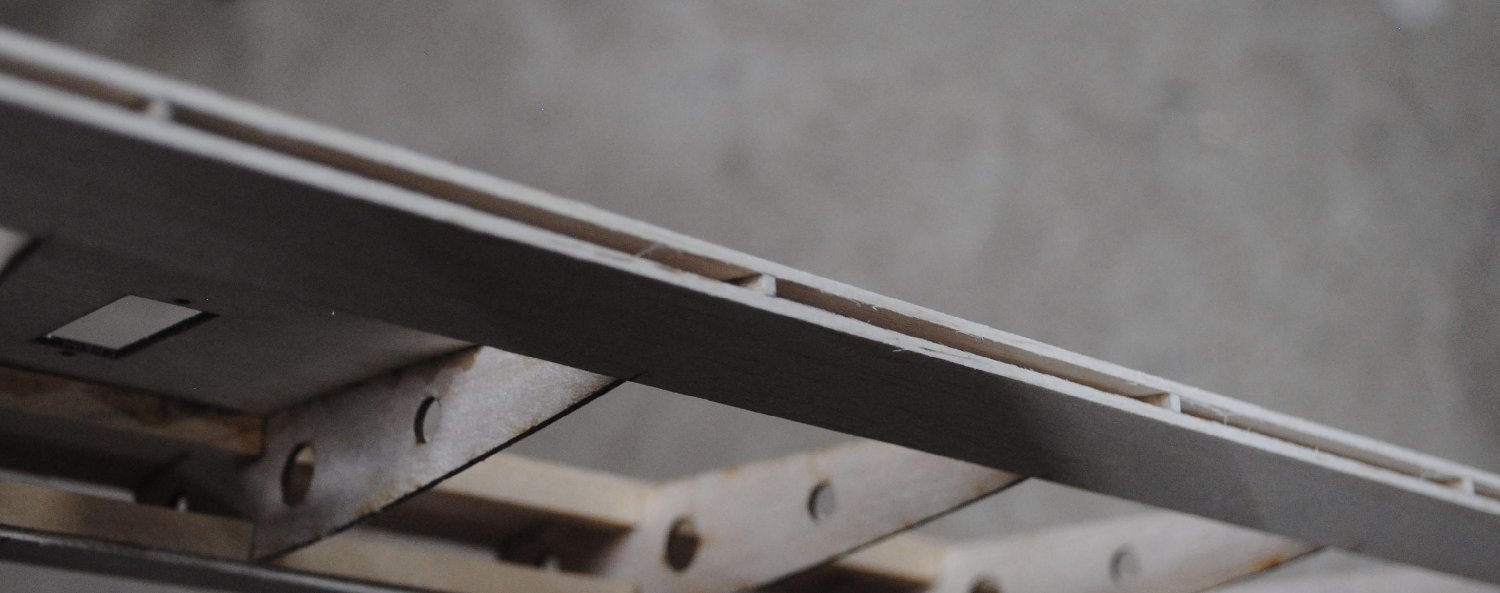
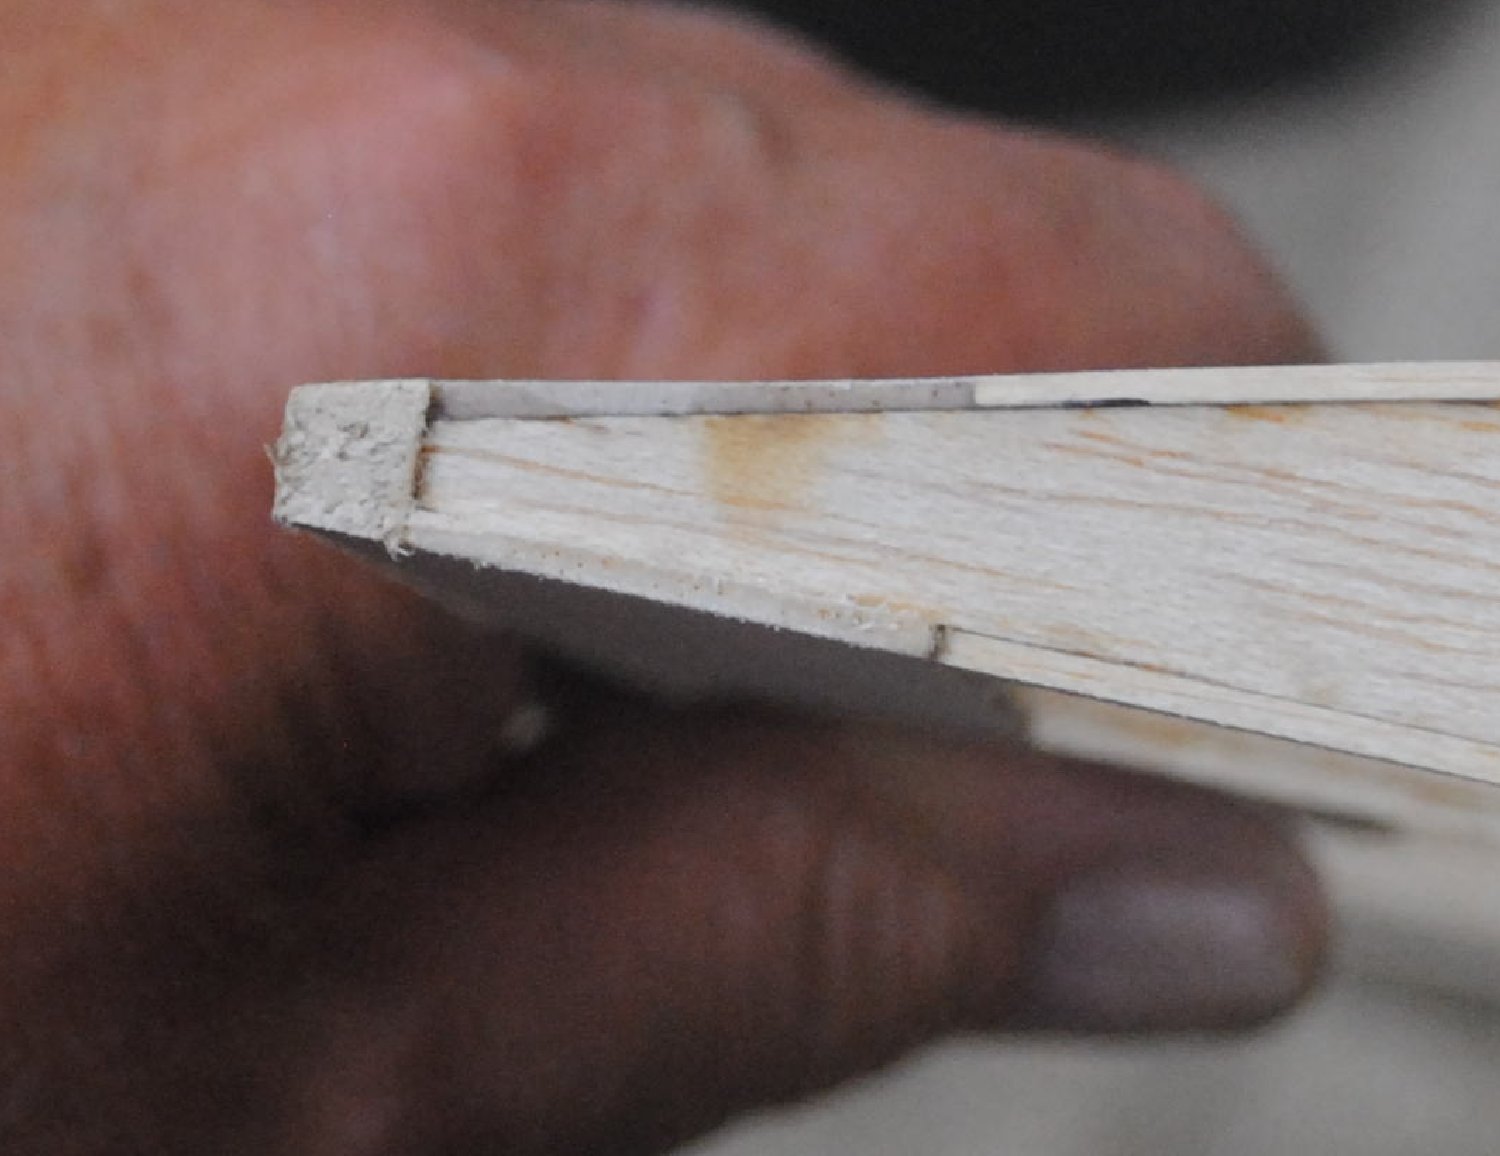
This is what the cross section of the wing looks like now.
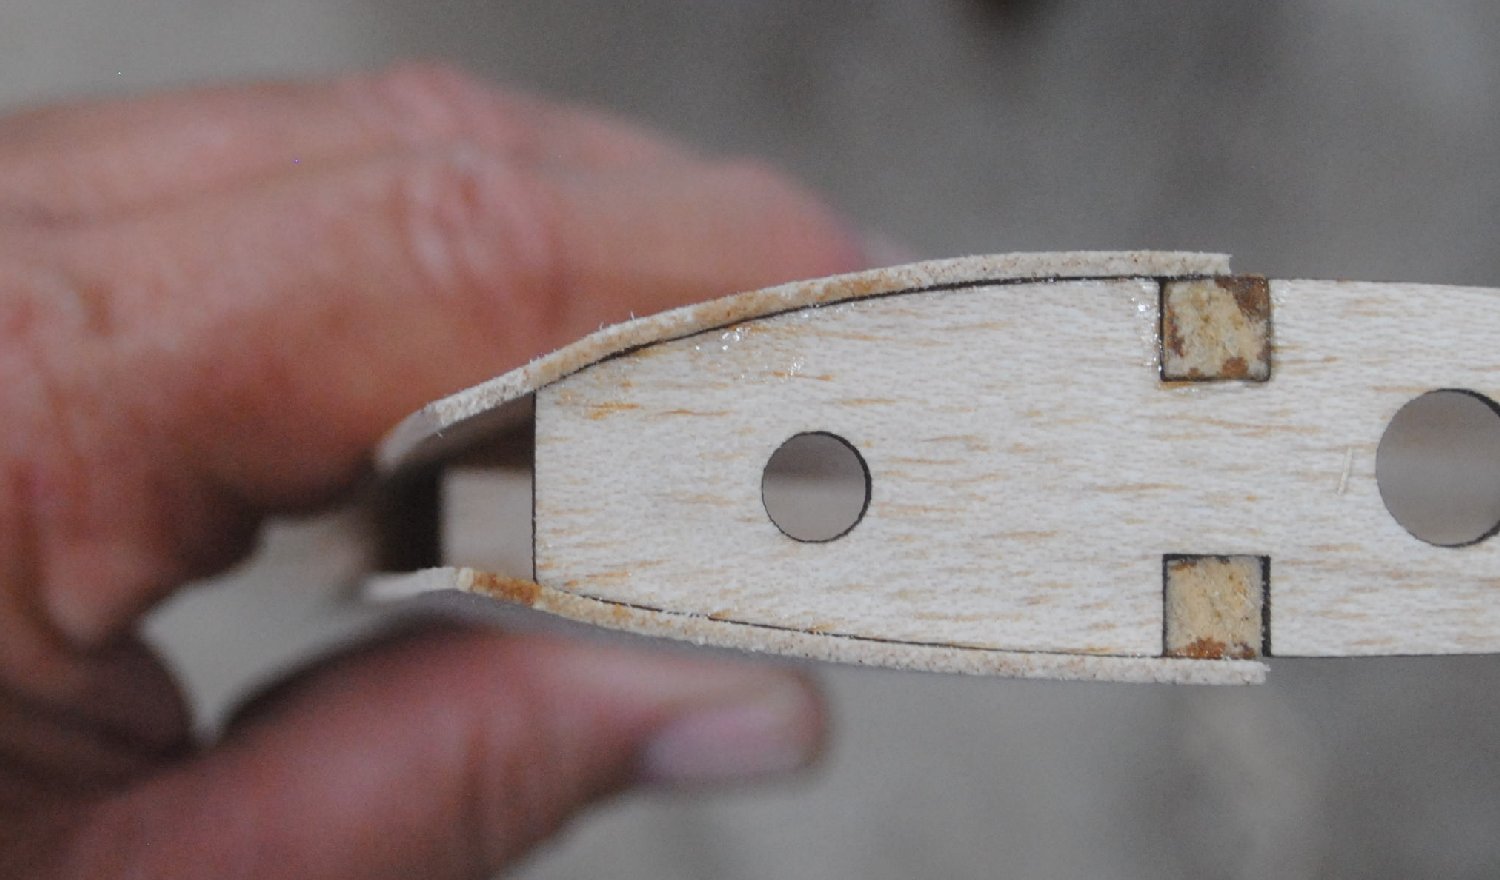
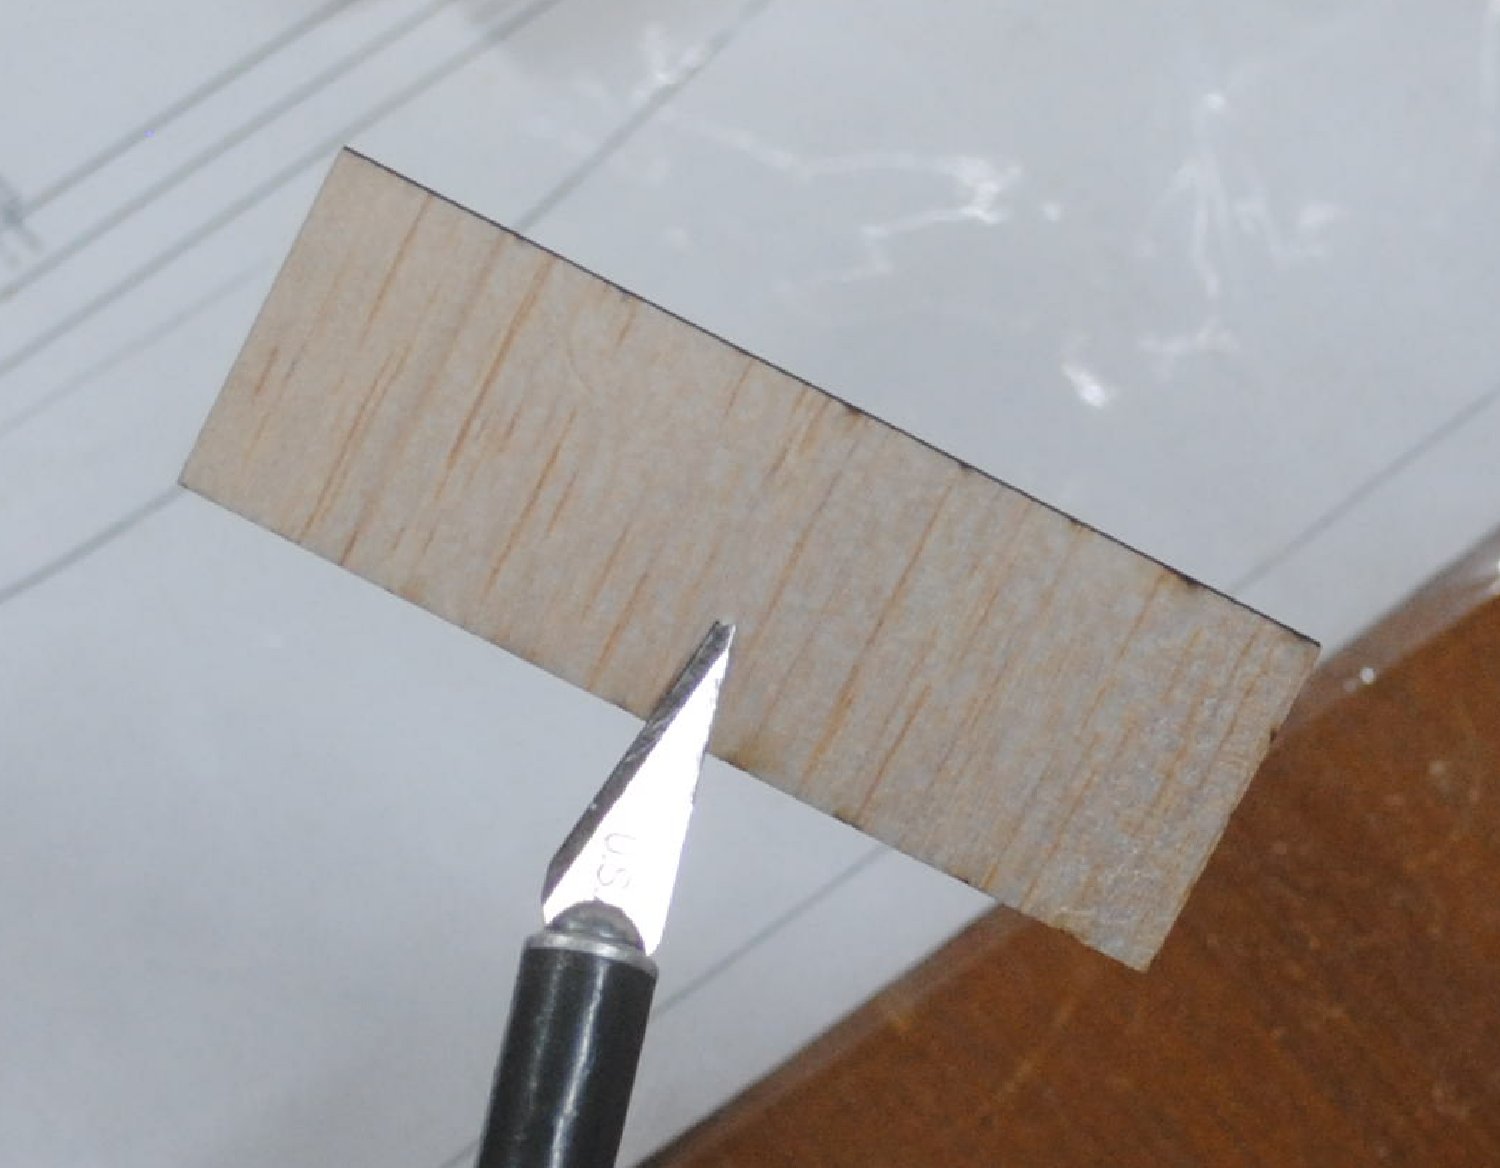
Remove the excess sheeting from the front of the wing. Start by trimming with a hobby knife, utility knife or mini planer, but don’t get carried away because it’s easy to gouge too deep between the ribs if the wood grain pulls your blade in too far. If you notice this happening, switch directions so the grain will pull the knife away from the wing. Finish with a sanding block.
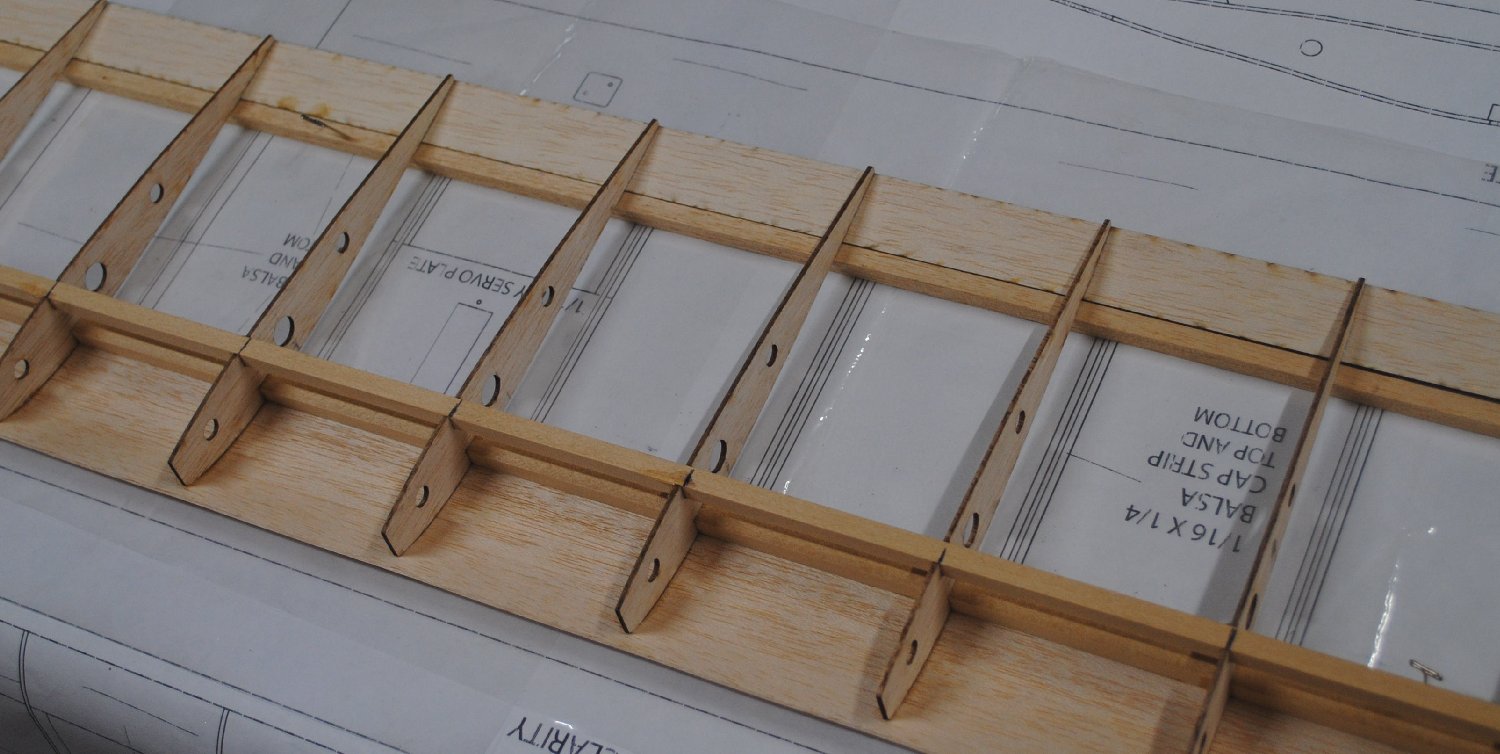
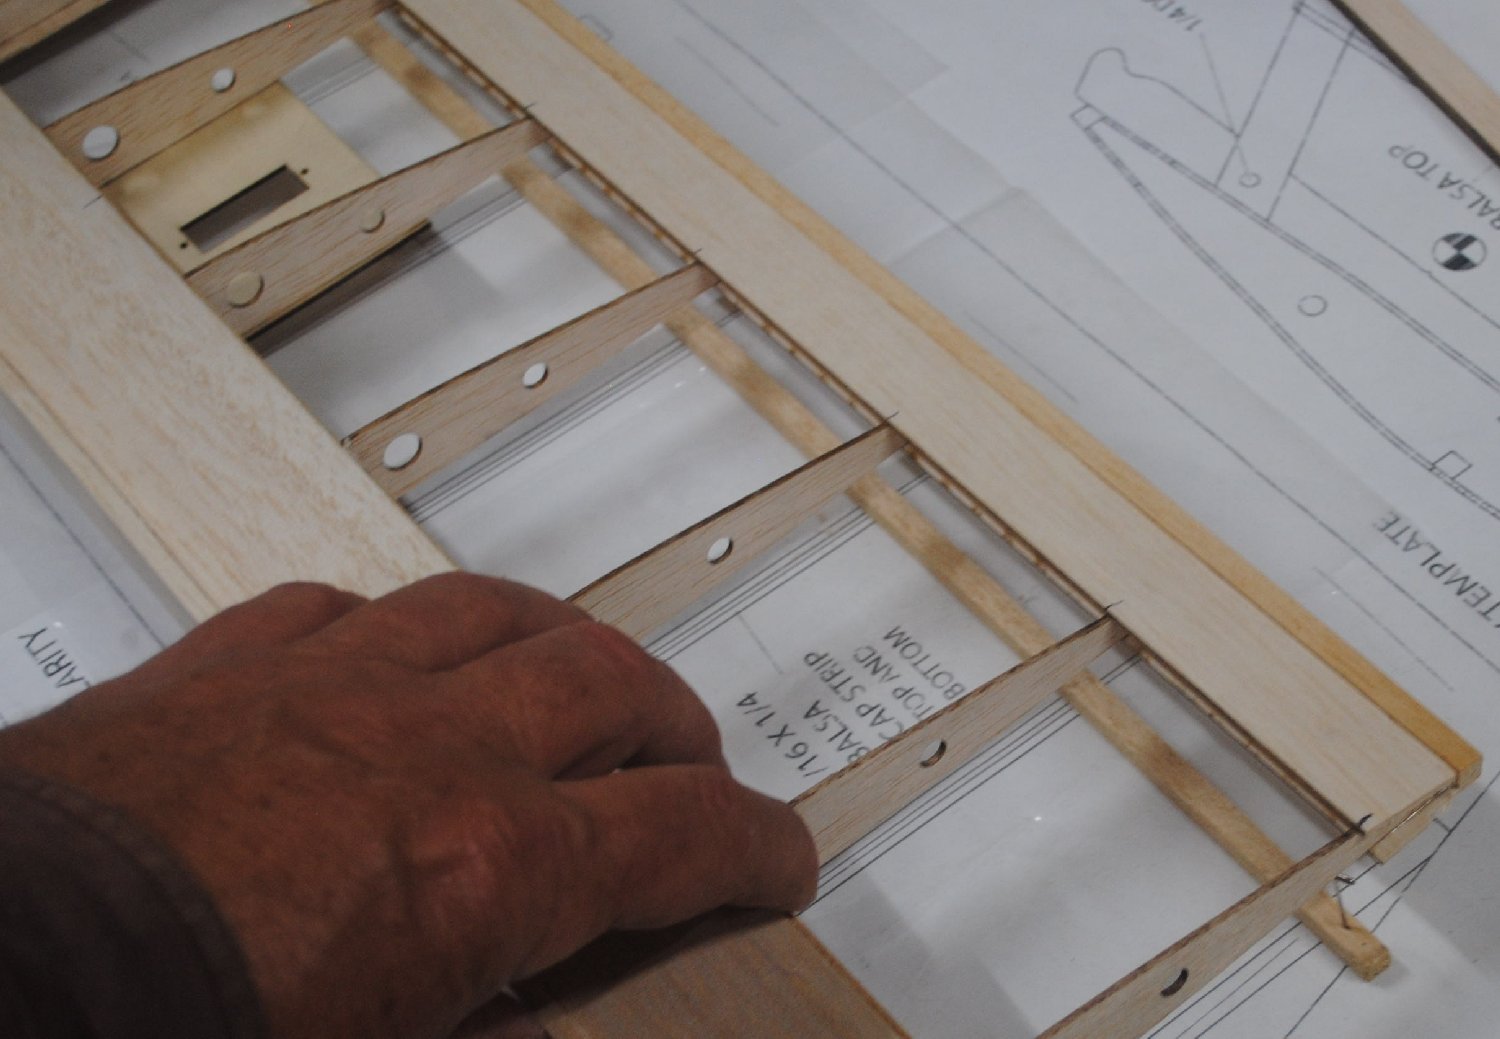
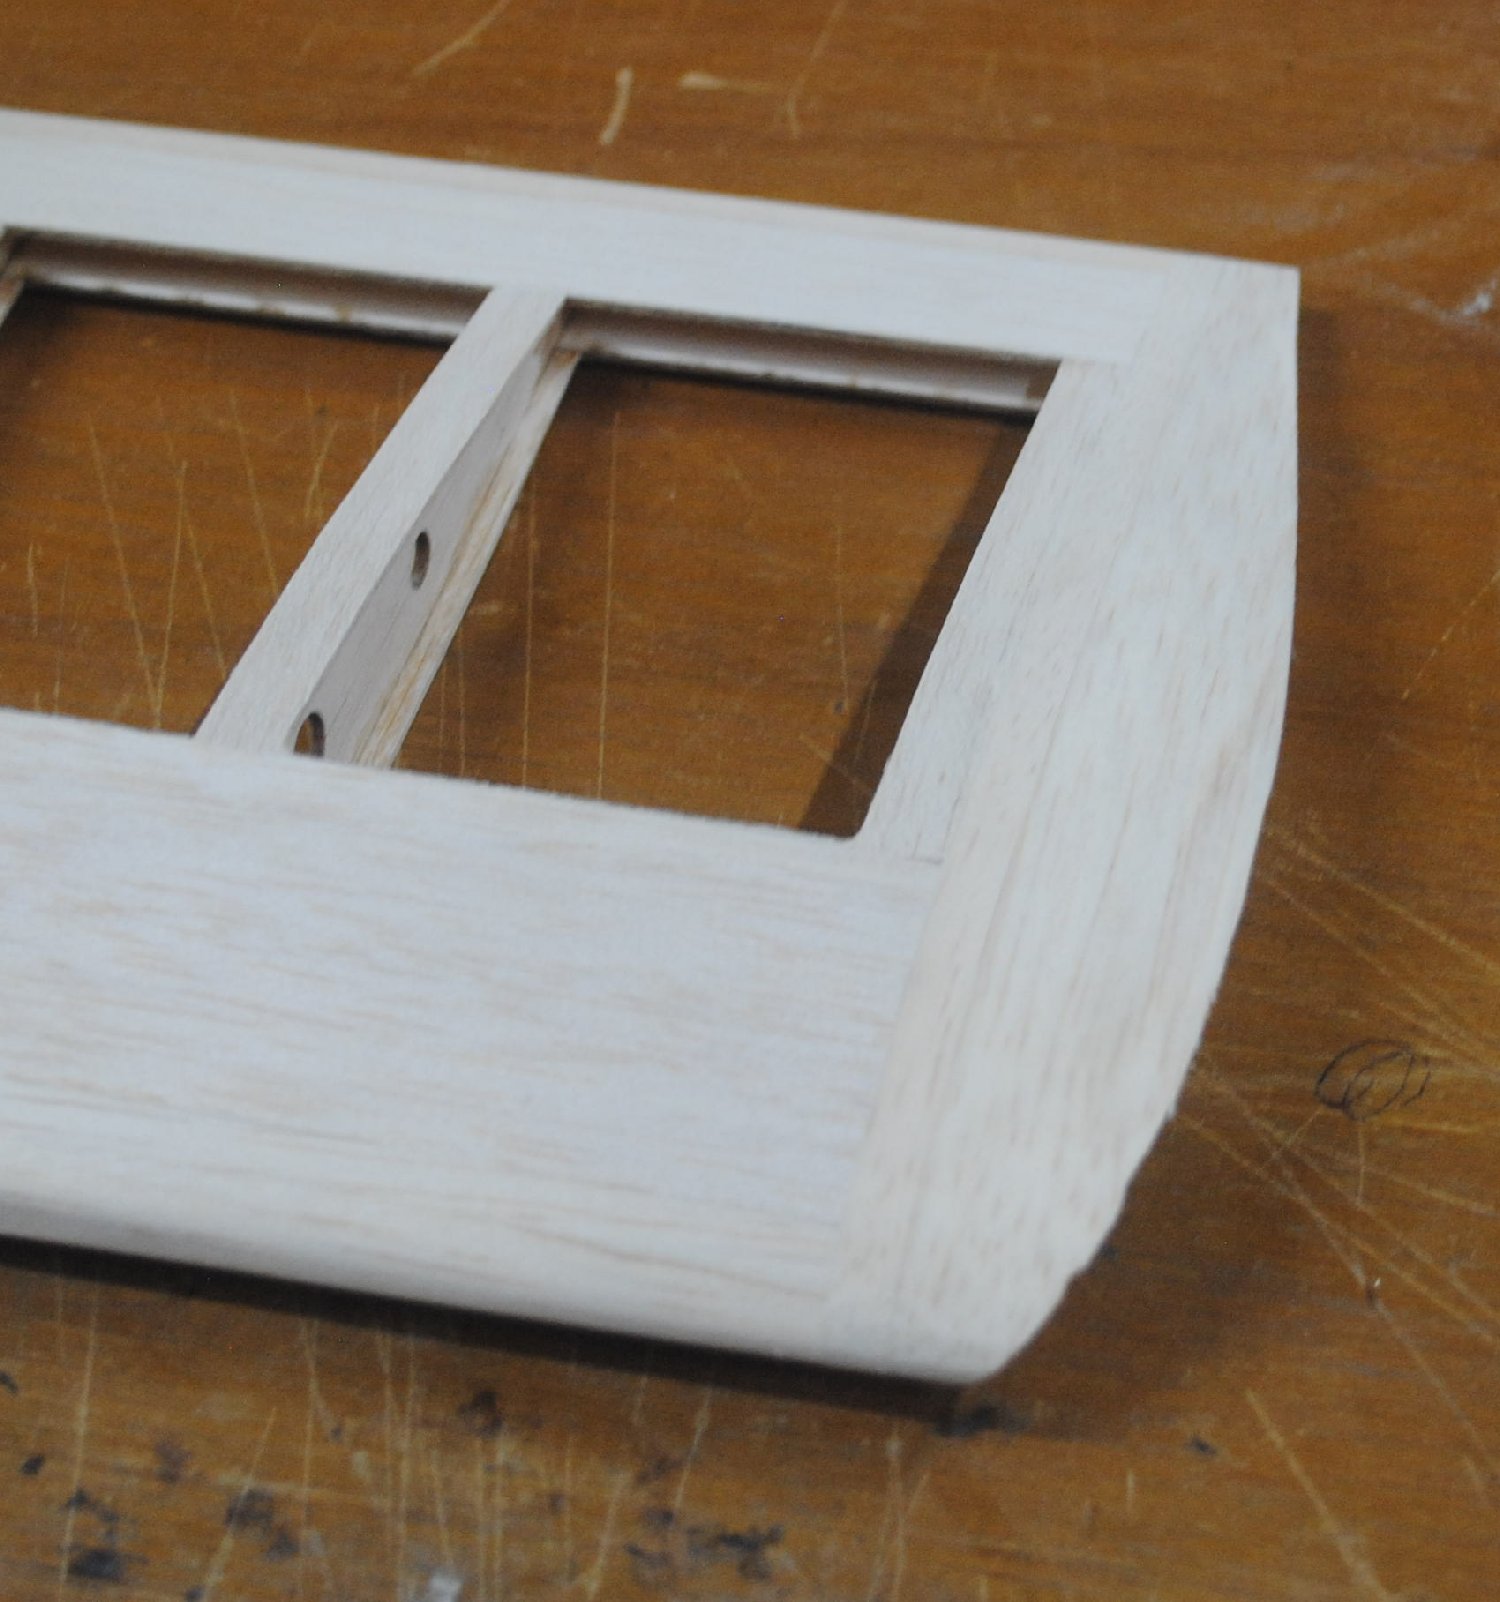
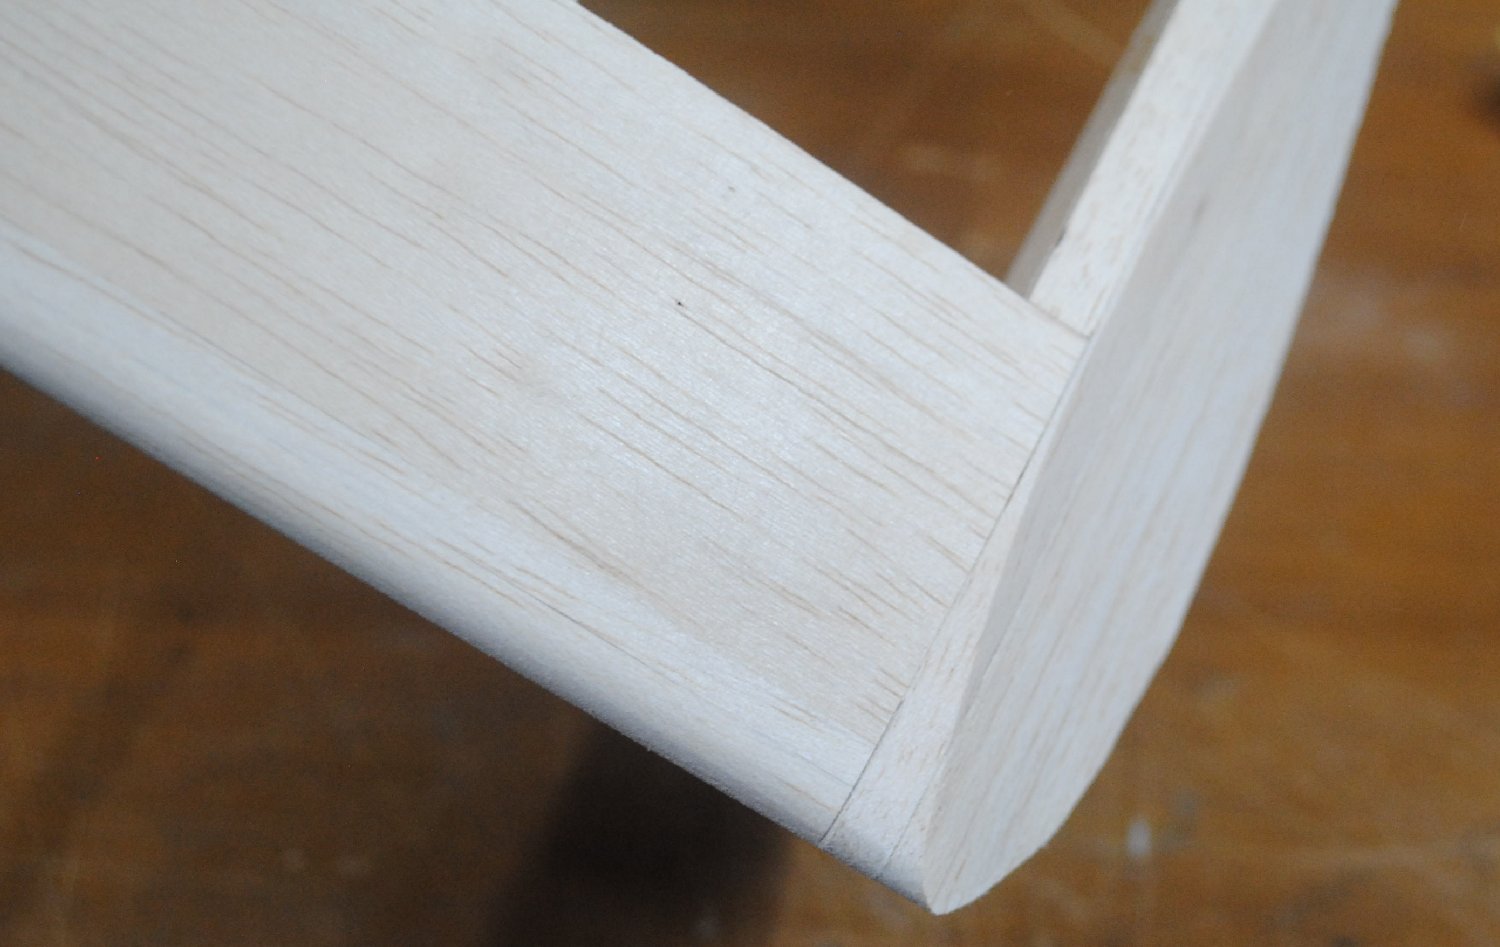
Here’s a wing that’s been trimmed and is ready for sanding.
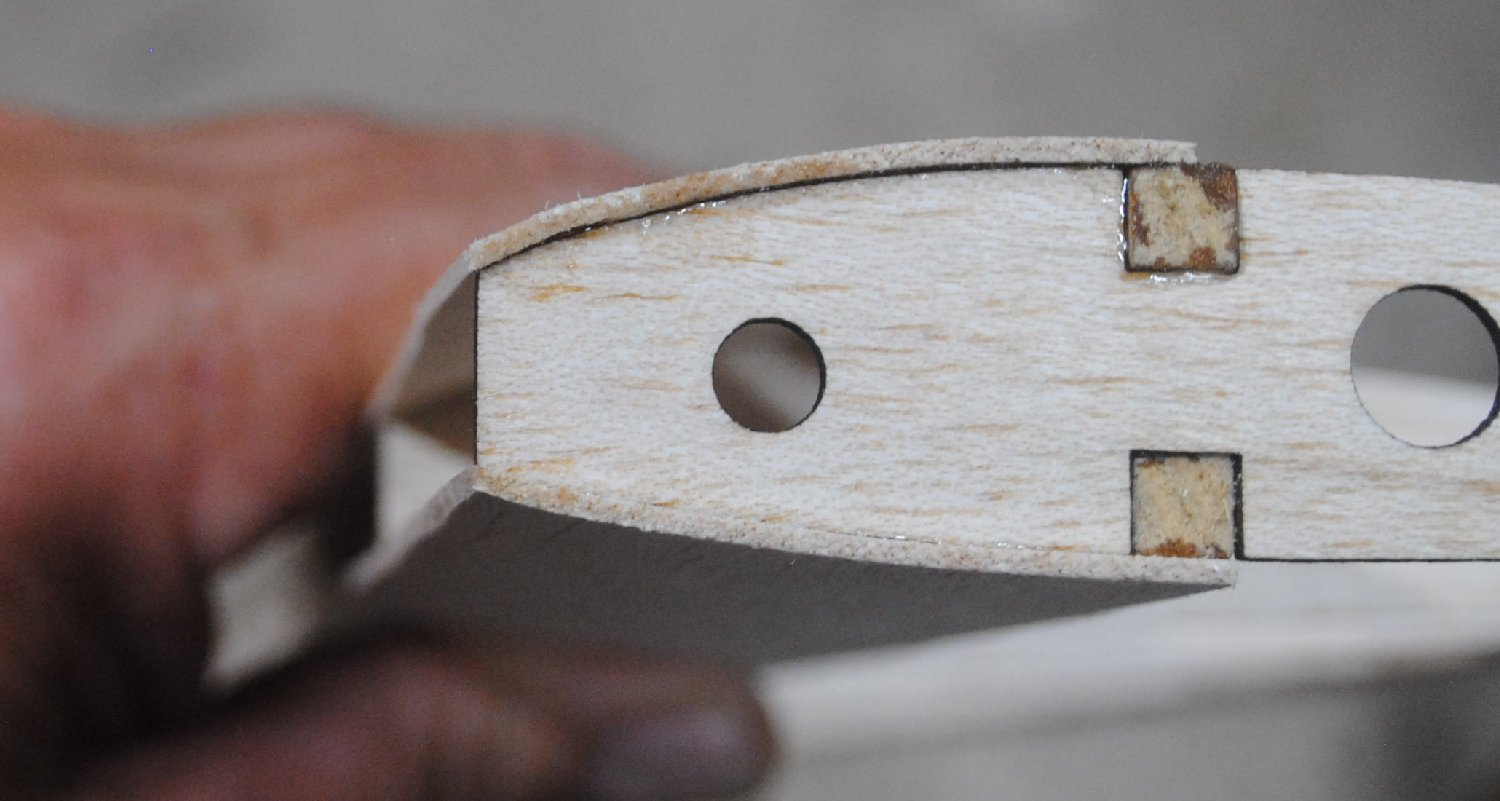
…and after sanding.

Sand the trailing edge sheeting flush to the ribs. The reason you put the center section sheeting on before sanding is to prevent the ribs from bending and breaking when you sand the trailing edge.
Attach the 1/4 x 3/8 balsa trailing edge stick. You can stand the wing on the table with the trailing edge up.
Put medium CA on the wing, then press the stick into place.
Attach the first layer of the leading edge, a 3/16 x 5/8 balsa stick.
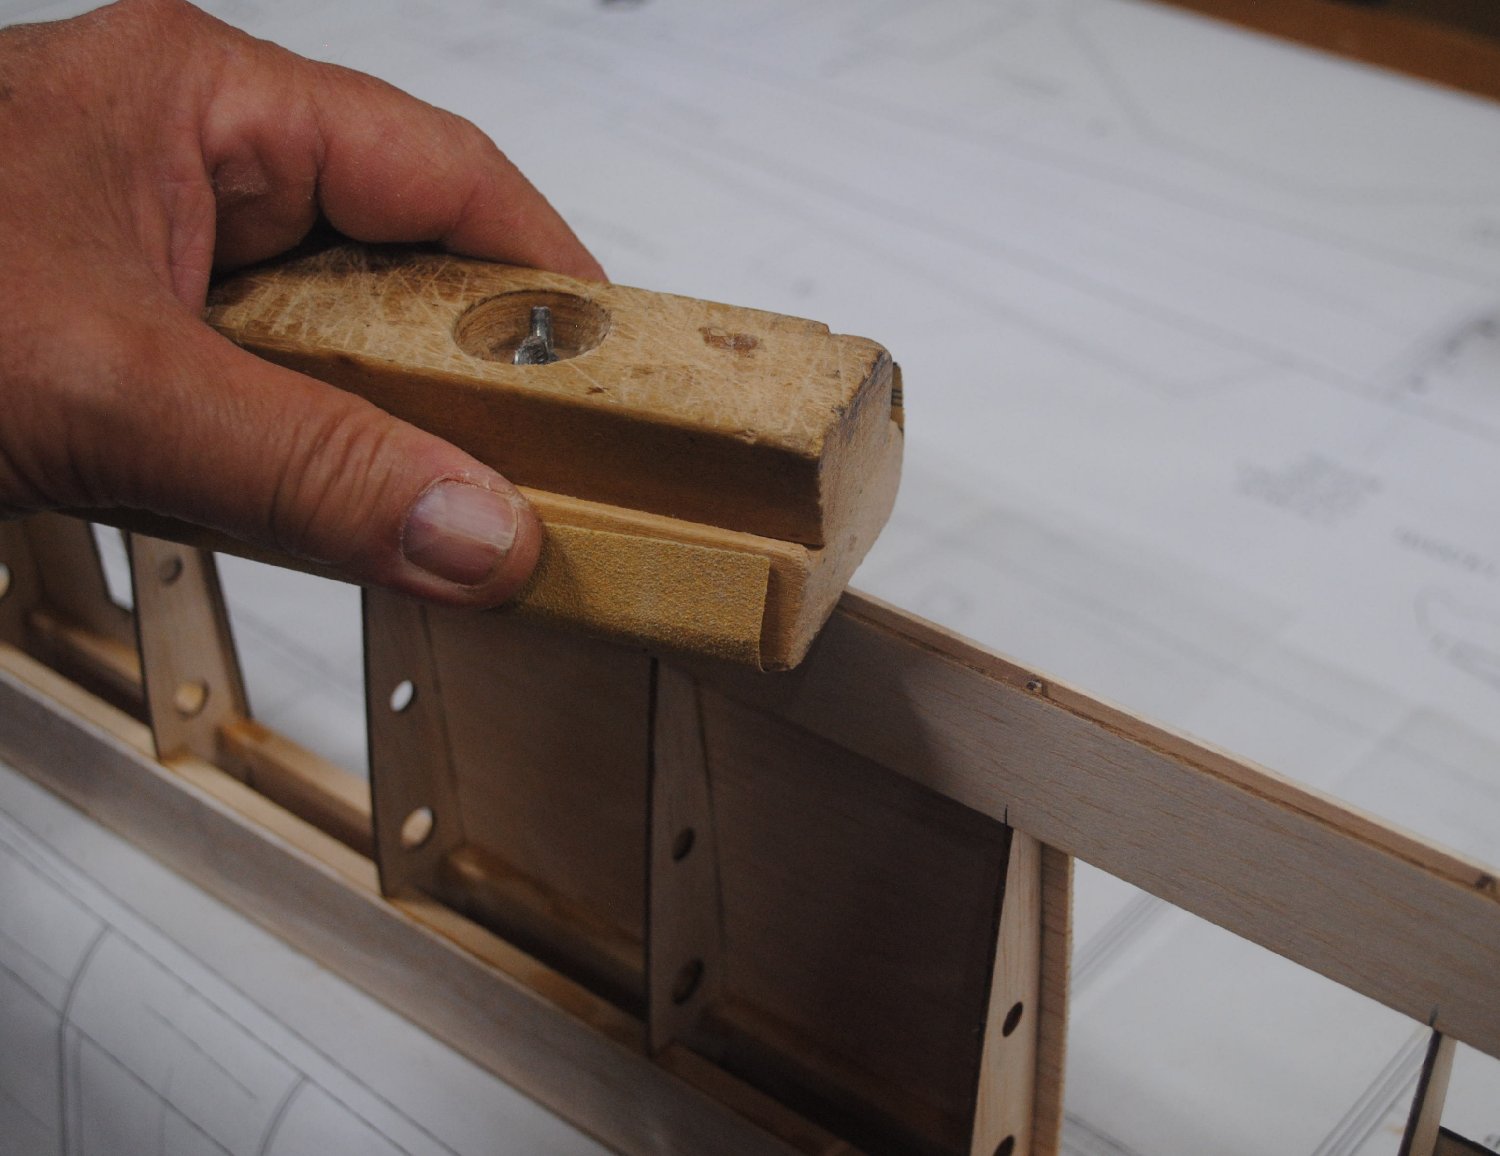
Attach the cap strips to the ribs between the leading and trailing edge sheeting, on the bottom of the wing only.
Lay the wing back on the table with the top side up and the cap strips on the bottom. Prop the wing up on the 1/4 inch balsa stick again. Weigh it down if necessary to make sure the wing is absolutely flat and free of twists.
The shear webs will be added next. Once they are in place the wing will no longer be able to twist, which is why it has to be flat when the webs are attached.
You can pick up the webs with a hobby knife to avoid getting glue on your fingers.

Put medium CA on the piece.

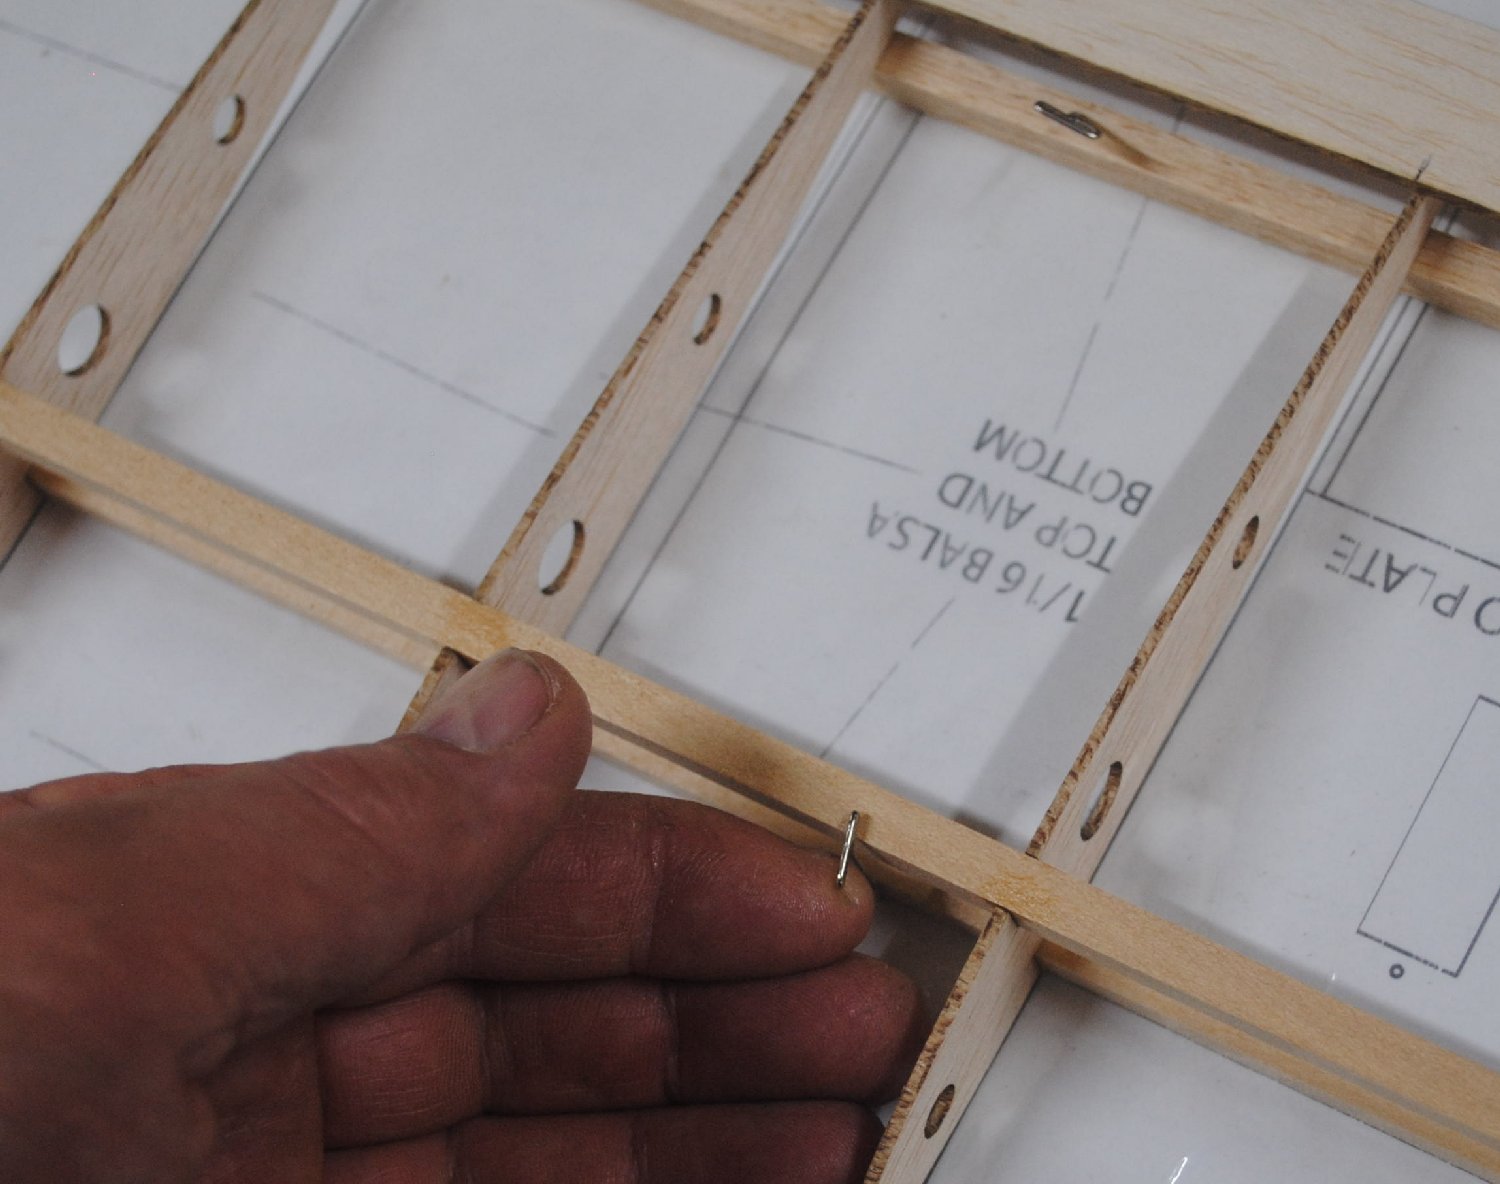
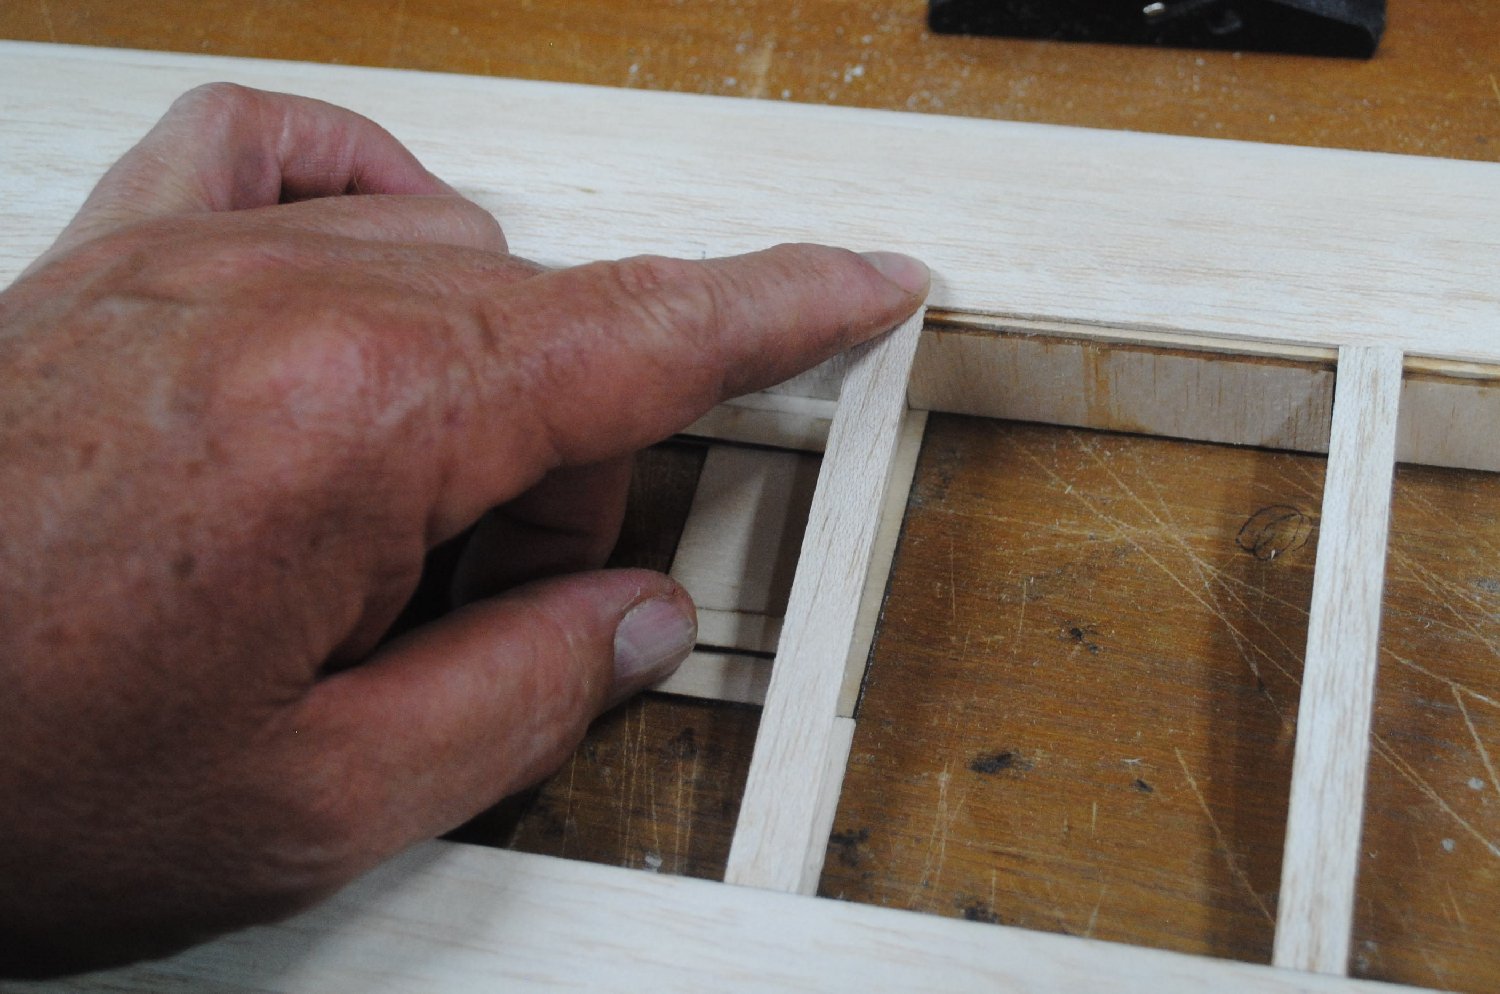
Now put the web on the back of the spars. It should sit on top of the bottom cap strips. Press it with your fingers until it sticks.
Add the rest of the shear webs. Check the fit first before you apply glue, and trim a sliver off if the space is too small for the web to fit.
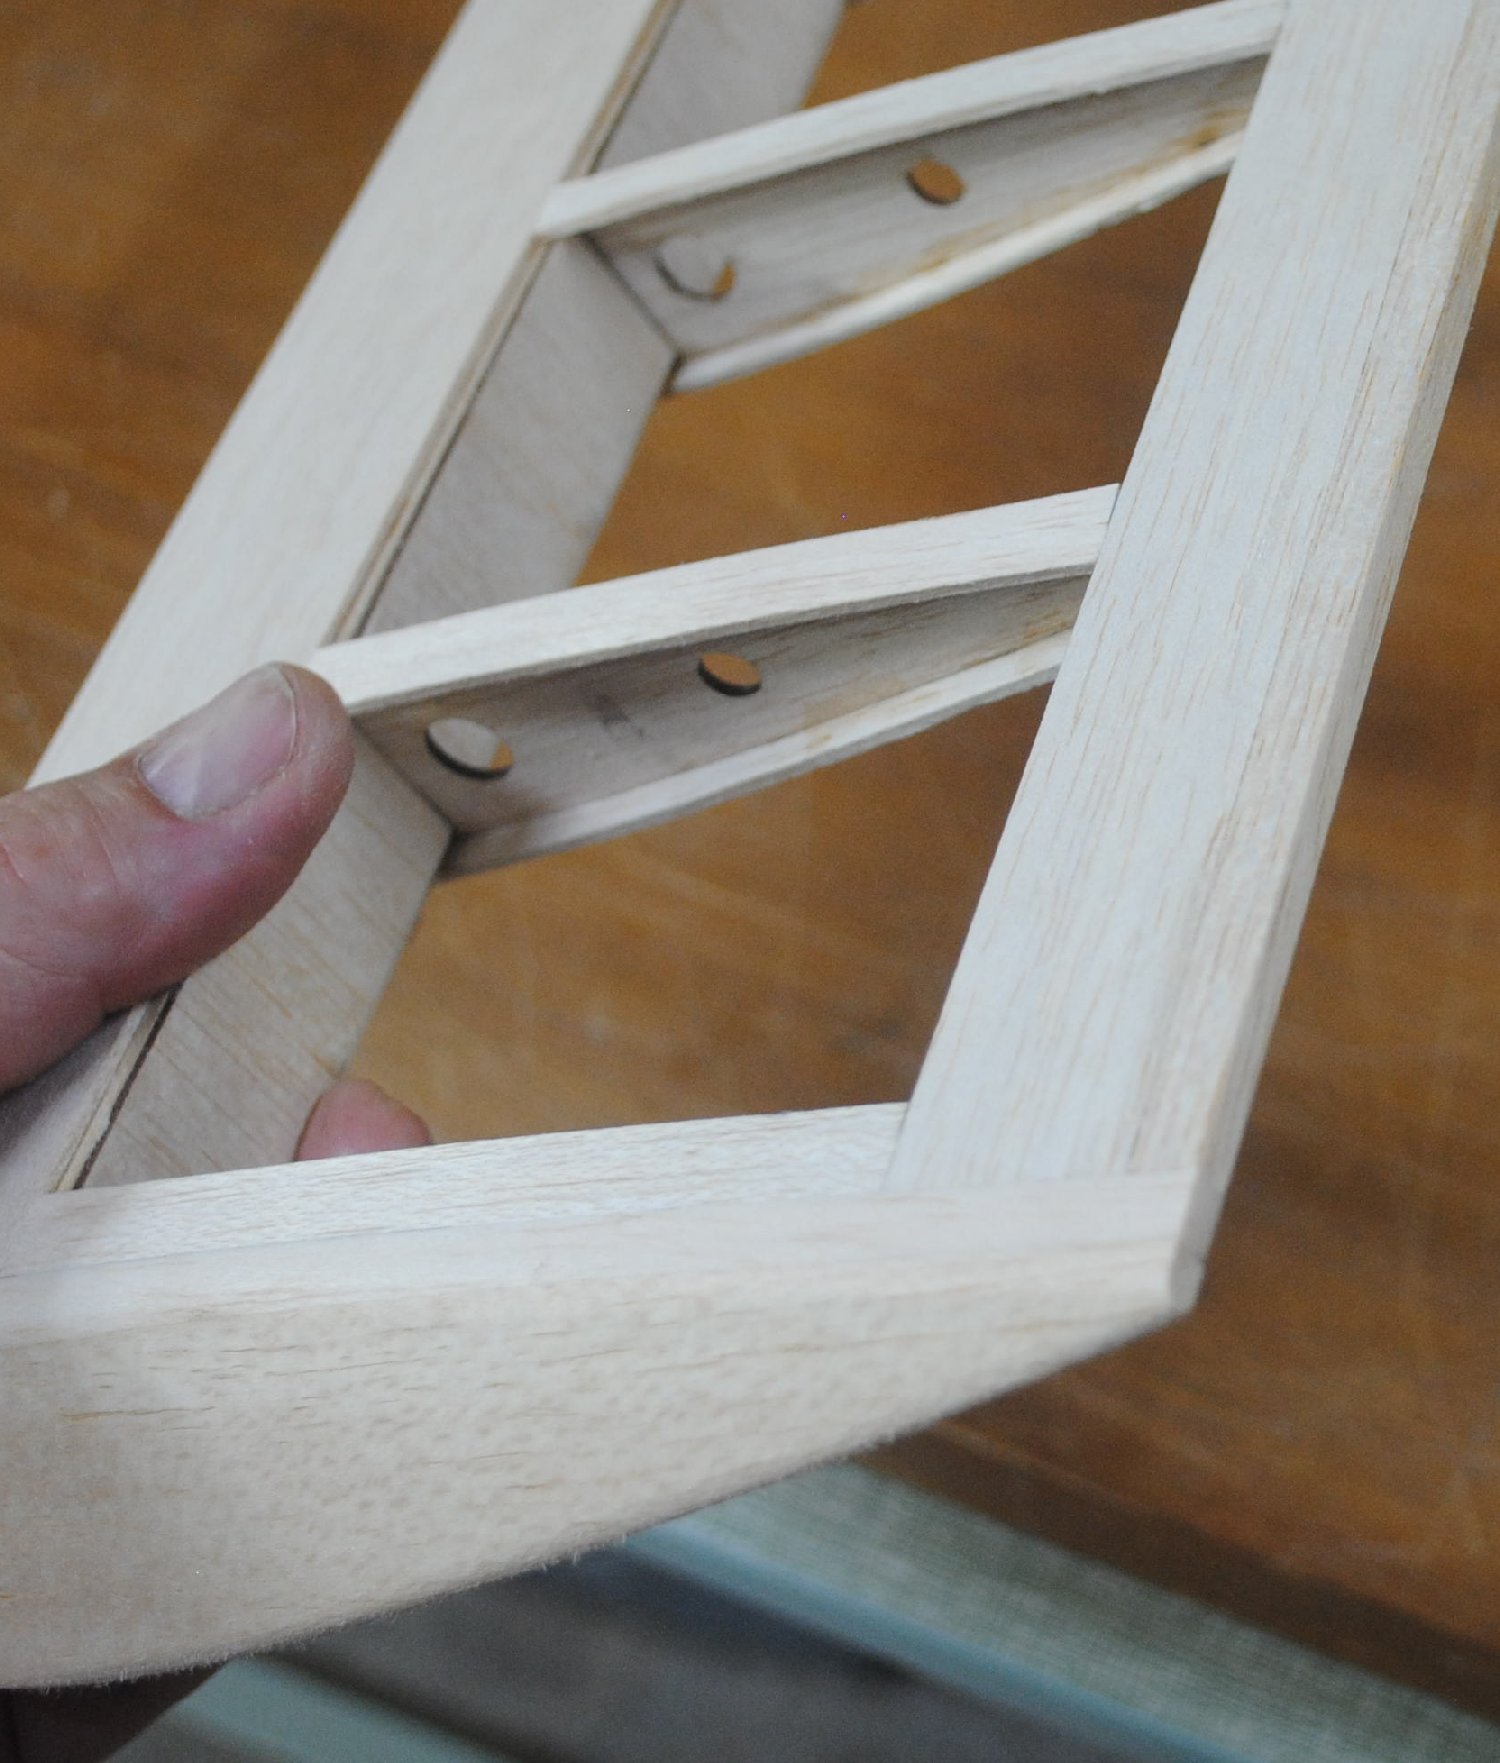
Use medium CA glue to attach four little pieces of 1/4 inch balsa triangle stock on the inside of the wing servo plates.
Press the middle of the stick to force it to conform to the airfoil curve.
Add the top center section sheeting, then the top cap strips. Cap strips can be cut from leftover sheeting.
Use medium CA to attach the 1/16 inch plywood servo plate reinforcement strips to inside of the servo plates.
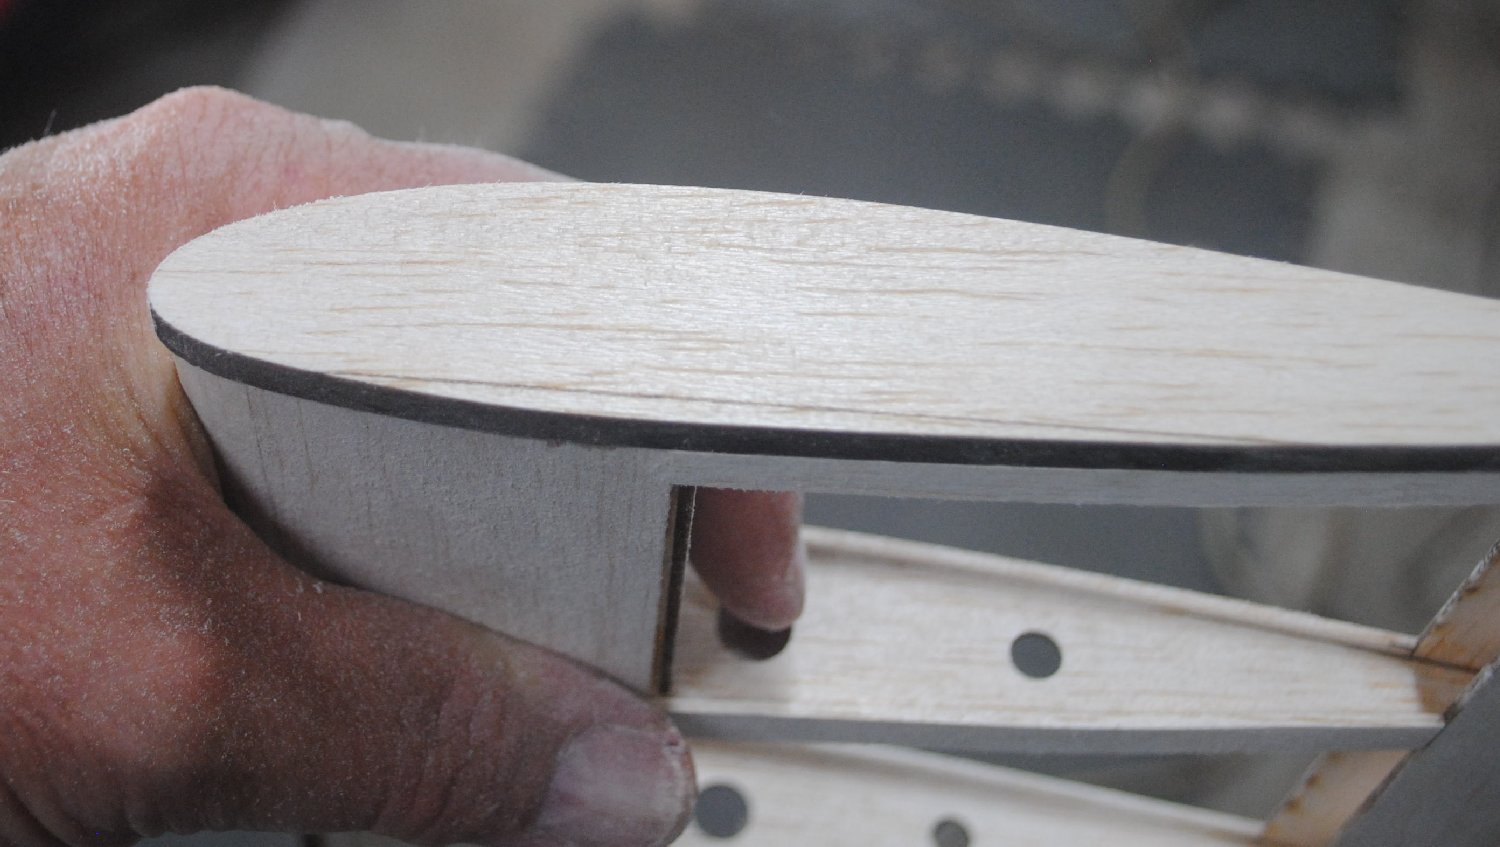
Shave the trailing edge stick until it almost matches the contour of the airfoil. Finish shaping it with a sanding block.
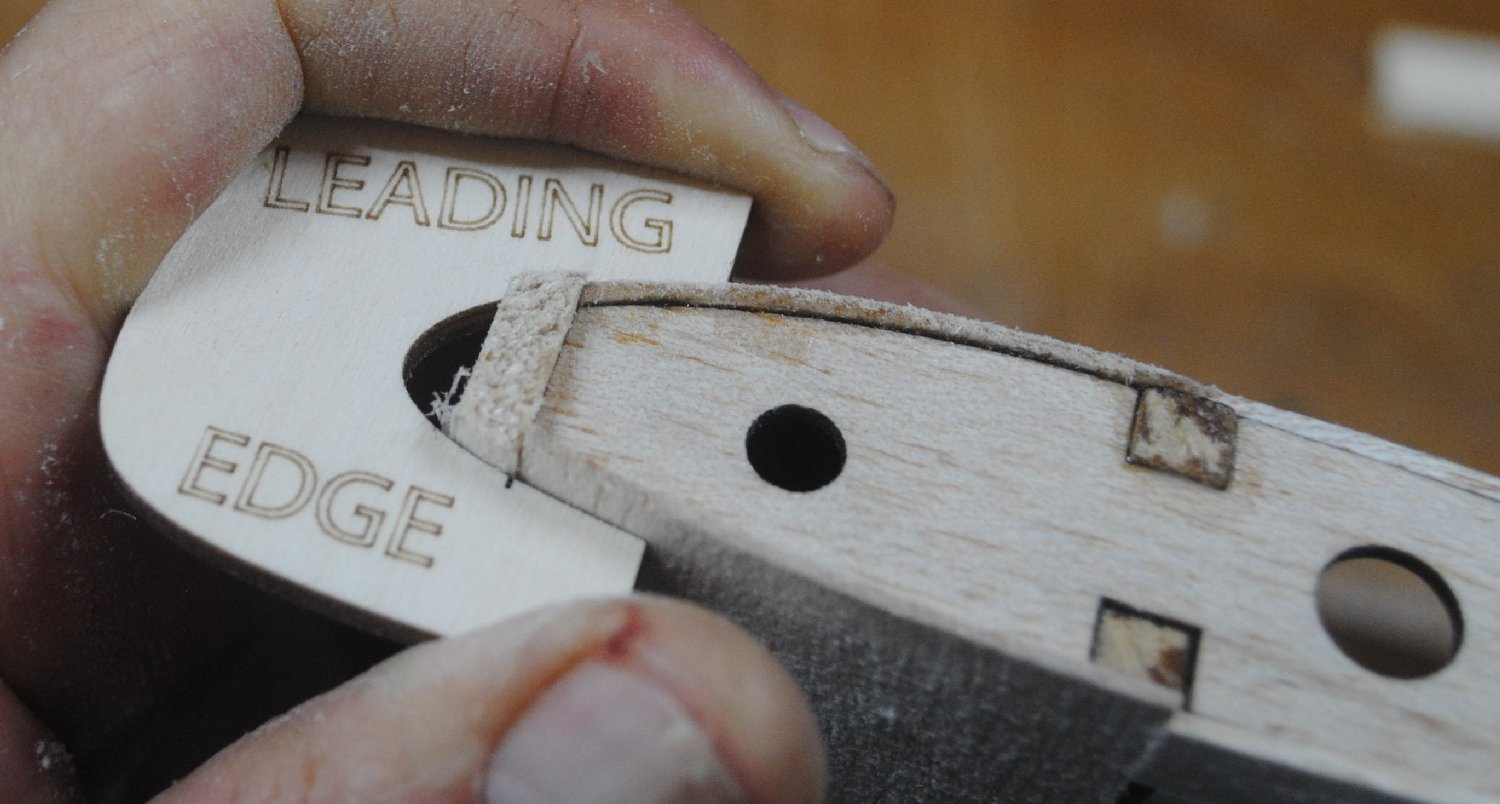
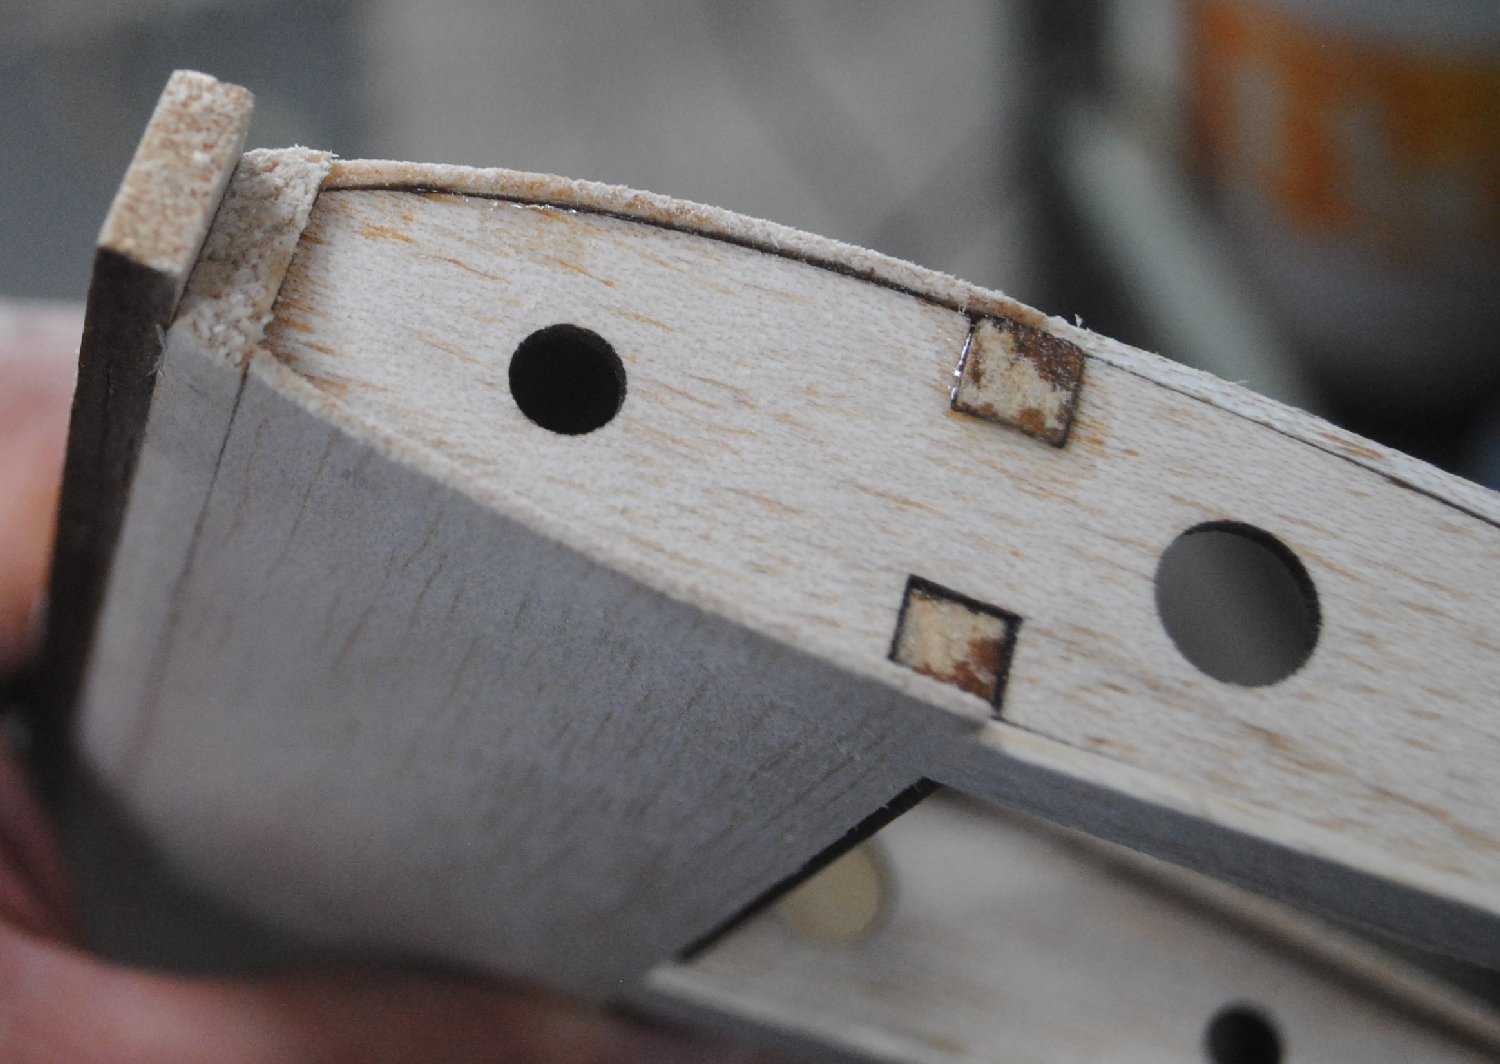
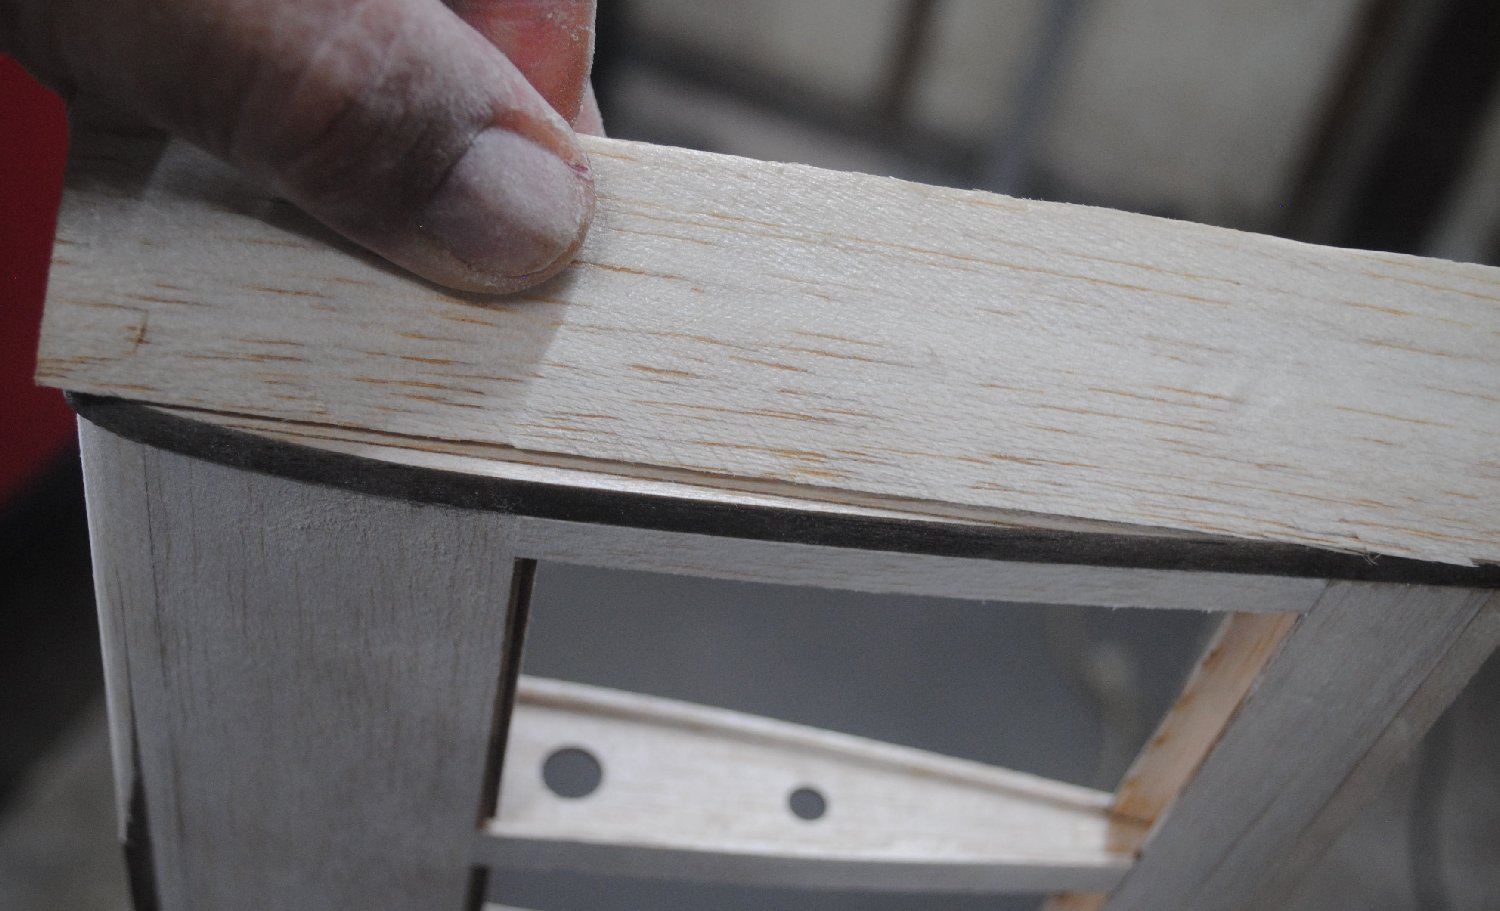
Sand the leading edge stick to conform to the airfoil. Use the leading edge template included in the kit to make sure the shape is accurate. The two little notches in the template are supposed to line up with the joint between the sheeting and the leading edge stick.
Attach the 3/16 x 1/4 x 48 outer leading edge stick with medium CA glue. Try not to use a ton of glue, because excess glue will squeeze out and make it more difficult to sand the shape of the leading edge. Just run a line down the middle, and that should be enough.
Continue sanding the leading edge to its final shape. A blade can save a lot of time before you start sanding, but don’t get carried away.

Sand the tip of the wing flat. This is one of those times when it makes a world of difference to have good sharp sandpaper instead of old worn out sandpaper.

Use medium CA glue to attach the 1/4 inch balsa sub wingtip. The etched line should face outwards.
Add the 1 inch balsa triangle wing tip, with the bottom edge of the triangle on the etched line.
Using a utility knife, carve the excess triangle stock away until it’s close to the right size, then finish it with a sanding block.
Notice that the 1/4 inch balsa sub wingtip protrudes at the bottom of the airfoil.

Use your sanding block to sand it away to make it flush with the triangle stock.

Check all joints between sheeting and cap strips and tip blocks.
Use a sanding block to sand anything that sticks up. All joints should be smooth and even. On a perfect wing you can’t identify a joint by feeling it. Rarely do we achieve perfection, but we can get rid of any big chunks of wood or blobs of glue that are sticking up. Blobs and chunks look terrible under the covering film. I don’t some guy at the flying field to ask me “Hey, is that a blob, or a chunk?”
The wing tip should have sharp edges after you sand it to conform to the contours of the wing.
Use a piece of hand held sand paper to gently round this sharp edge the way you did the edges on the fuselage.

Do not round off the trailing edge. You may have noticed that the trailing edges seem excessively thick. That’s the way they’re supposed to be, thick and not rounded off.
Now go back to the beginning and make the other wing.
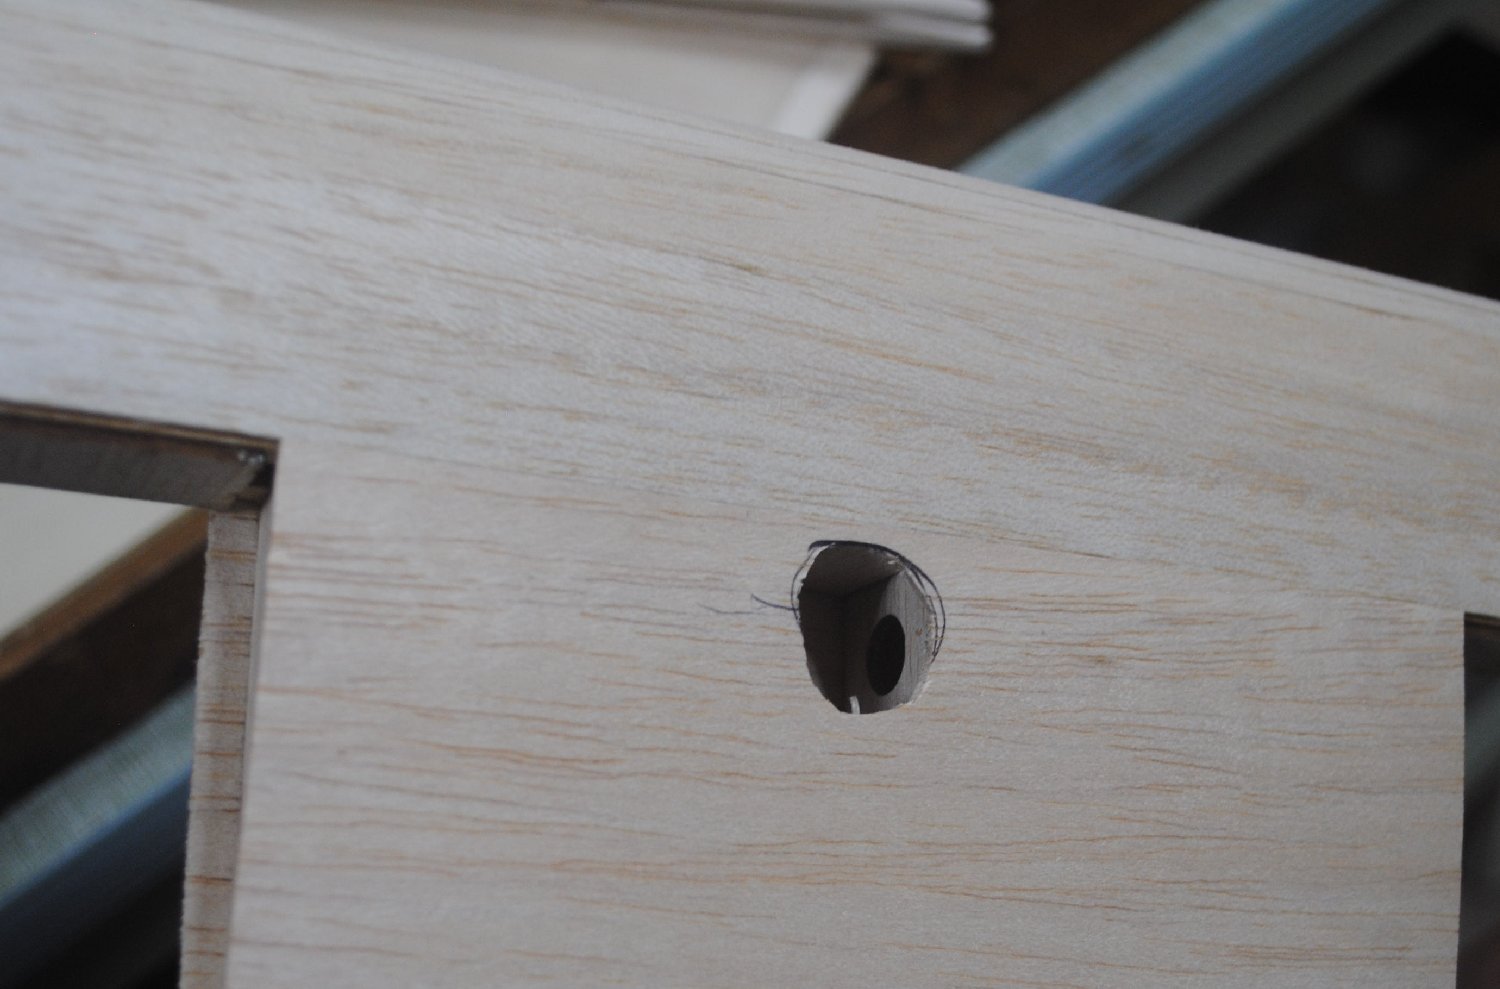
The bottom wing ribs have a large hole just behind the spars for the servo wires. Make a hole in the top sheeting of the bottom wing for the servo wires to come out of the wing into the radio compartment. The hole should be in line with the large hole in the rib, and it should be beside the center rib.
That’s pretty much it for the wings.